Showing posts with label recipe. Show all posts

Tuesday, November 15

Almost Too Easy Whole Wheat Beer Bread Recipe

Beyond Easy Whole Wheat Beer Bread
A warm, hearty loaf of flavorful whole grain bread in about an hour.

Two days ago I wrote a post on how to make homemade beer bread. Since then, several of you have asked me about substituting whole wheat flour for some of the all-purpose flour in the recipe. Since I figured I could spare five minutes in the name of bread—and because I was getting curious myself—I baked this loaf of whole wheat beer bread a couple of hours ago.

Instead of the three cups of all-purpose (white) flour in the original recipe, I used two cups of whole wheat all-purpose flour and one cup of all-purpose flour. Both were organic. Organic flours bake up beautifully, don't cost a whole lot more than conventional, and are better for both you and the environment. Look for them in the bulk bins at natural foods stores and even some supermarkets.

I decided not to add any herbs or cheese to the basic mix. The batter was extremely thick and heavy, so I mixed in 1/4 cup (2 ounces/60 ml) of water along with the 12 ounces of beer. If it hadn't been nine o'clock in the morning, I would have opened a second bottle of beer and drunk the excess.


Within minutes of putting the bread in the oven, the kitchen smelled divine. I did let the finished loaf cool 20 minutes before cutting into it, but it wasn't easy. I tasted a warm slice slathered with organic butter and was very pleased with the results. This bread has a nice texture and is dense but not too heavy. It would stand up well to a hearty stew or chili.

I again used a bottle of our homebrewed Irish pale ale, and the flavor of the beer really came through. I think this version would also be good spread with cream cheese or
herbed yogurt cheese. And after inhaling his warm test piece, Joe suggested covering toasted slices with sausage gravy. This bread has serious possibilities.

Farmgirl Susan's Almost Too Easy Whole Wheat Beer Bread Recipe
Makes one loaf

2 cups organic whole wheat flour
1 cup organic all-purpose flour
1 Tablespoon granulated sugar
1 teaspoon salt
1 Tablespoon baking powder (make sure it's fresh!)
14 ounces beer (or 12 ounces beer & 2 ounces water)

Optional glaze: 1 egg & 2 teaspoons water, beaten

Heat the oven to 375 degrees. In a large mixing bowl, combine the flour, sugar, salt, and baking powder. Slowly stir in beer and mix just until combined. The batter will be thick.

Spread in a greased 8-inch loaf pan (I love my Chicago Metallic Commercial Loaf Pans, which are great for baking yeast breads, too), brush with the egg glaze if desired, and bake until golden brown and a toothpick stuck in the center comes out clean, about 45 minutes.

Cool in the pan on a rack for 10 minutes. Remove from the pan and cool 10 more minutes. Serve warm or at room temperature.

More bread recipes on Farmgirl Fare:

Ten Tips For Better Bread
Farmhouse White: An Easy Basic White Sandwich Bread
My Favorite Easy Pizza Dough Recipe
Oatmeal Toasting Bread
How To Make Homemade Pita Bread in about an Hour
Fresh Tomato & Basil Whole Wheat Sourdough Bread
Savory Cheese & Scallion Scones (one of my most popular recipes)
Christmas Cranberry Scones (tasty all year round!)
100% Whole Grain Moist & Flavorful Bran Muffins (made without cereal)

Still hungry? You'll find links to all my sweet and savory Less Fuss, More Flavor recipes in the Farmgirl Fare Recipe Index.

©
FarmgirlFare.com, the freshly baked foodie farm blog where Farmgirl Susan shares stories & photos of her crazy country life on 240 remote acres.

Friday, September 2

Recipe: How To Make Pita Bread, Pita Chips, & Pita Pizzas and My Search for the Perfect Pita Recipe

The Pita Project (or Pita, Pita, I Too Much Eata!)
Three Weeks & 60 Minutes to Yum

Greek salad pitas with kalamata olive tapenade (1) - FarmgirlFare.com
Homemade pita breads are stuffed with crunchy Greek salad, baby spinach, and a quick and easy kalamata olive tapenade for a healthy light supper or lunch (recipe here).

There's homegrown ground lamb mixed with fresh basil, rosemary, thyme, onion, and garlic in the fridge. There are lemon cucumbers and white and yellow onions and San Marzano tomatoes and Italian parsley and Greek oregano and lots and lots of basil in my kitchen garden. And there are tiny drops of water falling from a cloudless sky, which can only mean that it is so hot and humid that sweat is dripping off the sun.

So what does a farmgirl do? She cranks the oven up to 500 degrees and makes pita bread of course! And just how does she do that?

She pulls out a recipe she has made only once (two years ago), and then, caught up in a seductive haze of gorgeous garden bounty and warm pita bread, she snaps a photo and posts it along with the promise of a recipe.

This promise receives such an unexpected, enthusiastic response that she becomes the tiniest bit nervous, since she has never before posted a recipe she hasn't made so many times she could prepare it in her sleep.

And so she decides she should probably make one more test batch.

Three weeks and six batches of pita bread later, I am ready to report my findings. And I have much more to share than just a recipe. I even created an amazingly scrumptious, quick and easy version of one of my favorite foods. I also spent more time crouched down in front of the oven than I have in my entire life. But let's start with the recipe.

I found it in
Bernard Clayton's New Complete Book Of Breads, a book I claimed in my Ten Tips For Baking Better Artisan Breads at Home post was worth buying just for the pita bread recipe. I still agree (though I do hope to one day try some of the other 300 recipes this enormous book contains).

Here's what Bernard has to say about pita bread:

"At the heart of the Middle East cuisine is a flat disk of bread known as pita in some countries and peda in others. As it bakes, the dough puffs to leave the center hollow. Not surprisingly it is also known as pocket bread. The pita can be torn or cut open and filled with meat or other delicacies, or a bit of it can be used as a spoon or as a 'pusher'."

The pieces of dough must be rolled flat before they are placed in a hot (500°) oven. The dough should be rolled to a thickness of no more than 3/16 inch. This is the thickness of a wooden yardstick, the kind given away at fairs and by auto dealers and paint stores. It can be used as a gauge."

The oven heat generates steam inside the pita and immediately the dough puffs into a ball. Later, as it cools, the bread will collapse. The oven must be hot. If it is not hot, the piece of dough will think it is meant to be a bun, and will rise slowly but without the all-important pocket in the center."

While this is a yeast dough, it puffs up because of steam. The yeast adds only flavor and texture. Don't overpower the dough with flour or it will be too dry to allow sufficient steam to be generated. Leave the dough on the soft side. Sprinkles of flour will take care of the stickiness."

What caught my interest was not only his claim that the steam (rather than the yeast) was responsible for the puffing, but also the fact that he only let the dough "rest" for 20 minutes and did not bake his pitas on a baking stone. That meant freshly baked pita bread in under an hour, as opposed to the two or three hours other recipes required.

After all of my experimenting (which I will discuss below), this is the recipe I am sticking with. It's essentially Bernard's, with a few minor adjustments.

Homemade Pita Bread and Kitchen Garden Bounty

Farmgirl Susan's Pita Bread after Bernard Clayton
Makes 8

2½ cups organic bread flour (I used Heartland Mill Organic Strong High-Gluten), plus more for sprinkling while kneading & rolling out dough
2 teaspoons salt
1 Tablespoon granulated sugar
1½ teaspoons instant yeast
2 Tablespoons extra-virgin olive oil
1 cup warm water (105 to 110°F)

8 eight-inch squares of aluminum foil for baking pitas
(Bernard claims that "placing the rounds on foil rather than on a baking sheet or stone allows a softer heat to surround the dough. A direct thrust of heat from a baking stone would form a crust difficult to puff.")

In a large bowl (I used my wooden dough bowl), combine 1 cup flour with the salt, sugar, and yeast. Add the oil and water. Beat vigorously with a wooden spoon for three minutes, then stir in the rest of the flour 1/2 cup at a time.

The dough should be a rough, shaggy mass that will clean the sides of the bowl. If the dough is moist, add a small amount of additional flour.


Pita dough ready to knead

Turn the dough onto a lightly floured work surface and knead for 6 minutes.

Preheat the oven to 500°.

Divide the dough into 8 pieces. I patted the dough into a circle and used my metal dough scraper (these things are so handy) to quickly and evenly cut it into eighths, as if cutting up a pie.


Divided Dough (it "stuck" back together while taking the picture)

Roll into balls, dust lightly with flour, and cover with a damp tea towel. Let rest for 30 minutes. (I increased this from Bernard's 20 minutes.)


Dough balls ready to be rolled out

Use the palm of your hand to flatten each ball into a disk. Finish with a rolling pin, flattening the dough into a disk about 6" in diameter and 3/16" thick. Their thinness is more important than making them perfectly round. Irregularity adds charm, says Bernard.


Rolled out disks ready for the oven

Place each round on a square of foil, and carefully place 3 or 4 of the rounds directly on the oven rack. Bake for 5 to 8 minutes, or until they are puffed.


Pitas puffing in the oven

Repeat with the remaining disks.


Hot puffed pitas ready to be wrapped in foil

When you remove the breads from the oven, stack them up and wrap them in a large piece of foil. This will keep the dough soft while the tops fall, leaving a pocket in the center. Cut them in half (so you can fill the pocket) and serve warm or at room temperature, or let cool, wrap tightly in aluminum foil, place in a zipper bag, and freeze.

Thaw frozen pitas before using (this only takes about 5 minutes at room temperature). To reheat, stack several in a pile, wrap with foil, and place in a 375 degree oven for 10 to 15 minutes.

Pita pockets can be filled with all sorts of wonderful things. They are especially well suited for holding soft fillings that tend to squish out the sides of sliced bread sandwiches, such as tuna salad, or egg salad made my favorite way with still barely warm farm eggs and lots of Hellman's (Best Foods) mayonnaise.

You can even fill your pita with a 'real' salad of chopped greens, diced tomato and cucumber, grated carrot, perhaps some sweet red pepper, and a sprinkling of vinaigrette or nice bottled dressing.


It doesn't get much better than this.

A BLT pita made with homegrown heirloom tomatoes and local bacon is about as good as it gets. Tuck in some sliced avocado and you would probably be whisked straight to heaven.

But my favorite thing to do with pita pockets (which was the reason I made them in the first place) is to make gyros. I am not sure if my version is authentic or not. It is basically like a Greek-style taco.

First you mix finely chopped onion or shallots and garlic with plenty of parsley, basil, thyme, rosemary, salt, and pepper into some nice ground lamb. (If you want some very nice ground lamb, buy lamb stew meat from the butcher and grind it up yourself at home, or see if they'll grind it for you. ) Do not overmix the meat.

Dried herbs are fine, but use fresh if you have them. Amounts are simply a matter of taste. This mixture is more flavorful if allowed to chill for several hours or overnight, but if you are pressed for time you can use it right away.

Brown the meat in a skillet. While it's cooking, stir together some chopped tomatoes and onions and put them in a small bowl. In another bowl, combine a chopped, peeled cucumber with plain yogurt and/or sour cream and a clove of garlic that has been minced with a little salt. (Lemon cucumbers taste delicious, are easy to grow from seed, and don't have to be peeled; miniature white cucumbers taste great and are easy to grow, too.)

Bring the hot lamb mixture, the warm pitas, the tomatoes and onions, and the cucumber/yogurt mixture to the table and let everyone assemble their own dinner. If you really want to gild the lily, you can offer a little dish of grated sharp cheddar cheese as well.

Warning: people can and will devour a great number of these in record time. The first time I made them, it was was just me and my mother at the table. Silence ensued as our complete attention was focused on our plates. As I casually reached for another pita, my mother looked over at me and said, "How many have you had?" I admitted that this would be my third.

"Why, how many have you had?"

"Five."

You've been warned.

This ground lamb mixture also makes lamb burgers fit for a king, especially when cooked on the grill, topped with melted sharp cheddar, and served on toasted homemade rolls or bread (or stuffed into warm pitas) that have been spread with a thin layer of dijon mustard.

So now you not only know how to make delicious pita pockets in under an hour, but also what to do with them. There is just one tiny problem. During my intensive research, I discovered a deep dark secret: Not all pitas puff. Oh, I know there are people out there who claim that every pita puffs perfectly for them, but this was not my experience (and I suspect they may be lying).

I tried everything. I altered the recipe. I rolled the dough balls out to different thicknesses. I let them rise for less time and more time. I baked them on one big piece of foil instead of lots of little ones. I baked them on a heavy duty rimmed commercial baking sheet and on a very hot
baking/pizza stone (the secret to incredible homemade pizzas and crusty artisan breads).

I even turned to my very favorite bread book,
Bread Alone by Daniel Leader, and tried his recipe, which called for only 1/4 teaspoon of yeast, no oil, no sugar, less salt, and two and a half hours of rising time. The pitas were baked on a hot baking/pizza stone at 400°.

I did have a slightly better puff rate than with Bernard's recipe, but the pitas were not nearly as flavorful (no oil or sugar and less salt will do that to a thing). I started to become
just a little bit frustrated.


What to do? What to do?

I finally realized that I'm never going to get 100% pita puffage. And I no longer care, because I have traveled down The Road of the Unpuffed Pita, and there is no turning back. I'm in love.

If your pitas don not puff properly, there is no need to panic. As I see it, you have three tasty options.

The first option is to gobble them up straight from the oven and pretend they didn't exist.

The second is to turn them into pita chips.


I cannot claim responsibility for the invention of pita chips. I also cannot believe that I lived this long without them, since I am now a certified pita chip addict. The other night I was so desperate for some that I actually made them using my frozen stash of puffed pitas. They are ridiculously easy to make, and a million variations abound.

Nic at Bakingsheet likes to spray hers with olive oil and sprinkle them with salt, pepper, cumin, and paprika. Shuna at Eggbeater simply brushes them with olive oil and sea salt, while Sam at Becks & Posh makes hers with homemade chile oil.

The pita chips in the photo above were my first attempt. Some of them were brushed with a yummy herbed olive oil/canola mixture I swiped from a container of tiny marinated mozzarella balls. Others were brushed with extra-virgin olive oil and sprinkled with finely grated Pecorino Romano and a little salt.

I won't admit how quickly this first batch disappeared. Let's just say that there was no need to make dinner that night—and they go very well with a glass or two of red wine.

Baking time depends on the thickness of the pitas and how crisp you desire them. I baked various batches in a 400° oven for anywhere from 6 to 15 minutes. I also baked some in my beloved toaster convection oven at 400° for 6 to 10 minutes on the convection setting.

I don't know if pita chips store well, because I never had any last that long.

The third way of dealing with pocketless pitas has inspired my new motto: When life gives you unpuffed pitas, make pizza!


Pita bread pizzas: my new favorite 'fast food'

Making heavenly homemade individual pizzas just got a whole lot easier. You simply top the unpuffed pitas however you desire and pop them in the oven for about 6 minutes. I baked these in my toaster convection oven on a homemade hearth (click here for more info) at 425° for 6 minutes. I reheated cold leftover pita pizzas at 425° for 5 to 8 minutes.

Both times I let the hearth heat up for 15 minutes. During this time you could fix a garden salad or heat up a bowl of homemade soup to have with your pizza.

Suddenly a recipe gone wrong has turned into a fabulous gourmet dinner that is ready in less than 30 minutes and can be prepared on the spur of the moment with whatever ingredients you happen to have hanging around. All you need to do is keep a supply of unpuffed pitas in the freezer.


I made this pizza using a frozen pita. It's topped with a thick layer of homemade pesto, slices of fresh mozzarella, the first orange banana tomatoes from the garden (well worth the wait), and a sprinkling of Pecorino Romano. I ate half of it standing up in the kitchen.

So there you have it. The complete Pita Project.

I can't offer you 100% success rate with this recipe, but perhaps you'll fare better than I did. On the other hand, after tasting a couple of rejects, you may just find yourself crouched down in front of the oven, fervently hoping that all of your pitas don't puff.

More links for bread lovers:
Ten Tips on How To Bake Better Artisan Breads at Home
Beyond Easy Beer Bread
Whole Wheat Beer Bread

Onion Rye Beer Bread
Three Onion & Three Cheese Pizza
Tomato Pesto Pizza & My Favorite Basil Pesto Recipe

Fresh Tomato & Basil Whole Wheat Sourdough Bread
No-Knead Crusty Freeform Bread
Oatmeal Toasting Bread
Savory Cheese & Scallion Scones
Cranberry Christmas Scones
Spicy Pumpkin Pecan Raisin Muffins
Best Blueberry Bran Muffins & Other Bran Muffin Variations


Still hungry? You'll find links to all my sweet and savory Less Fuss, More Flavor recipes in the Farmgirl Fare Recipe Index.

© 
FarmgirlFare.com, the (mostly) puffed up foodie farm blog where Farmgirl Susan shares recipes, stories & photos from her crazy country life on 240 remote Missouri acres.

Sunday, July 17

Ten Tips on How To Bake Better Artisan Breads at Home

Freshly Baked Pain au Levain - Farmgirl Fare
Freshly baked pain au levain (recipe in Daniel Leader's Bread Alone)


January 2011 Update: More tips! You might also enjoy my new post, How To Shape Bread Dough Into Sandwich Loaves and Some Simple Bread Baking Tips.

This Daily Farm Photo of two freshly baked loaves of my pain au levain prompted some requests for tips on how to bake better crusty, free form breads, so I came up with 10 simple things you can do to immediately improve your loaves.

Then I realized one sentence on each would not suffice. So this post is much longer than originally planned. Also, I tend to get carried away on the subject of bread.

Let me preface this list by stating three things. One, bread bakers are an opinionated bunch. Two, there are at least six million opinions regarding bread baking out there. And three, most of these opinions contradict one another.

Such a basic process can easily get very complicated. And very confusing. Start delving through a pile of books on bread baking, and in no time at all your head will be spinning and your brain will feel as if it's made of dough. (I speak from experience.)

This is by no means a comprehensive lesson on bread baking, or even a basic introduction. If you've never baked a loaf of bread in your life, I recommend you begin by making pizza dough. Click here for my simple recipe.


Farmhouse White Sandwich Bread (recipe here)

From there, I suggest trying my popular Farmhouse White Sandwich Bread, which is a classic, basic loaf that's perfect for beginning bread bakers. And once you're
comfortable with the basic formula you can go on to experiment by adding various other ingredients to the dough (the recipe post includes several suggestions).

If you're ready to try making crusty, European-style loaves such as the ones pictured above—or if you're looking for ways to improve the breads you're already making—I offer you these tips.

They're not deep, dark secrets. They're not magic tricks. They're simply ten things that made my breads better and resulted in the loaves you see here.


Even the covers of these bread baking cookbooks are inspiring.

1. Do some reading.
Just don't overdo it. Pick one bread book and read it from cover to cover. If you like it and it makes sense to you, read it again. Then try a recipe. If you like the result—or if it came out terrible but you know it has potential—make it again. And again and again and again.

I believe that it's better to make one bread 10 times than to make 10 breads one time. You can't get to know a bread by making it only once.

I have a pile of cookbooks devoted to bread, but the only one that lives in my kitchen is Bread Alone by Daniel Leader. I've turned to it so many times it's now in about four pieces. It's a wonderful book, full of everything from detailed information on ingredients and mouthwatering recipes (and photos) to stories about visiting an organic grain grower and starting the Bread Alone bakery in upstate New York.

It's easy to read, and the recipes are accessible even to a beginner. At first it may seem daunting, but it's not. Start with his learning loaves and move on from there. After 20 years this book is still in print, and for good reason.

Update: Daniel Leader's latest book, Local Breads: Sourdough and Whole-Grain Recipes from Europe's Best Artisan Bakers, is fabulous. It's the culmination of dozens of trips to Europe over the past two decades in search of bakers who are still using time-honored methods and ingredients to create loaves unique to their towns and cities.

Part travelogue, part bread making class, and part gastronomic history lesson, the book is full of colorful stories of local artisans and their authentic treasured recipes, many of which have been shared for the first time, and all of which have been translated by Daniel for American home bakers. I love it even more than Bread Alone.


If you're a beginning bread baker, the beautiful step by step color photos and general information in Bread: Artisan Breads from Baguettes and Bagels to Focaccia and Brioche can help demystify the whole bread baking process, while inspiring you to start kneading. I really like the Italian Rosemary Raisin Bread, and my Carrot Herb Rolls (made with fresh herbs and lots of shredded carrots) are adapted from Bread. The stuffed focaccia is really good.

Another excellent bread book also comes from a New York bakery. Amy's Bread, Revised and Updated: Artisan-Style Breads, Sandiwches, Pizzas, and More from new York City's Favorite Bakery is packed with useful information (especially for beginners) and offers recipes for tempting loaves of all kinds and all degrees of difficulty.

Artisan Baking Across America is a gorgeous book "to bake from, to learn from, to read for the sheer pleasure of realizing the devotion and mastery that go into the making of our best daily bread." It includes stunning photographs, intimate portraits of all kinds of artisan bread bakeries and bakers, and some of their best recipes.

Bernard Clayton's New Complete Book Of Breads offers over 300 recipes for every type of bread you can imagine, and each recipe includes instructions for making the dough with your hands, an electric mixer, and a food processor. The recipe for pita bread alone was worth the price of the book.

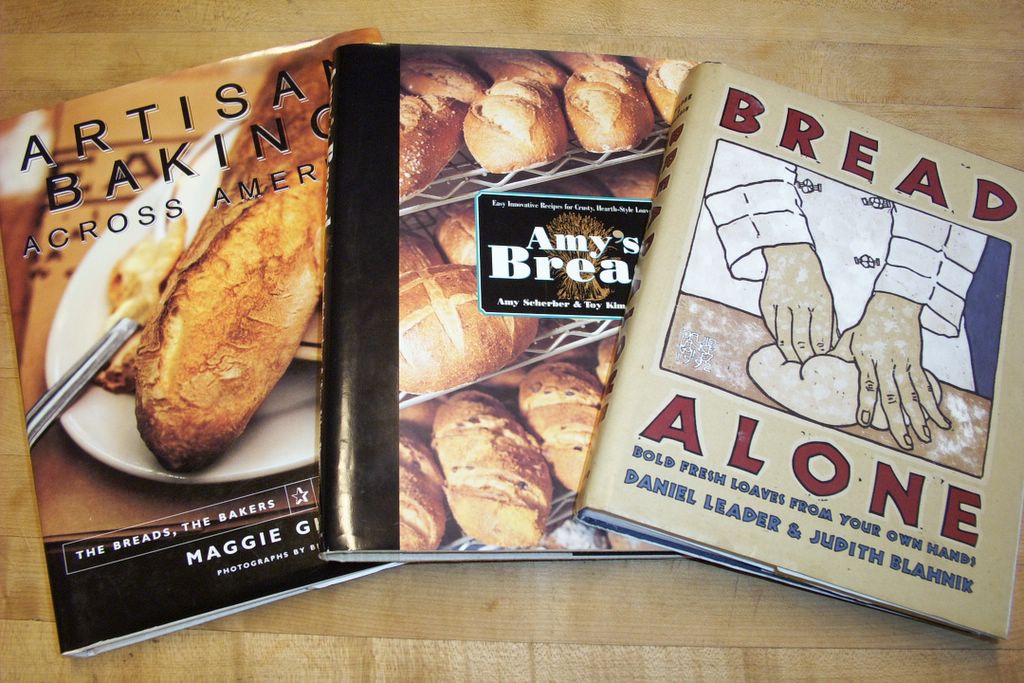
Bread in novels: There's another bestselling book called Bread Alone. It's a quiet novel written by my good friend Judi Hendricks, and it, too, is wonderful. Much of the story takes place in a Seattle bakery, and Judi confided in me that she loves Daniel Leader's Bread Alone so much she named her novel after it.

I've read it at least three five or six times, and it always inspires me to bake bread. The sequel,
The Baker's Apprentice is a delicious read as well.

2015 Update: Baker's Blues, the third novel in the Bread Alone series is out! Click here for a special conversation I had with Judi about food, writing, and her long awaited new book.

Yet another similarly titled book is Sarah-Kate Lynch's By Bread Alone, a quirky novel I enjoy re-reading every couple of years.

2. Start with the best ingredients.
Depending on your point of view, this may sound either completely obvious or totally unnecessary. Flour is flour, right? Water is water? But when you are creating something with only four basic ingredients (flour, water, salt, yeast), the quality of those ingredients is crucial.

Wheat that is grown in dead soil and doused with chemical pesticides and herbicides, then sprayed with more pesticides once it's been harvested and is sitting in storage so it doesn't get bugs in it (yes, this is what is often done), and then highly processed and chemically bleached so that it's nice and white—this flour will never give you great bread.

Organic flour is the way to go. Stoneground if possible. It's hard to find stoneground white flour, but Heartland Mill produces their white flours using equipment that is very kind to the wheat. I use organic bread flour (sometimes called high-gluten flour) for sourdough loaves, pizza dough, and combined with organic all-purpose flour in other breads like Farmhouse White.

Water should be pure. My water comes from a spring-fed, 300-foot deep well (actually 600 feet deep if you figure we're already 300 feet down in a valley). It's run through a large outdoor filter to remove sediment, and then I filter it again at the faucet. Municipal tap water is full of chlorine and often other contaminants. These do not make good bread.

Salt is a chic ingredient these days, and some of it is incredibly expensive. There are many natural alternatives to common table salt, which is pretty nasty stuff. Sea salt is nice, but it can be heavily processed, and some people recommend not using any sort of sea salt since our oceans have become so polluted. Kosher salt, a coarse salt which can come from either mines or the sea, contains no additives.

Look around, see what you can find, what you like the taste of, and experiment with it.

2016 update: I've been buying this pure Himalayan pink salt in bulk for several years (at a very reasonable price) and using it for everything from baking bread to taking baths. It's wonderful.

Yeast is always a topic of hot debate among bread bakers. Some highly respected professionals swear by "instant" yeast—which can be mixed right into the dry ingredients—while others refuse to even utter the words.

Fresh yeast is another hot topic; again, some people swear by it, while others say it's too much trouble as it doesn't stay fresh for long and can be hard to find. I've never baked with it. My sourdough loaves don't use any added yeast. Once you have a sourdough starter, that's all you need.

If you do use yeast, make sure that it's alive—no matter what kind. I use instant yeast, which I buy in economical 1-pound packages. I store it in a jar in the freezer where it keeps for over a year, though others say it won't, and still others say you should never, ever freeze yeast. See how it can get really confusing?

You can read more about the different types of yeast available here.


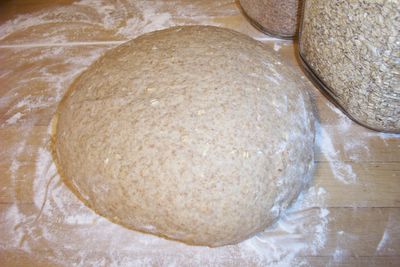
Oatmeal Toasting Bread 'Old' Dough (oatmeal bread recipe here)

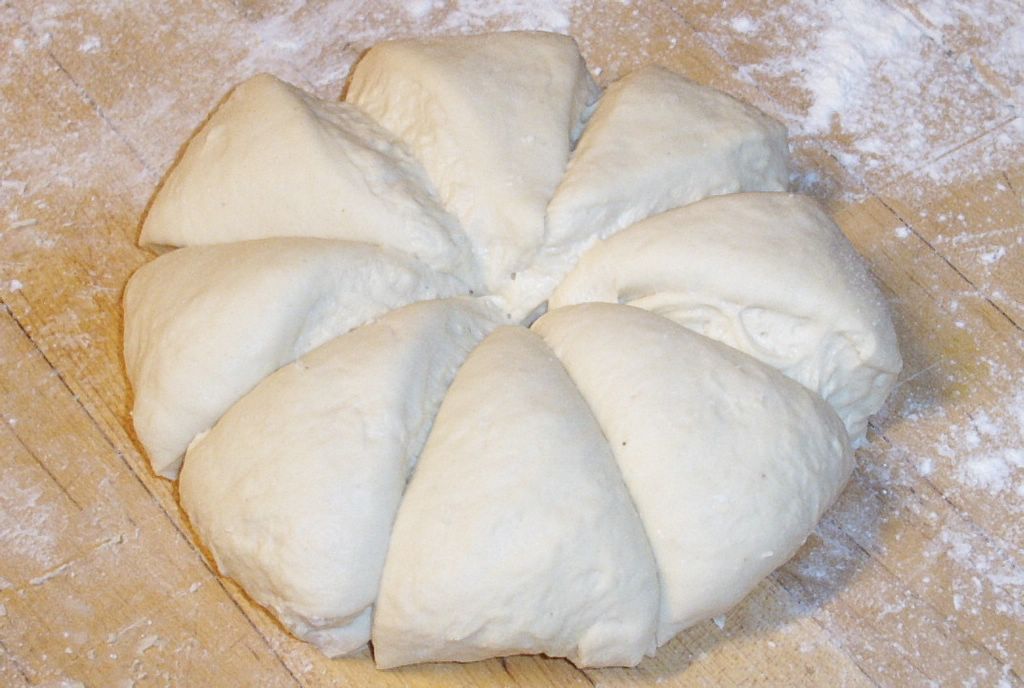
3. Use a sourdough starter or a sponge or a poolish or a lump of old dough.
There are all different types of 'starters.' Some are made in a few hours, some in a few days, and some live in your fridge forever.

If you make bread two days in a row, you can just save a lump of dough from the first batch and mix it into the second, or you can freeze it for another time, like the Oatmeal Toasting Bread dough pictured above.

Any kind of starter will vastly improve the crust, crumb, and flavor of your loaves. It's simply a matter of finding which one works for you. I've had my two sourdough starters ('regular' and rye) for nearly four years. The older they get, the better they make your bread. I made them using the directions in
Bread Alone.

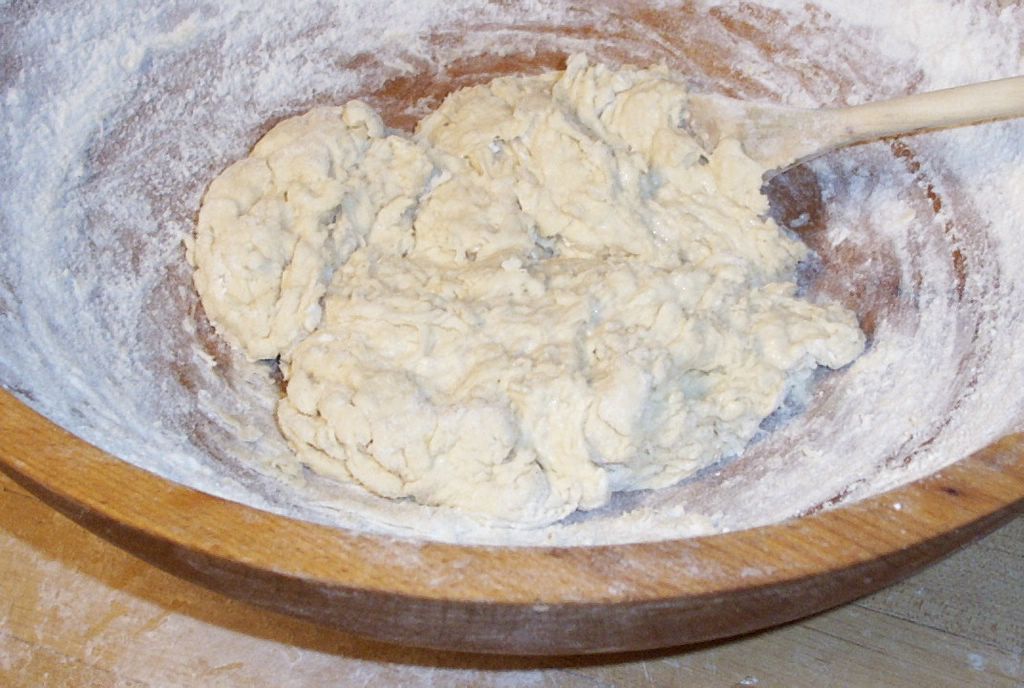
4. Find a wooden dough bowl and use it forever.


2008 Update: While I still love using my wooden bowls, most of the time I now let my dough ferment (the first rise) in a straight-sided food grade plastic container with a snap-on lid, which makes it easy to see when the dough has doubled in size. There's no need to grease or flour the container.

2017 Update: I recently bought this 12-quart Rubbermaid container and this lid for big batches of dough and it's really nice. 

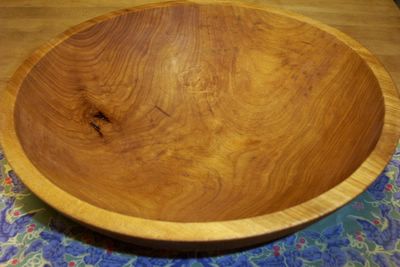
The wooden bowl is the bread baker's equivalent of the cast iron skillet. The more you mix and rise your dough in it, the more seasoned it becomes. Clean it with only a plastic scraper and a damp cloth. Wash it with water if you must, but never use soap (though if you buy a used wooden bowl, you'll need to clean it thoroughly with soapy water and soak it briefly in a mild bleach solution before the first use).

Old yeast cells will survive in the bowl, enhancing fermentation and building flavor in your doughs.

I've been using the same antique wooden bowl for a dozen years. It's four inches high and about 13 inches from rim to rim. It will hold enough dough to make three good-sized loaves. Every so often I take a cloth and rub almond oil or food grade mineral oil into the wood to keep it from drying out. It should really be done once a month. You can also use almond oil and mineral oil on wood cutting boards and rolling pins.

New wooden bowls are available in various sizes, or you might luck out and find one at an antiques store or flea market or on ebay. Old bowls are often very pricey though, because decorators and antiques collectors love them.

If you want to buy a new wooden bowl, I would check out
The Bowl Mill in Vermont. I haven't purchased any of their bowls, but they appear to be of superior quality and workmanship. If treated properly, a wooden dough bowl should last for many years.

Whether you decide to buy a new wooden bowl or an old one, remember that you don't want one that has been painted or stained or is cracked.

5. Sprinkle in the flour and stir like crazy.
When you're mixing up your dough, add only about a handful of flour at a time. Use your whole arm to stir, making wide sweeping motions (I use a wooden spoon.) This will "whip" the dough and allow the gluten to develop.

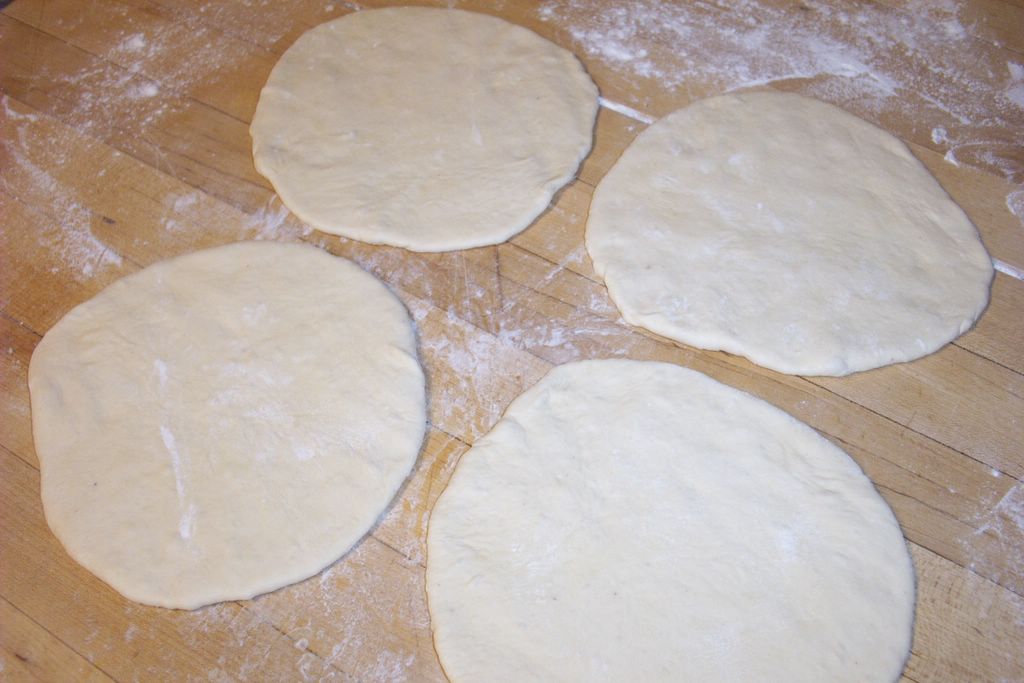
This technique works best with a wide, shallow bowl. Take several minutes to mix in all the flour, saving one cup to add while kneading. Then turn the bread out onto a floured surface and begin kneading it.

6. Give it a rest and then add the salt.

Honey whole grain dough ready for a little rest

This tip not only greatly improves nearly any type of bread, but it also allows you to decrease your kneading time (which improves the bread even more). Autolyse (pronounced AUTO-lees and used as both a noun and a verb) is a French word that refers to a rest period given to dough during the kneading process.

When making your dough, mix together only the water, yeast, flour, and grains until it forms a shaggy mass. Knead it for several minutes, and then cover the dough and let it rest for 20 minutes. I simply leave the dough on the floured counter and put my wooden bowl over it.

During this time, the gluten will relax and the dough will absorb more water, smoothing itself out so that it is moist and easier to shape. After the autolyse, knead the dough for several more minutes, mixing in any other ingredients such as herbs or nuts or dried fruit.

Since salt causes gluten to tighten, hindering its development and hydration, it should not be added to the dough until after the autolyse. And if you're using the "old dough" method (where you add a lump of finished dough from a previous batch of bread to your new dough rather than use a sponge or starter), do not mix it in until after the autolyse either, as it contains salt.

When you incorporate an autolyse into your bread baking, you will be rewarded with loaves that have greater volume and a creamier colored crumb, as well as more aroma and sweet wheat flavor. They will also look nicer and taste better. Bread doughs that contain a high proportion of white flour will benefit the most from an autolyse.

7. Keep the temperature low & the rise slow.

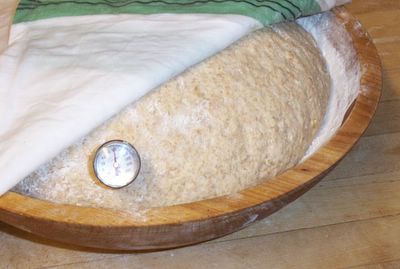
Taking the dough's temperature before the first rise

The fundamental art of bread baking can easily turn into a scientific study full of confusing technical jargon and complicated explanations. Since this is only an article and not an entire book, I am going to simply skip straight to the bottom line with this tip: the longer your dough is allowed to rise, the better your bread will be.

The two ways to extend rising times are by adjusting the temperature of the dough and the amount of yeast you put in it. The lower the temperature, the slower the rise. The less yeast used, the slower the rise.

Crusty, European-style breads often rise for many hours. For example, the sourdough breads I make contain no added yeast at all, only the sourdough starter—actually called a chef—that lives in my refrigerator.

The night before I plan to bake bread, I mix the chef with flour and water and set it in a place that is about 70° Fahrenheit for 8 to10 hours. The next day, this mixture becomes the base for my finished dough, which will rise for a total of another five to six hours before it's finally baked.

Many bakers agree that the ideal room temperature for bread dough to rise is between 70° and 75°. If you're baking in a kitchen that is cooler than 70°, you can easily raise the temperature of your dough by using warm or hot water (or milk)—or just let it rise a little slower, which will improve your loaves. Keep in mind that kneading the dough will also increase its temperature by a few degrees.

If the air in your kitchen is above 75°, you can use cold water in your dough (and can hopefully find a cooler place to let it rise). Storing your flours in the freezer is another way to lower the temperature of your dough, and it will also keep whole grain flours fresher.

An
instant read thermometer is a handy item to have for taking water, flour, and dough temperatures, and it's indispensible if you're a serious bread baker.

2017 Update: Last year I finally switched from the instant read dial thermometers pictured above to this digital version, and I'll never go back! I also use it to check everything from roasted chicken to the hot water for our beloved aeropress coffee/espresso maker.

Using less yeast than is called for in a recipe will allow the dough to rise for a longer period of time. A basic rule you can apply to nearly any bread recipe is to simply use half the yeast and double the rising time. You may have to make adjustments, but this is a good place to start.

By doing just this one thing, you should see a great improvement in your breads. They'll have more grain flavor, a nice, dense crumb with irregular air pockets, and a pleasant chewiness.

8. Catch yourself a Couche.


Pain Au Levain rising in my homemade couche

Couche is the French word for "couch" or "resting place." In the bread baking world, a couche is a piece of heavy canvas that is dusted with flour and used to support freestanding loaves, such as rolls and baguettes, while they are proofing. (When making bread, the second rise—after the loaves have been shaped—is referred to as the "proofing" phase. The first rise is the "fermentation.") As you can see in the photo, the couche cradles the loaves, keeping them straight and preventing them from sticking together.

Couches made of special heavy baker's canvas can be purchased from commercial bakery suppliers. My couche is made from a yard of raw canvas I bought several years ago at a fabric store for about $4.00. Before using it the first time, I washed it in hot water (without any detergent) to remove any sizing from the material. Since then, I have simply shaken it out well after each use. If you do need to wash your couche, use cold water (so the flour doesn't turn to glue) and no detergent.

You can place your couche either directly on a counter or on a large baking sheet (I can't imagine life without my commercial half-size sheet pans) if you need to move the loaves somewhere else to rise. Sprinkle it generously with flour and rub the flour into the canvas. Long loaves such as torpedoes or baguettes should be placed in the couche seam side up.

When you're ready to put the loaves into the oven, flip them over onto your baker's peel (or an upside down, large rimmed baking sheet) so that the seam is on the bottom and the floured side is facing up. I have several different peels and prefer the wood-handled aluminum ones the best because the thin metal easily slides under the crusts. I recommend buying the largest size you can.

To keep your loaves (and pizzas) from sticking to the peel when you slide them into the oven, lay a piece of unbleached parchment paper (which is also wonderful for baking cookies and roasting vegetables) on the peel before turning the loaves onto it, then slide the loaves and the parchment into the oven.


This is how you get that pretty white pattern on the tops of your loaves (the dark parts are where the crust "bloomed" after it was scored just before putting it into the oven). And, more importantly, your crusts will be thicker and bolder because extra flour will have embedded itself in the dough while it was rising.

9. Turn your oven into a stone hearth.
A baking stone will simulate a stone hearth in your oven and is a must if you are trying to bake crusty, free form loaves. (It's also the secret to making fantastic homemade pizza.) It will allow your breads to bake more evenly, and the initial, intense burst of heat on the cold dough will help to create high, richly colored loaves and chewy, better-tasting crusts.

There are many shapes and sizes and thicknesses of pizza or baking stones available. (Update: Now you can even buy baking stones made from steel, which some bakers swear by.) Be sure to choose one that leaves a 2- to 3-inch gap of space on all sides in your oven so air can circulate. My baking stone is 14"x15" and about 3/4" thick and I've had it for 18 years. It's now dark and seasoned. After each use, I just brush it off. If you need to wash yours, use only water, never soap.

You should season a new baking stone by heating it once or twice in a moderate oven before using it. When making bread or pizza, always allow your baking stone to preheat in the oven for at least 45 minutes so that it's nice and hot.

I find that placing my baking stone on a rack in the center of my oven gives me evenly baked breads. If the bottoms of your breads are burning before the tops are brown, or vice versa, try placing your baking stone on a lower or higher oven rack. For pizzas I place the baking stone on the lowest oven rack and crank up the heat to 500 degrees.

Oatmeal Toasting Bread in loaf pans
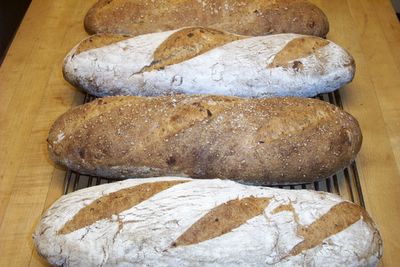
Freshly baked Oatmeal Toasting Bread (recipe here)

2009 Update: A few years ago I started baking all of my pan loaves on my baking stone. I place the cold stone in the cold oven like usual, let the oven heat up, and then put the loaf pans full of risen dough directly on the hot baking stone. I really like the results, and the loaves are nice and brown on the bottoms and sides.

Heavy duty commercial loaf pans really make a difference. I love my Chicago Metallic pans (pictured above is the 1-pound sizeI also use this larger size), and these USA Pans are really nice too.


10. Make some steam.
Have you ever wondered how some European-style breads get that gorgeous, glossy shine on their crusts—and why your loaves never turn out looking like that? Well, they can. All you need to do is fill up your oven with steam during the first part of baking.

Steam slows crust formation, which allows for the best possible oven "spring." It also gelatinizes the starch on the surface of the bread so that it develops a thin, glossy, beautifully brown crust.

There are two easy ways to create steam in your oven. One is to fill an inexpensive plastic spray bottle with water and mist the walls and floor of the oven for several seconds right after you put the bread in. Repeat this two more times at two or three minute intervals. (Warning: Do not spray the oven light! It makes a really big mess when it shatters.)

Try to open the oven door as little as possible when you're misting so that you don't lose all your valuable heat. You can set your oven 25 to 50 degrees higher than you need it to be to adjust for the heat loss while misting, and then just turn down the temperature once you're finished.

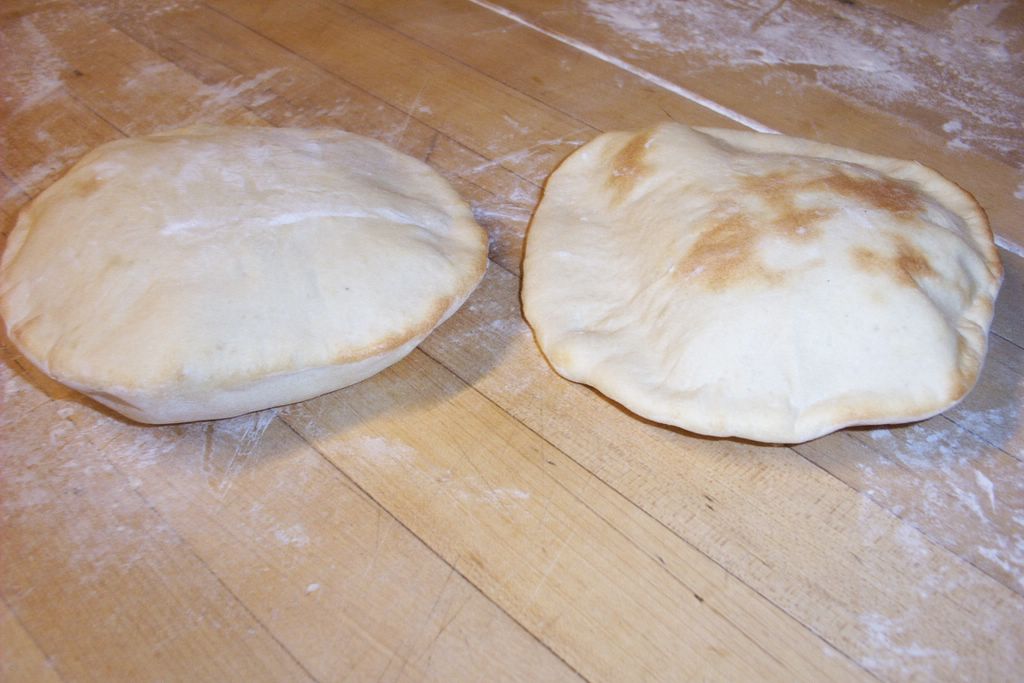
As long as your loaves do not have a decorative flour pattern on them (like the sourdough onion rye bread shown above), you can directly mist the dough as well. Or you can use a pastry brush to paint them with water before putting them in the oven.

The other way to create steam in your oven is by carefully pouring about a cup of hot water into a preheated pan you have set on a rack underneath your baking stone. Do this right after you have put your bread in the oven. Use a wide, shallow, old metal pan or a cast iron skillet (one of the most useful kitchen bargains around).

Do not use your favorite CorningWare baking dish, even though it's the perfect size. It will end up badly cracked, and you will end up in tears. If desired, you can also directly mist the loaves and oven walls at the beginning of the baking process when you use this method.

2009 Update: I rarely bother with the steam anymore, and I really haven't seen much (if any) difference in my breads. When I do want to create steam, I follow this tip from Daniel Leader's awesome book, Local Breads: Before you turn the oven on, place a cast iron skillet (one of the best kitchen bargains on the planet) on the rack below your baking stone. After you slide your unbaked loaves onto the hot baking stone, toss a handful of ice cubes into the hot cast iron skillet and quickly shut the oven door.

Oh, let's just make it an even baker's dozen tips!


11. Storing your edible masterpiece. 
Once you've baked a delicious loaf, you'll want it to stay as fresh as possible (assuming it lasts more than a few hours). Crusty loaves will keep best if you leave them unwrapped at room temperature.

You can store them, cut side down, in a breadbox or a cupboard or even on the kitchen counter. To re-crisp the crust, mist your bread with water and reheat it in a 400° oven for 5 to 8 minutes.

I store sandwich-style pan loaves in plastic bags at room temperature, but only for a couple of days. If the bread is whole grain, I usually leave the bag partly open. During our hot and humid Missouri summers I keep them in the fridge, which will make some people cringe, but I always toast refrigerated bread.

If you're not planning to eat your bread right away, consider freezing it. Bread freezes beautifully. I always bake several loaves at a time, no matter what kind of bread I'm making; there's no reason to go to all that effort for just one loaf.

I simply put whole or half loaves in heavy-duty freezer bags and toss them in the chest feezer, though some people recommend wrapping each loaf in aluminum foil first. You can defrost frozen bread at room temperature, or you can go straight from freezer to oven. For baguettes and large sandwich loaves (and all sorts of other things), I buy 2.5-gallon jumbo zipper bags, which I wash and reuse over and over.

12. Write everything down.


I used to be really bad about doing this, but I now find it indispensable. Each time you bake bread, simply take a few minutes to write down everything you did, from the amount of ingredients you used to the length of each rise, to how the finished bread looked and tasted. The more detailed your notes, the better.

There are so many things that can affect your bread baking; everything from the brand of flour to the weather can make a difference in how your bread comes out. For instance, when it's cloudy because of a low pressure system in the area, bread dough actually rises more quickly because it has less atmospheric pressure on it. Taking notes allows you to not only look back and see what worked and what didn't, but also helps you figure out why.


Farmhouse White ready for the oven
Farmhouse White ready for the oven (recipe here)

Each time I bake bread, even if I'm making my Farmhouse White for the 200th time, I pull out one of my bread notebooks and make detailed notes about the entire process. I also record the indoor temperature and humidity, the outdoor temperature, what the weather is like, and any other variables I can think of. This information can be especially helpful for the breads you don't bake very often.


Honey Whole Grain Bread baked using tips 2,5,6,7, and 9

13. And finally: Practice, practice, practice.
There is nothing that will improve your breads more than simply making them over and over again. And the best part is, there is nothing that will thrill your friends and loved ones more than receiving the results of your bread baking efforts.

So that's all there is to it. Just take these tips with you into the kitchen, and in no time at all you should be hearing those sweet, magic words, "This is the best bread I've ever tasted!"

Got more flour left? Check out these other Farmgirl Fare bread recipes:
Beyond Easy Beer Bread (my most popular recipe)
Whole Wheat Beer Bread
Onion Rye Beer Bread

How To Make Pita Bread in About an Hour
Savory Feta Cheese & Scallion Scones
Cranberry Christmas Scones (tasty any time of year!)
Meyer Lemon (or Regular Lemon) Scones
Whole Wheat Scones with Currants & Oats

Oatmeal Toasting Bread (makes wonderful rolls and burger buns too)
Italian Rosemary Raisin Bread
Fresh Tomato & Basil Whole Wheat Sourdough Bread

Carrot Herb Rolls (and a great bread book for beginning bread bakers)
My Favorite Easy Pizza Dough Recipe

Still hungry? You'll find links to all my sweet and savory Less Fuss, More Flavor recipes in the Farmgirl Fare Recipe Index. Enjoy!

© FarmgirlFare.com, the warm and crusty and slathered with butter foodie farm blog where Farmgirl Susan shares recipes, stories, and photos from her crazy country life—and everything is better with homemade bread.