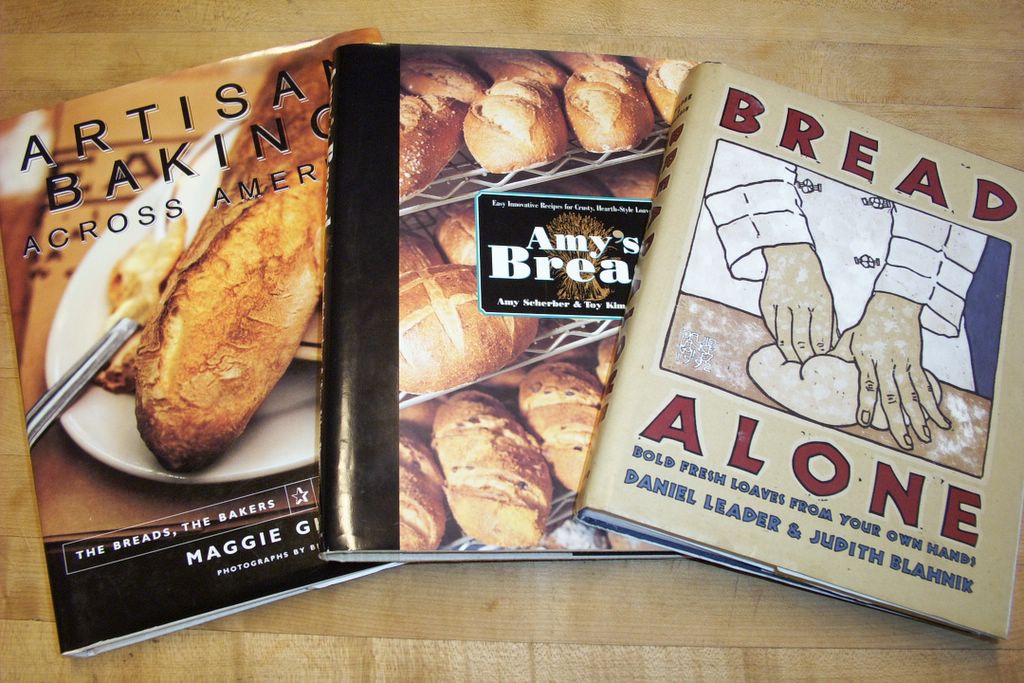
Bread in novels: There's another bestselling book called Bread Alone. It's a quiet novel written by my good friend Judi Hendricks, and it, too, is wonderful. Much of the story takes place in a Seattle bakery, and Judi confided in me that she loves Daniel Leader's Bread Alone so much she named her novel after it.
I've read it at least three five or six times, and it always inspires me to bake bread. The sequel, The Baker's Apprentice is a delicious read as well.
2015 Update: Baker's Blues, the third novel in the Bread Alone series is out! Click here for a special conversation I had with Judi about food, writing, and her long awaited new book.
Yet another similarly titled book is Sarah-Kate Lynch's By Bread Alone, a quirky novel I enjoy re-reading every couple of years.
2. Start with the best ingredients.
Depending on your point of view, this may sound either completely obvious or totally unnecessary. Flour is flour, right? Water is water? But when you are creating something with only four basic ingredients (flour, water, salt, yeast), the quality of those ingredients is crucial.
Wheat that is grown in dead soil and doused with chemical pesticides and herbicides, then sprayed with more pesticides once it's been harvested and is sitting in storage so it doesn't get bugs in it (yes, this is what is often done), and then highly processed and chemically bleached so that it's nice and white—this flour will never give you great bread.
Organic flour is the way to go. Stoneground if possible. It's hard to find stoneground white flour, but Heartland Mill produces their white flours using equipment that is very kind to the wheat. I use organic bread flour (sometimes called high-gluten flour) for sourdough loaves, pizza dough, and combined with organic all-purpose flour in other breads like Farmhouse White.
Water should be pure. My water comes from a spring-fed, 300-foot deep well (actually 600 feet deep if you figure we're already 300 feet down in a valley). It's run through a large outdoor filter to remove sediment, and then I filter it again at the faucet. Municipal tap water is full of chlorine and often other contaminants. These do not make good bread.
Salt is a chic ingredient these days, and some of it is incredibly expensive. There are many natural alternatives to common table salt, which is pretty nasty stuff. Sea salt is nice, but it can be heavily processed, and some people recommend not using any sort of sea salt since our oceans have become so polluted. Kosher salt, a coarse salt which can come from either mines or the sea, contains no additives.
Look around, see what you can find, what you like the taste of, and experiment with it.
2016 update: I've been buying this pure Himalayan pink salt in bulk for several years (at a very reasonable price) and using it for everything from baking bread to taking baths. It's wonderful.
Yeast is always a topic of hot debate among bread bakers. Some highly respected professionals swear by "instant" yeast—which can be mixed right into the dry ingredients—while others refuse to even utter the words.
Fresh yeast is another hot topic; again, some people swear by it, while others say it's too much trouble as it doesn't stay fresh for long and can be hard to find. I've never baked with it. My sourdough loaves don't use any added yeast. Once you have a sourdough starter, that's all you need.
If you do use yeast, make sure that it's alive—no matter what kind. I use instant yeast, which I buy in economical 1-pound packages. I store it in a jar in the freezer where it keeps for over a year, though others say it won't, and still others say you should never, ever freeze yeast. See how it can get really confusing?
You can read more about the different types of yeast available here.

Oatmeal Toasting Bread 'Old' Dough (oatmeal bread recipe here)
3. Use a sourdough starter or a sponge or a poolish or a lump of old dough.
There are all different types of 'starters.' Some are made in a few hours, some in a few days, and some live in your fridge forever.
If you make bread two days in a row, you can just save a lump of dough from the first batch and mix it into the second, or you can freeze it for another time, like the Oatmeal Toasting Bread dough pictured above.
Any kind of starter will vastly improve the crust, crumb, and flavor of your loaves. It's simply a matter of finding which one works for you. I've had my two sourdough starters ('regular' and rye) for nearly four years. The older they get, the better they make your bread. I made them using the directions in Bread Alone.
4. Find a wooden dough bowl and use it forever.
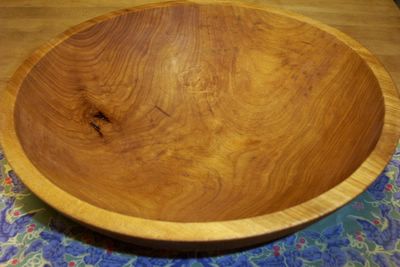
The wooden bowl is the bread baker's equivalent of the cast iron skillet. The more you mix and rise your dough in it, the more seasoned it becomes. Clean it with only a plastic scraper and a damp cloth. Wash it with water if you must, but never use soap (though if you buy a used wooden bowl, you'll need to clean it thoroughly with soapy water and soak it briefly in a mild bleach solution before the first use).
Old yeast cells will survive in the bowl, enhancing fermentation and building flavor in your doughs.
I've been using the same antique wooden bowl for a dozen years. It's four inches high and about 13 inches from rim to rim. It will hold enough dough to make three good-sized loaves. Every so often I take a cloth and rub almond oil or food grade mineral oil into the wood to keep it from drying out. It should really be done once a month. You can also use almond oil and mineral oil on wood cutting boards and rolling pins.
New wooden bowls are available in various sizes, or you might luck out and find one at an antiques store or flea market or on ebay. Old bowls are often very pricey though, because decorators and antiques collectors love them.
If you want to buy a new wooden bowl, I would check out The Bowl Mill in Vermont. I haven't purchased any of their bowls, but they appear to be of superior quality and workmanship. If treated properly, a wooden dough bowl should last for many years.
Whether you decide to buy a new wooden bowl or an old one, remember that you don't want one that has been painted or stained or is cracked.
5. Sprinkle in the flour and stir like crazy.
When you're mixing up your dough, add only about a handful of flour at a time. Use your whole arm to stir, making wide sweeping motions (I use a wooden spoon.) This will "whip" the dough and allow the gluten to develop.
This technique works best with a wide, shallow bowl. Take several minutes to mix in all the flour, saving one cup to add while kneading. Then turn the bread out onto a floured surface and begin kneading it.
6. Give it a rest and then add the salt.
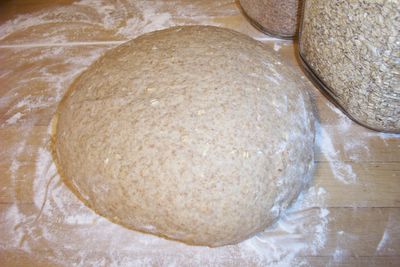
Honey whole grain dough ready for a little rest
This tip not only greatly improves nearly any type of bread, but it also allows you to decrease your kneading time (which improves the bread even more). Autolyse (pronounced AUTO-lees and used as both a noun and a verb) is a French word that refers to a rest period given to dough during the kneading process.
When making your dough, mix together only the water, yeast, flour, and grains until it forms a shaggy mass. Knead it for several minutes, and then cover the dough and let it rest for 20 minutes. I simply leave the dough on the floured counter and put my wooden bowl over it.
During this time, the gluten will relax and the dough will absorb more water, smoothing itself out so that it is moist and easier to shape. After the autolyse, knead the dough for several more minutes, mixing in any other ingredients such as herbs or nuts or dried fruit.
Since salt causes gluten to tighten, hindering its development and hydration, it should not be added to the dough until after the autolyse. And if you're using the "old dough" method (where you add a lump of finished dough from a previous batch of bread to your new dough rather than use a sponge or starter), do not mix it in until after the autolyse either, as it contains salt.
When you incorporate an autolyse into your bread baking, you will be rewarded with loaves that have greater volume and a creamier colored crumb, as well as more aroma and sweet wheat flavor. They will also look nicer and taste better. Bread doughs that contain a high proportion of white flour will benefit the most from an autolyse.
7. Keep the temperature low & the rise slow.
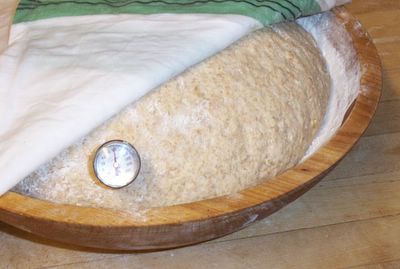
Taking the dough's temperature before the first rise
The fundamental art of bread baking can easily turn into a scientific study full of confusing technical jargon and complicated explanations. Since this is only an article and not an entire book, I am going to simply skip straight to the bottom line with this tip: the longer your dough is allowed to rise, the better your bread will be.
The two ways to extend rising times are by adjusting the temperature of the dough and the amount of yeast you put in it. The lower the temperature, the slower the rise. The less yeast used, the slower the rise.
Crusty, European-style breads often rise for many hours. For example, the sourdough breads I make contain no added yeast at all, only the sourdough starter—actually called a chef—that lives in my refrigerator.
The night before I plan to bake bread, I mix the chef with flour and water and set it in a place that is about 70° Fahrenheit for 8 to10 hours. The next day, this mixture becomes the base for my finished dough, which will rise for a total of another five to six hours before it's finally baked.
Many bakers agree that the ideal room temperature for bread dough to rise is between 70° and 75°. If you're baking in a kitchen that is cooler than 70°, you can easily raise the temperature of your dough by using warm or hot water (or milk)—or just let it rise a little slower, which will improve your loaves. Keep in mind that kneading the dough will also increase its temperature by a few degrees.
If the air in your kitchen is above 75°, you can use cold water in your dough (and can hopefully find a cooler place to let it rise). Storing your flours in the freezer is another way to lower the temperature of your dough, and it will also keep whole grain flours fresher.
An instant read thermometer is a handy item to have for taking water, flour, and dough temperatures, and it's indispensible if you're a serious bread baker.
2017 Update: Last year I finally switched from the instant read dial thermometers pictured above to this digital version, and I'll never go back! I also use it to check everything from roasted chicken to the hot water for our beloved aeropress coffee/espresso maker.
Using less yeast than is called for in a recipe will allow the dough to rise for a longer period of time. A basic rule you can apply to nearly any bread recipe is to simply use half the yeast and double the rising time. You may have to make adjustments, but this is a good place to start.
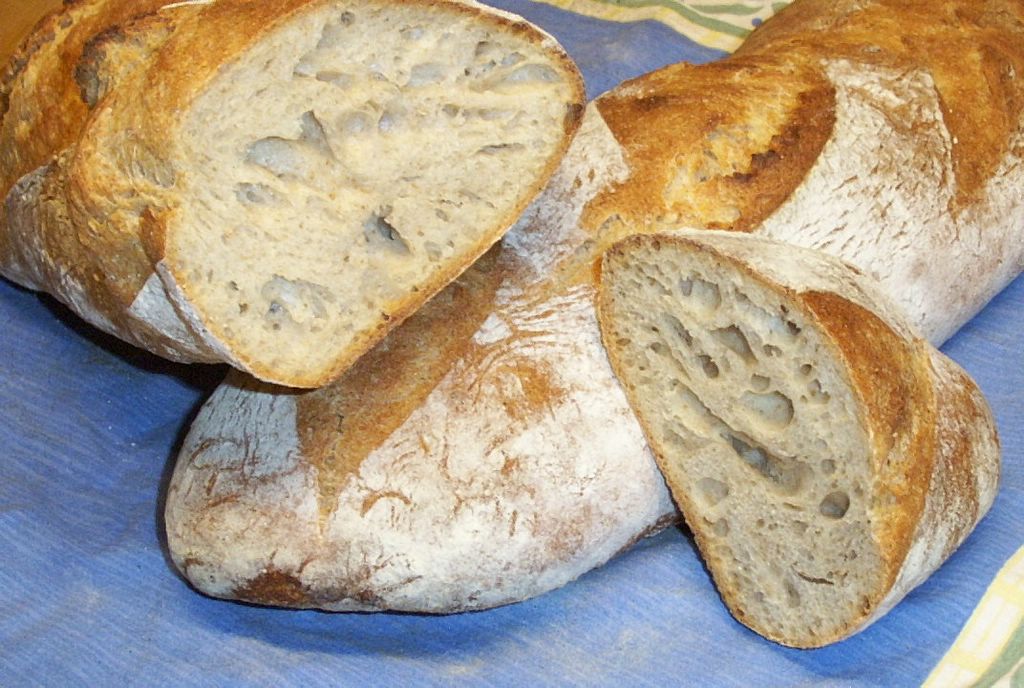
By doing just this one thing, you should see a great improvement in your breads. They'll have more grain flavor, a nice, dense crumb with irregular air pockets, and a pleasant chewiness.
8. Catch yourself a Couche.

Pain Au Levain rising in my homemade couche
Couche is the French word for "couch" or "resting place." In the bread baking world, a couche is a piece of heavy canvas that is dusted with flour and used to support freestanding loaves, such as rolls and baguettes, while they are proofing. (When making bread, the second rise—after the loaves have been shaped—is referred to as the "proofing" phase. The first rise is the "fermentation.") As you can see in the photo, the couche cradles the loaves, keeping them straight and preventing them from sticking together.
Couches made of special heavy baker's canvas can be purchased from commercial bakery suppliers. My couche is made from a yard of raw canvas I bought several years ago at a fabric store for about $4.00. Before using it the first time, I washed it in hot water (without any detergent) to remove any sizing from the material. Since then, I have simply shaken it out well after each use. If you do need to wash your couche, use cold water (so the flour doesn't turn to glue) and no detergent.
You can place your couche either directly on a counter or on a large baking sheet (I can't imagine life without my commercial half-size sheet pans) if you need to move the loaves somewhere else to rise. Sprinkle it generously with flour and rub the flour into the canvas. Long loaves such as torpedoes or baguettes should be placed in the couche seam side up.
When you're ready to put the loaves into the oven, flip them over onto your baker's peel (or an upside down, large rimmed baking sheet) so that the seam is on the bottom and the floured side is facing up. I have several different peels and prefer the wood-handled aluminum ones the best because the thin metal easily slides under the crusts. I recommend buying the largest size you can.
To keep your loaves (and pizzas) from sticking to the peel when you slide them into the oven, lay a piece of unbleached parchment paper (which is also wonderful for baking cookies and roasting vegetables) on the peel before turning the loaves onto it, then slide the loaves and the parchment into the oven.
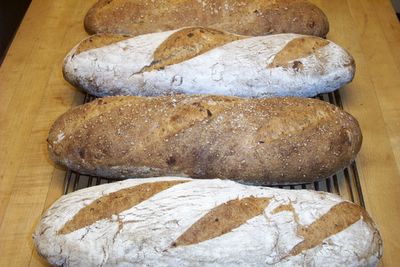
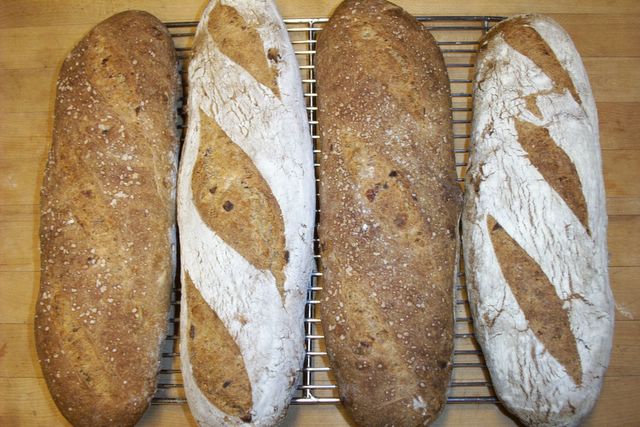
This is how you get that pretty white pattern on the tops of your loaves (the dark parts are where the crust "bloomed" after it was scored just before putting it into the oven). And, more importantly, your crusts will be thicker and bolder because extra flour will have embedded itself in the dough while it was rising.
9. Turn your oven into a stone hearth.
A baking stone will simulate a stone hearth in your oven and is a must if you are trying to bake crusty, free form loaves. (It's also the secret to making fantastic homemade pizza.) It will allow your breads to bake more evenly, and the initial, intense burst of heat on the cold dough will help to create high, richly colored loaves and chewy, better-tasting crusts.
There are many shapes and sizes and thicknesses of pizza or baking stones available. (Update: Now you can even buy baking stones made from steel, which some bakers swear by.) Be sure to choose one that leaves a 2- to 3-inch gap of space on all sides in your oven so air can circulate. My baking stone is 14"x15" and about 3/4" thick and I've had it for 18 years. It's now dark and seasoned. After each use, I just brush it off. If you need to wash yours, use only water, never soap.
You should season a new baking stone by heating it once or twice in a moderate oven before using it. When making bread or pizza, always allow your baking stone to preheat in the oven for at least 45 minutes so that it's nice and hot.
I find that placing my baking stone on a rack in the center of my oven gives me evenly baked breads. If the bottoms of your breads are burning before the tops are brown, or vice versa, try placing your baking stone on a lower or higher oven rack. For pizzas I place the baking stone on the lowest oven rack and crank up the heat to 500 degrees.
 Freshly baked Oatmeal Toasting Bread (recipe here)
2009 Update: A few years ago I started baking all of my pan loaves on my baking stone. I place the cold stone in the cold oven like usual, let the oven heat up, and then put the loaf pans full of risen dough directly on the hot baking stone. I really like the results, and the loaves are nice and brown on the bottoms and sides.
Heavy duty commercial loaf pans really make a difference. I love my Chicago Metallic pans (pictured above is the 1-pound size; I also use this larger size), and these USA Pans are really nice too.
10. Make some steam.
Have you ever wondered how some European-style breads get that gorgeous, glossy shine on their crusts—and why your loaves never turn out looking like that? Well, they can. All you need to do is fill up your oven with steam during the first part of baking.
Steam slows crust formation, which allows for the best possible oven "spring." It also gelatinizes the starch on the surface of the bread so that it develops a thin, glossy, beautifully brown crust.
There are two easy ways to create steam in your oven. One is to fill an inexpensive plastic spray bottle with water and mist the walls and floor of the oven for several seconds right after you put the bread in. Repeat this two more times at two or three minute intervals. (Warning: Do not spray the oven light! It makes a really big mess when it shatters.)
Try to open the oven door as little as possible when you're misting so that you don't lose all your valuable heat. You can set your oven 25 to 50 degrees higher than you need it to be to adjust for the heat loss while misting, and then just turn down the temperature once you're finished.
As long as your loaves do not have a decorative flour pattern on them (like the sourdough onion rye bread shown above), you can directly mist the dough as well. Or you can use a pastry brush to paint them with water before putting them in the oven.
The other way to create steam in your oven is by carefully pouring about a cup of hot water into a preheated pan you have set on a rack underneath your baking stone. Do this right after you have put your bread in the oven. Use a wide, shallow, old metal pan or a cast iron skillet (one of the most useful kitchen bargains around).
Do not use your favorite CorningWare baking dish, even though it's the perfect size. It will end up badly cracked, and you will end up in tears. If desired, you can also directly mist the loaves and oven walls at the beginning of the baking process when you use this method.
2009 Update: I rarely bother with the steam anymore, and I really haven't seen much (if any) difference in my breads. When I do want to create steam, I follow this tip from Daniel Leader's awesome book, Local Breads: Before you turn the oven on, place a cast iron skillet (one of the best kitchen bargains on the planet) on the rack below your baking stone. After you slide your unbaked loaves onto the hot baking stone, toss a handful of ice cubes into the hot cast iron skillet and quickly shut the oven door.
Oh, let's just make it an even baker's dozen tips!
11. Storing your edible masterpiece. Once you've baked a delicious loaf, you'll want it to stay as fresh as possible (assuming it lasts more than a few hours). Crusty loaves will keep best if you leave them unwrapped at room temperature.
You can store them, cut side down, in a breadbox or a cupboard or even on the kitchen counter. To re-crisp the crust, mist your bread with water and reheat it in a 400° oven for 5 to 8 minutes.
I store sandwich-style pan loaves in plastic bags at room temperature, but only for a couple of days. If the bread is whole grain, I usually leave the bag partly open. During our hot and humid Missouri summers I keep them in the fridge, which will make some people cringe, but I always toast refrigerated bread.
If you're not planning to eat your bread right away, consider freezing it. Bread freezes beautifully. I always bake several loaves at a time, no matter what kind of bread I'm making; there's no reason to go to all that effort for just one loaf.
I simply put whole or half loaves in heavy-duty freezer bags and toss them in the chest feezer, though some people recommend wrapping each loaf in aluminum foil first. You can defrost frozen bread at room temperature, or you can go straight from freezer to oven. For baguettes and large sandwich loaves (and all sorts of other things), I buy 2.5-gallon jumbo zipper bags, which I wash and reuse over and over.
12. Write everything down.

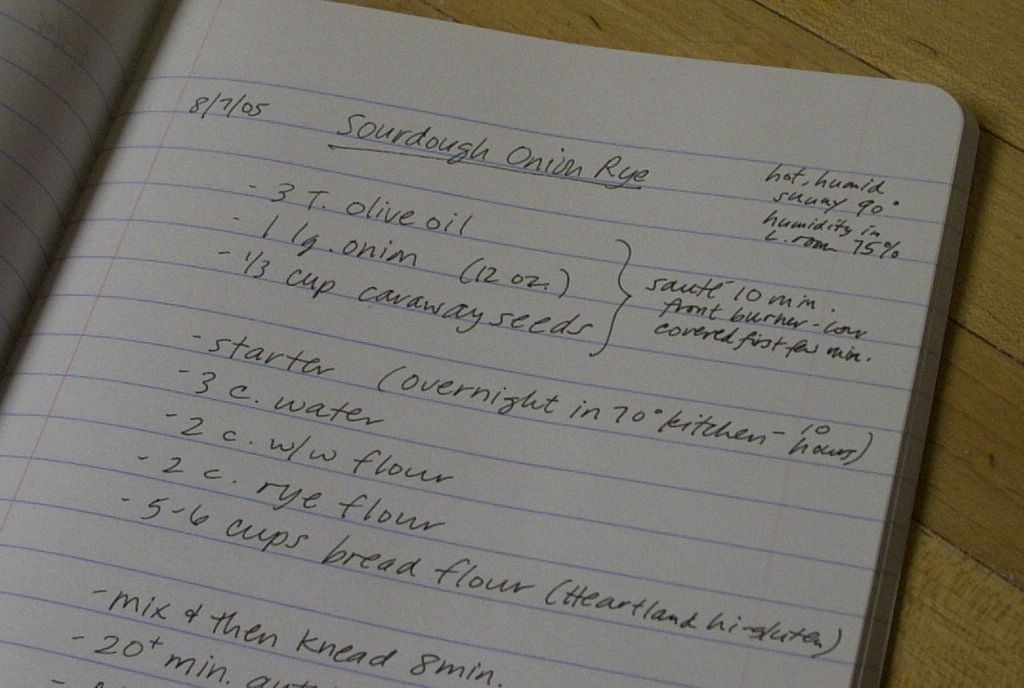
I used to be really bad about doing this, but I now find it indispensable. Each time you bake bread, simply take a few minutes to write down everything you did, from the amount of ingredients you used to the length of each rise, to how the finished bread looked and tasted. The more detailed your notes, the better.
There are so many things that can affect your bread baking; everything from the brand of flour to the weather can make a difference in how your bread comes out. For instance, when it's cloudy because of a low pressure system in the area, bread dough actually rises more quickly because it has less atmospheric pressure on it. Taking notes allows you to not only look back and see what worked and what didn't, but also helps you figure out why.
 Farmhouse White ready for the oven (recipe here)
Each time I bake bread, even if I'm making my Farmhouse White for the 200th time, I pull out one of my bread notebooks and make detailed notes about the entire process. I also record the indoor temperature and humidity, the outdoor temperature, what the weather is like, and any other variables I can think of. This information can be especially helpful for the breads you don't bake very often.
Farmhouse White ready for the oven (recipe here)
Each time I bake bread, even if I'm making my Farmhouse White for the 200th time, I pull out one of my bread notebooks and make detailed notes about the entire process. I also record the indoor temperature and humidity, the outdoor temperature, what the weather is like, and any other variables I can think of. This information can be especially helpful for the breads you don't bake very often.

Honey Whole Grain Bread baked using tips 2,5,6,7, and 9
13. And finally: Practice, practice, practice.
There is nothing that will improve your breads more than simply making them over and over again. And the best part is, there is nothing that will thrill your friends and loved ones more than receiving the results of your bread baking efforts.
So that's all there is to it. Just take these tips with you into the kitchen, and in no time at all you should be hearing those sweet, magic words, "This is the best bread I've ever tasted!"
Got more flour left? Check out these other Farmgirl Fare bread recipes:
Beyond Easy Beer Bread (my most popular recipe)
Whole Wheat Beer Bread
Onion Rye Beer Bread
How To Make Pita Bread in About an Hour
Savory Feta Cheese & Scallion Scones
Cranberry Christmas Scones (tasty any time of year!)
Meyer Lemon (or Regular Lemon) Scones
Whole Wheat Scones with Currants & Oats
Oatmeal Toasting Bread (makes wonderful rolls and burger buns too)
Italian Rosemary Raisin Bread
Fresh Tomato & Basil Whole Wheat Sourdough Bread
Carrot Herb Rolls (and a great bread book for beginning bread bakers)
My Favorite Easy Pizza Dough Recipe
Still hungry? You'll find links to all my sweet and savory Less Fuss, More Flavor recipes in the Farmgirl Fare Recipe Index. Enjoy!
© FarmgirlFare.com, the warm and crusty and slathered with butter foodie farm blog where Farmgirl Susan shares recipes, stories, and photos from her crazy country life—and everything is better with homemade bread.