Showing posts with label bread recipes. Show all posts

Thursday, December 27

Recipe: Italian Rosemary Raisin Bread (Pane di Ramerino)

Italian Rosemary Raisin Bread
Pane di Ramerino — Italian Rosemary Raisin Bread

For more years than I like to think about, we've been slowly but surely working on a large metal building here on the farm that will one day house our wholesale artisan bread bakery and us. (2011 Update: The bakery is on possibly permanent hold, but we've finally moved in!)

Since progress lately has been more along the lines of slowly rather than surely, we finally broke down and admitted to ourselves that this project was never going to be completed unless we hired some outside help. Besides, The Shack is literally falling down around us.

For the past five weeks our new contractor and his helper have been hard at work by 7:30 nearly every weekday morning. Great headway is being made, and we're both extremely excited. It looks like 2008 really will be The Year We Move Out Of The Shack. It's like a checkbook-draining dream come true.


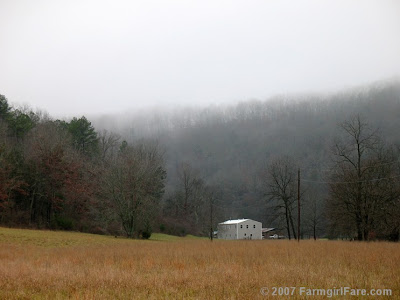
Home Sweet Soon-to-Be Home

The builders weren't planning to start until the end of this month, but a spot opened up in their schedule and anybody who's ever had construction done or watched the movie "The Money Pit" knows that you never, ever turn away a contractor who is willing to show up and work.

Because of our schedule, however, this has necessitated my becoming more involved with the project at this point than was originally planned.

Suddenly I've been busy making command decisions about phone jacks and bathroom lighting while frantically trying to figure out whether we might someday want to put in a bigger refrigerator or a second seven-foot-wide deck oven.

I also get to go pick stuff up.

I now know what it feels like to spend five and a half hours shopping alone at Lowe's Home Improvement Center. The other day, arriving mostly clueless and clutching a very long list, I systematically worked my way through what felt like 3,000 miles of aisles, pouncing on every one of those PRESS THIS BUTTON IF YOU NEED HELP thingies I could find.

But since the store was practically empty of customers - everybody else was apparently out shopping for holiday presents rather than junction box covers and 33 feet of 10-3 wire for the dryer - there was only a skeleton crew on the floor. The third time this one guy rounded a corner and saw me standing by the help button he actually blurted out, "Not you again!" At least he was smiling when he said it.

After I'd sweet talked another guy into helping me pick through an enormous pile of 2x4s in search of 32 really pretty ones (did you know you can use a garden hoe to pull the far stacks of boards within reach?), and yet another one into helping me secure said 2x4s (along with the several dozen other boards I'd picked out myself) in the bed of the truck, I headed out into the dark and foggy rain for the 90 mile drive back to the farm, smiling at the half-price rosemary topiary I'd treated myself to as a reward for making it out of the store alive.

It's important to learn new things, and I'm proud that I can now carry on a semi-intelligent conversation about RACO boxes, ring shanks, and SEU cable. I understand the difference between full round head and clipped head nails, and I've fallen head over heels for 1x4s, which from now on I will refer to as 'girl boards.' I also know more than I ever thought possible about breaker boxes and pulling amps.

This is all very thrilling of course, but I'd much rather be baking than taking Wiring 101, especially as I watch our bread bakery finally becoming a reality. It's a proven fact that all workers are 50% more productive when they've been well fed (no, really), and our two builders informed me early on that they love baked goods of any sort.

When I'm not stuffing them with molasses ginger spice snaps, Mexican monkey cake, or my whole wheat chocolate chip and raisin cookies—which they both declared were the best cookies they'd ever eaten—I've been experimenting with new bread recipes, including this one.


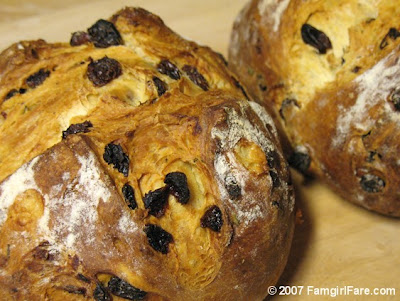
It's almost too pretty to eat.

Italian Rosemary Raisin Bread
(Pane di Ramerino)

Makes 2 small loaves - Adapted slightly from
Bread

This is the second recipe I've made from a wonderful European book called
Bread: Artisan Breads from Baguettes and Bagels to Focaccia and Brioche by authors and cooking instructors Eric Treuille and Ursula Ferrigno (he's French, she's Italian). If you learn best by looking at pictures, then this is definitely the book for you because it's packed with gorgeous, full-color photos.

And while it's perfect for beginners, I think many experienced bakers would also enjoy it. I've already discovered all sorts of handy tips and useful nuggets of information. The carrot herb rolls I created last month using the carrot bread recipe were a big hit, and there are several other breads I'm planning to make. At
around $15, this book is also a bargain.

Pane di ramerino has been baked daily throughout Tuscany since the early 16th century. As you can see, this is a beautiful bread, and it would not only be perfect to serve to guests but would also make a lovely gift. Thankfully the recipe makes two small loaves so you can spread the yeasty joy and still have some left for yourself.

I never would have thought to combine raisins and rosemary in bread, but the result is delicious. The flavor of the rosemary is subtle, so double the amount if you want to taste it more.

This is a rich, easy-to-work-with dough made with milk, olive oil (which adds another layer of flavor) and eggs. The texture of the crumb is reminiscent of a cinnamon roll. This bread freezes beautifully and can even be sliced while still frozen. (I use a large serrated knife.)


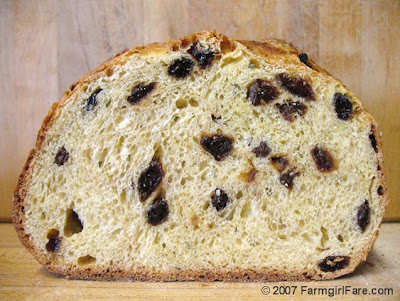
It also makes amazing toast, which I've been eating slathered with apricot jam and thinly sliced sharp cheddar cheese. This may sound like an odd combination, but it reminds me of the cheese and chutney sandwiches I was introduced to by an English pal when I was a kid.

The authors claim pane di ramerino is a superlative breakfast bread and "quite simply the best accompaniment to fresh goat cheese." My friend Amanda, who writes about glorious Mediterranean food at Figs Olives Wine, suggested using this bread to make her cool weather bruschetta with ricotta salata and thyme. Mmmmmm. I'm thinking it would also make marvelous French toast - perhaps for brunch on New Year's Day.

I've never had good luck using those little packets of yeast, and they're pricey. Instead I buy instant yeast in inexpensive 1-pound packages and store it in a jar in the freezer, where it will keep for at least a year.

3¾ cups organic bread flour (1 lb, 2¾ oz - 533 g) plus a little more while kneading
2 teaspoons instant yeast**
1/2 cup warm milk
1 Tablespoon chopped fresh rosemary
1½ packed cups (4½ oz - 127 g) raisins
4 Tablespoons extra-virgin olive oil
4 large eggs, beaten
1½ teaspoons salt


1. Mix the flour and yeast in a large mixing bowl. Make a well in the center and add the milk, rosemary, raisins, olive oil, and eggs. Mix to form a soft, sticky dough, adding extra flour, 1 Tablespoon at a time, if the dough is too moist.

2. Turn the dough out onto a lightly floured work surface. Knead 6 minutes. Cover the dough and let it rest for 20 minutes.

3. Knead in the 1½ teaspoons salt, and continue kneading until the dough is silky, springy, and elastic, about 5 to 8 minutes.

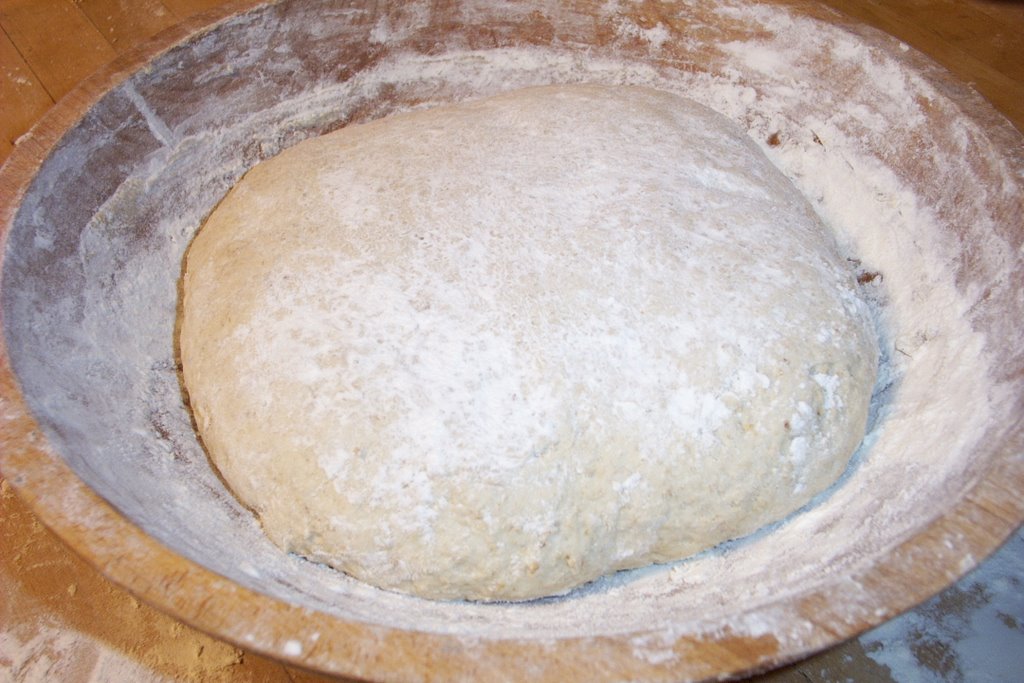
4. Put the dough in a plastic lidded container (or in a large bowl covered with a damp tea towel) and let it rise until doubled in size, about 1½ to 2 hours.


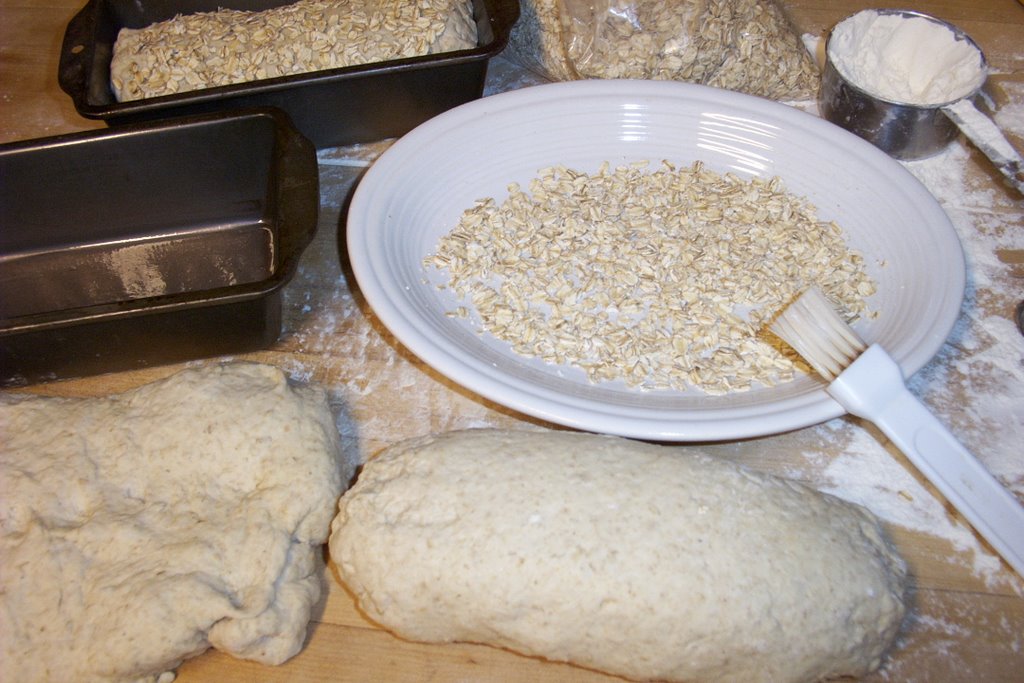
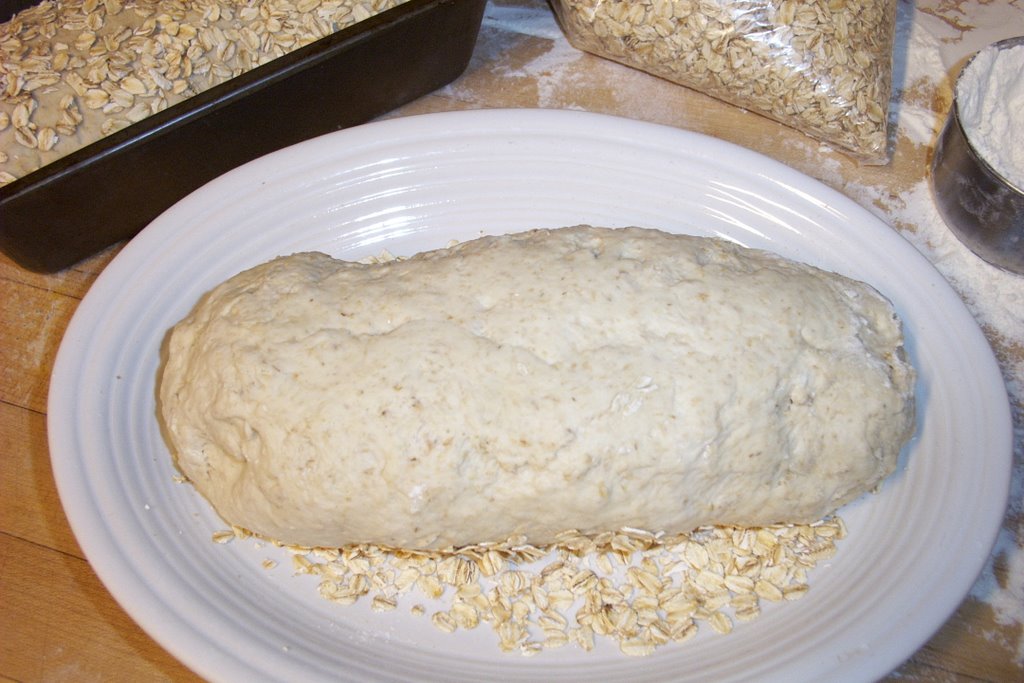
Shaped loaves ready for proofing

5. Divide the dough into two pieces. Shape each into a round loaf and place on a well floured couche or work counter. If you don't have a baking stone (they make the best pizza and bread!), bake your focaccia on a heavy duty baking sheet. I've been using the heck out of some of my commercial rimmed baking sheets for 20 years for everything from baking scones to roasting Brussels sprouts.

Lightly dust tops of loaves with flour and cover with a damp tea towel.

6. Put the baking stone in the cold oven and heat to 400 degrees (never put a cold stone in a hot oven). Proof loaves until doubled in size, about 1 hour. (Note: the book says that the loaves will spread and look slightly flat after rising, but will rise up dramatically during the initial stages of baking. Mine didn't flatten out, but my dough was on the dense side.)

7. Cut a slash, 1/2 inch deep, across the top of the loaf, then another in the opposite direction to make an "X."

8. Bake in the preheated oven (directly on the baking stone if you're using one) until golden brown and hollow sounding when tapped underneath, about 30 minutes with a baking stone and 45 minutes without. Cool on a wire rack.

Still hungry? You'll find links to all my sweet and savory Less Fuss, More Flavor recipes in the Farmgirl Fare Recipe Index.

**A NOTE ON YEAST: I prefer to use instant yeast when baking bread because you can add it straight in with the dry ingredients. If you're using active dry yeast instead of instant yeast, you'll need to proof it first.

For this recipe, place the 1/2 cup of warm milk in a small bowl and sprinkle the yeast over it. Let stand for 5 minutes, then stir to dissolve. Add this yeast mixture to the flour along with the rosemary, raisins, olive oil, and eggs.

Instant yeast is stronger than active dry yeast, so some bakers recommend using up to 25% more active dry yeast than the amount of instant yeast called for in a recipe (that would be 2½ teaspoons for this recipe). Others substitute active yeast for instant yeast 1 to 1. This may take your dough a little longer to rise, but that will only result in even better tasting bread.

Alternately, if a recipe calls for active dry yeast and you want to substitute instant yeast, you may want to use a little less. The original version of this recipe actually called for 2 teaspoons of active dry yeast and I simply used 2 teaspoons of instant yeast instead.

© FarmgirlFare.com, the yeasty foodie farm blog where Farmgirl Susan shares stories & photos of her crazy country life on 240 remote Missouri acres.

Monday, November 19

Recipe: Colorful Carrot Herb Rolls and a Beautiful Bread Book for Beginners


Packed with carrots and perfect for the autumn (or spring!) table.

Some of my personal goals for this year included delving into the numerous (and mostly unused) cookbooks on my shelves, baking new kinds of breads, and making much better use of all the beautiful herbs in my kitchen garden.

I've been doing okay, but with this new recipe I hit the personal goal jackpot. It's a variation of the carrot bread in Bread: Artisan Breads from Baguettes and Bagels to Focaccia and Brioche by authors and cooking instructors Eric Treuille and Ursula Ferrigno (he's French, she's Italian).

I've been reviewing this book, and my opinion of it can be summed up in one word: wonderful. Wait, make that two words: wonderful and inspiring. This is the second recipe I've made so far, and the first bread, a round Italian Rosemary Raisin Loaf, is as pretty as it is delicious.

Here's a little blurb from the book jacket, and it's all true:

Bread mixes delicious recipes with essential techniques to provide the home cook with practical reference and inspiration. From mixing and shaping to proofing and glazing—each stage of the bread-making process is clearly explained, with problem-solving tips and a complete illustrated guide to key ingredients and equipment to help you succeed. Bread's step-by-step demonstrations of the principles and practices of bread-making will give you the confidence and skills to try its tantalizing range of over 100 breads.

If you learn best by looking at pictures, then this is definitely the book for you because it's packed with gorgeous, full-color photos. And while it's a perfect book for beginners (I already know at least one budding bread baker who'll be receiving a copy for Christmas), I think many experienced bakers would also enjoy it.

I've already discovered all sorts of handy tips and useful nuggets of information, and there are several more breads I'm planning to make, including the Hungarian Potato Bread, Dark Chocolate Bread (1¼ cups of cocoa powder!), Swedish Dill Bread (made with cream cheese), and the Prune and Chocolate Bread ('a deeply indulgent loaf, chock-a-block with juicy prunes and melted chocolate').

There's also an intriguing recipe for a straight dough (as opposed to sourdough) Pane con Pomodori e Cipolle Rosse (Tomato and Red Onion Bread) which looks similar to the Fresh Tomato & Basil Whole Wheat Sourdough Bread I wrote about last month.

One of the nice things about it is that many of the breads start with the same basic recipe and build on it, which means trying all sorts of different breads suddenly becomes much less daunting.

Variations on the same recipe are also often given. For example, you can take the American multi-grain bread and turn it into sunflower and honey bread, cracked grain bread, or shape it into rolls. The pita bread recipe includes a whole-wheat version as well as instructions on how to make Lavash (Armenian Flat Bread).


A new holiday tradition?

Farmgirl Susan's Carrot Herb Rolls
Makes sixteen 3-inch rolls — Adapted from Bread: Artisan Breads from Baguettes and Bagels to Focaccia and Brioche

**Click here to print this recipe**

The carrot bread recipe this is adapted from came from the chapter in Bread called Flavored Breads, and what caught my eye was its use of raw shredded carrots. Other variations included are: spinach bread, beet bread, chili bread, onion and caraway bread, and herb bread (which didn't include the carrots).

First I made the plain carrot dough, shaping half into a round loaf and the rest into rolls. The second time around I dove into the herb garden first, emerging with fistfulls of fresh parsley, rosemary, and thyme which I tossed into the mix. I also substituted 1 cup of white whole wheat flour for 1 cup of the bread flour.

The result? Flavorful, healthy, autumn-colored rolls that I think would be a welcome and interesting addition to any holiday table. They have a soft but substantial crumb and a chewy crust that crisps up nicely when reheated. They also freeze beautifully. You can really taste the carrots, and a taste-tester friend I gave some to reported that they're great with goat cheese.

As always, I urge you to seek out local and organic ingredients; they really do make a difference. At around a dollar a pound and readily available, organic carrots are a bargain. Look for organic flours in the bulk sections of natural food stores.

I highly recommend investing in a couple of heavy duty commercial rimmed baking sheets. At less than $14 each, they're one of the best kitchen deals around. Treat them well—I usually line mine with sheets of unbleached parchment paper, which is wonderful stuff—and they'll last for ages. I've been using the heck out of some of mine for 20 years for everything from baking scones to roasting Brussels sprouts, not to mention baking thousands of cookies.

3 cups organic bread flour (15-3/8 oz, 437 g)
1 cup organic white whole wheat flour (5 oz, 143 g)
2 teaspoons (10 ml) instant yeast
1½ cups warm water (12 oz, 335 g)
2 Tablespoons organic butter, melted (1 oz, 28 g)
2¼ cups organic carrots, finely shredded (13-7/8 oz, 380 g)
1/4 cup chopped fresh parsley (3/8 oz, 10g)
2 Tablespoons (30 ml) chopped fresh rosemary
1 Tablespoon (15 ml) chopped fresh thyme
2½ teaspoons (12 ml) salt


At first it may seem like there are too many carrots. There aren't!

Mix the whole wheat white flour, bread flour, and yeast in a large bowl. Make a well in the center and pour in the water and melted butter. Stir until combined. Mix in the carrots, parsley, rosemary, and thyme and stir until a soft sticky dough forms.

Turn dough out onto a well-floured surface and knead 5 minutes, sprinkling on a little more bread flour if necessary to keep dough from sticking to your hands and the work surface.


Kneaded dough read for a rest (autolyse).


Cover dough with bowl and let rest 20 minutes (this rest period is called the autolyse).

Sprinkle the salt over the dough and knead for another 5 minutes, until the salt is fully incorporated and the dough is smooth and still slightly sticky, adding more flour if necessary.


It's so easy to see if the rising dough has doubled in size.

Put the dough in a clear, straight-sided food grade plastic container with a snap-on lid and let it rise until doubled in size, about 1 to 1½ hours. I mark the height of the unrisen dough and the doubled height on the side of the container with a felt tip pen (it comes off when scrubbed with a sponge). You could also use a piece of tape.

The ideal temperature for rising dough is about 70 to 75 degrees F. If the air is cooler, you can use warmer water when mixing the dough or simply let it rise longer (which will actually improve your finished bread).

An instant read thermometer, like the one you can see poking into my dough in the photo above, is an inexpensive, handy little item that is extremely helpful when baking bread. Use it to check the temperature of your ingredients (water, milk, even flour) before adding them. Then use it to check the temperature of the dough while it's rising.

You can even check the air temperature in your kitchen by putting the thermometer in a glass of room temperature water (this is also a good way to accurately check the temperature inside your refrigerator).

You may be surprised at just how much such a small investment will change your kitchen experiences. Once you start using one, you'll probably wonder how you ever lived without it. These thermometers are called "instant," but it does take a few seconds to get a reading. There are also digital versions available, but I've never used one.

Once the dough has risen, punch it down by pressing down with your knuckles into the center of the dough. Turn the dough out of the container onto a lightly floured work surface, then let it rest for 10 minutes.


Shaped rolls ready for proofing.

Divide the dough into 16 pieces, about 3 ounces/84 grams each. To shape round rolls, press down on the pieces to expel any air bubbles. Cup the palm of your hand over each piece and roll it over an unfloured surface until it forms a smooth ball.

If you don't want your finished rolls to end up touching each other, simply space them farther apart on two baking sheets. Either bake both sheets at once, or set the second one in the refrigerator or someplace cool while the first one bakes. Alternatively, you can place the dough balls closer together and in a circle to make decorative pull-apart rolls.


Risen and ready for the oven.

Place the rolls on a heavy duty baking sheet lined with unbleached parchment paper.

Sprinkle rolls lightly with flour and cover with a tea towel. Proof until doubled in size, about 45 minutes.

About 20 minutes before baking, heat oven to 400 degrees (205C).

For a light shine and crisp baked crust, brush rolls with lightly salted water immediately before baking. I use a silicone pastry brush.

Perfect for mini sandwiches, too.

Bake in preheated oven until the tops are golden brown and the bottoms sound hollow when tapped, about 25 to 30 minutes. Cool on a wire rack. Store in an airtight container or freeze. If desired, reheat at 350F (175C) for 5 to 10 minutes before serving. The crust will crisp right back up.


Still hungry? You'll find links to all my sweet and savory Less Fuss, More Flavor recipes (including several other bread recipes) in the Farmgirl Fare Recipe Index.

© FarmgirlFare.com, the crazy for carrots foodie farm blog where Farmgirl Susan shares stories & photos of her crazy country life on 240 remote acres.

Tuesday, October 23

Recipe: Fresh Tomato & Basil Whole Wheat Sourdough Bread

Whole wheat sourdough bread made with fresh tomatoes and basil - FarmgirlFare.com

Are you a beginning bread baker? You might find my Ten Tips on How To Bake Better Artisan Breads at Home helpful.

One of the side effects of having a food blog is that I get lots of e-mail. Food e-mail. Bread e-mail. For a bread baking foodie, there's nothing better than finding a note like this in your in box:

It occurred to me that you might be interested in trying this bread. We tried making tomato basil whole wheat sourdough last week with tomatoes (as water) and roughly chopped basil leaves.

I'd be happy to send you the percentages if you are interested. It just seemed like something that was right up your alley. It was really quite delicious. Simply sliced with some smoked cheddar cheese it made a delectable sandwich.


Yes, it was definitely right up my alley, and it really was quite delicious. Even though they've been baked, you still get that fresh tomato flavor. Many thanks to fellow breadies Joel and his wife (in the wonderful state of West Virginia!) for generously sharing their recipe.


Fresh Tomato & Basil Whole Wheat Sourdough Bread
Makes 2 loaves, approximately 20 ounces each

What immediately piqued my interest about this bread was that it uses chopped fresh tomatoes in place of water. Such a brilliant idea. My only concern was what color it would turn out. I used to make savory feta cheese & sun-dried tomato scones when I had my little bakery cafe in Northern California, and while quite tasty, they were an odd sort of pinkish orange.

Using whole wheat flour, which bakes up darker than white flour, easily solves this problem. Joel's version calls for 100% whole wheat flour, but I used 50% whole wheat flour and 50% bread flour.

The tomatoes don't need to be peeled, which is always good news in my book. If you don't have any sourdough starter handy, I'm thinking that you could try replacing all or some of the water with fresh tomatoes in pretty much any bread recipe.

Creating a sourdough starter takes several days but isn't difficult to do. There are many different types, and recipes for them abound. I made my French levain starter several years ago using the instructions in Daniel Leader's Bread Alone, one of my favorite bread books.

I also love Local Breads, is Daniel's latest bread book, and am looking forward to making some of the European starters in it hopefully soon.

Joel's starter is 50% flour, 50% water, refreshed about 6 to 8 hours before using it. I simply refreshed my 50%/50% levain starter like I do when I bake pain au levain by adding flour to the entire batch and then letting it sit on the counter overnight. I think whatever sourdough starter you have should work in this recipe.

A digital kitchen scale makes baking and cooking so much easier. I love my 11-pound Oxo Good Grips scale (which was voted #1 by America's Test Kitchen for good reason) and often use it several times a day. The pull-out display is awesome, and it's also great for weighing postage.

As always, I urge you to seek out local and organic ingredients, as they really do make a difference.

300 g refreshed sourdough starter (10-1/2 oz,1-1/8 cups)
300 g coarsely chopped fresh tomatoes, preferably juicy organic heirlooms (about 2 medium, 10-1/8 oz)
30 g coarsely chopped fresh basil (2 large handfuls, 1 oz)
225 g whole wheat flour (7-7/8 oz, 1-3/4 cups)
225 g bread flour (7-7/8 oz, 1-3/4 cups)
113 g warm water (4 ounces, 1/2 cup; may not need)
1 Tablespoon salt (15ml)

Combine the sourdough starter, tomatoes, and basil in a large bowl. Stir in the whole wheat flour and most of the bread flour. Mix until roughly combined, then let rest for 20 minutes. This is the autolyse.

At this point, you can add up to 4 ounces (1/2 cup) warm water if your dough seems like it's going to be too stiff (it will depend on how juicy your tomatoes are). Or you can add more chopped tomatoes; I didn't have any more or that's what I would have done. How slack (wet) you want the dough is up to you.

With the extra 4 ounces of water, mine ended up so slack it was sticky and hard to work with, and the loaves really spread out while proofing despite using a couche. The bread still came out great, but I'll make a slightly stiffer dough next time.


Kneaded and ready to ferment (rise for the first time)

Turn the dough out onto a floured work surface and knead in the salt. Continue kneading for 10 to 15 minutes until the tomatoes are incorporated and the dough is soft and smooth, adding more bread flour as needed.

Place the dough in a straight-sided food grade plastic container with a snap-on lid and let it rise (ferment) until it has doubled in size, about 2 to 4 hours. You should be able to push a floured finger deep into the dough and leave an indentation that doesn't spring back.

Cover a baking peel (also called a pizza peel) with unbleached parchment paper (this is wonderful stuff) and sprinkle it with flour.

Turn the risen dough out onto a lightly floured work surface, flattening gently with your hands to break up any large air bubbles. With a bench/pastry scraper (these are so handy; I use mine all the time) or large knife, cut the dough into two equal pieces and shape them into rounds or logs about 12 inches long.

An hour before baking, place a baking stone (the secret to crusty breads and amazing pizzas) on the middle rack and heat the oven to 500 degrees.


Nestled in their couche and ready to proof


Place the loaves smooth side up on the parchment paper, about 2 inches apart. Make a couche by lifting the parchment paper between the loaves, making pleats and drawing the loaves together. Tightly roll up two kitchen towels and slip them under the parchment paper on the sides of the two outer loaves to support and cradle them.

Lightly dust the tops of the loaves with flour and cover them with plastic wrap or a damp tea towel (my preference). This nifty parchment couche trick comes from Local Breads. Alternatively, you can use a traditional, well-floured canvas couche as I did above.

Let them proof until almost doubled in size, about 1 to 2 hours. If you press a floured fingertip into the dough it should spring back slowly.

Quickly score the tops of the loaves with a blade or sharp knife (I use a large serrated knife) and slide them, still on the parchment, onto the baking stone. Bake until the loaves are dark golden brown and the bottoms sound hollow when tapped, about 25 to 30 minutes. Try to let them cool for at least 40 minutes before tearing into them.

Store in a resealable plastic bag at room temperature or freeze.

Baking notes: I only had enough garden tomatoes left to make this recipe once, but I'll be experimenting with it more next summer. I'm thinking the tomato flavor could be enhanced even more with the addition of a few slow roasted tomatoes, a speciality of my food blogging pals Kalyn and Alanna. Maybe next year I'll finally talk myself into turning the oven on for hours and hours during the mid-summer heat to make some. They both keep assuring me it's worth it.

Still have more flour left? You'll find links to more scumptious bread recipes in the Farmgirl Fare Recipe Index.

© FarmgirlFare.com
, where Farmgirl Susan shares recipes, stories, and photos from her crazy country life on 240 remote Missouri acres—and there's always at least one sourdough starter in the fridge.

Thursday, August 23

Breakdowns & Onion Rye Beer Bread Recipe

This is the newest version of my Beyond Easy Beer Bread, which is my most popular recipe. Five minutes of work reward you with a heavenly aroma wafting through the house and a warm, crusty loaf in under an hour. There are endless flavor variations possible, and you can even use it for sandwiches. You might also enjoy my Whole Wheat Beer Bread Recipe.


Onion rye beer bread with caraway seeds—sort of (baked in this awesome pan).

It's been one of those weeks. You know, the kind where just when you're sure nothing else can break or go wrong—and it certainly can't get any hotter than 103 degrees in the shade—one of the enormous ancient chest freezers on the kitchen porch, that's naturally crammed to capacity with all kinds of frozen food, appears to be in. . .distress.

Then you pick up the mail and find a Safety Recall Notice informing you that The One Reliable Vehicle you own—as opposed to the others you own, the newest of which is from 1993, and all of which, if they're even capable of being driven off the farm, usually require a call to AAA in order to make it back home—apparently has a small defect that may cause the vehicle to suddenly catch on fire "when parked or being operated."

Fortunately a simple repair by the dealer can fix the problem, but until this is performed, the letter advised us to, I kid you not, "park your vehicle away from structures to prevent a potential underhood fire from spreading."

Given how things have been going, Joe, my hunky farmguy who was out in the 90-degree shop alternately trying to figure out why the '86 pickup wouldn't start and why the wiring on the flatbed trailer wouldn't work, wasn't surprised to see my glum-looking, sweat-drenched face peering around the big sliding door yesterday afternoon.

"What happened?" was all he said, but you could tell that numerous scenarios, none of them good, were rapidly flipping through his brain.

"Okay, you know I'm making this new beer bread. So I get the exploded beer all cleaned up off the counter and the floor, add enough water to the batter to make up for the beer I lost, put the pan in the oven, and am halfway done washing the dishes when I realize I forgot to put any rye flour in the rye beer bread."

Given that this was an incredibly small disaster in the grand scheme of things, he not only displayed plenty of sympathy and understanding, but also managed not to laugh in my face at my stupidity. This motivated me enough to trudge back into the 90-degree kitchen and start the whole baking process all over again. But the un-rye version ended up tasting great.

Just cross your fingers that between now and our appointment next week The One Reliable Vehicle doesn't spontaneously burst into flames.


Farmgirl Susan's Beyond Easy Beer Bread
Makes one 8-inch loaf

The optional egg glaze gives the top a beautiful, dark golden color. As always, I encourage you to use local and organic ingredients; they really do make a difference.

Basic Beer Bread Mix (Onion Rye instructions are below):

Organic all-purpose flour 3 cups / 750 ml / 15-1/8 oz / 430 g
Granulated sugar 1 tbsp / 15 ml / 5/8 oz / 16 g
Salt 1 tsp / 5 ml / 1/4 oz / 6 g
Baking powder 1 tbsp / 15 ml / 5/8 oz / 16 g

Beer 1½ cups / 355 ml / 12 oz / 338 g

Optional glaze: 1 egg & 2 tsp (10 ml) water, beaten

Heat oven to 375°F/190°C. Combine flour, sugar, salt, and baking powder in a large mixing bowl. Slowly stir in beer and mix just until combined. Batter will be thick.

Spread in a greased 8-inch loaf pan (I love these Chicago Metallic commercial loaf pans), brush with egg glaze if desired, and bake until golden brown and a toothpick stuck in the center comes out clean, about 45 minutes.

Cool in the pan on a rack for 10 minutes. Remove from pan and cool 10 more minutes. Serve warm or at room temperature. Will keep for 1 to 2 days stored in a plastic bag or airtight container. May be frozen.

For the Onion Rye or Un-Rye version:
Heat 2 Tablespoons olive oil in a medium skillet. Add 1 cup finely chopped onion and 1 Tablespoon caraway seeds. Cook at medium heat, stirring frequently, until onion is translucent and beginning to brown, about 5 to 8 minutes. (This step may be done ahead of time; let onion mixture sit at room temperature up to two hours or refrigerate.)

If desired, replace the 3 cups of all-purpose flour with 1½ cups all-purpose flour, 1 cup rye flour, and 1/2 cup whole wheat flour. Stir onion mixture into batter along with 2 more Tablespoons of beer or water.

© FarmgirlFare.com, the always tasty and sometimes rye foodie farm blog where Farmgirl Susan shares photos & stories of her crazy country life on 240 remote Missouri acres.

Thursday, May 10

Farm Photo 5/10/07: Ultimate Grilled Cheese Sandwich On Italiano No-Knead Bread


Mozzarella & Romano Grilled Cheese On Italiano No-Knead Bread
(Click here for the recipe)

Attention bread bakers and bread lovers! We're just finishing up month number two over at A Year In Bread. The three of us decided several months ago that we couldn't do this project without discussing the no-knead bread recipe that appeared last fall in the New York Times and created such a worldwide phenomenon. (Wondering what A Year In Bread is? Click here to learn more about this tasty and yeasty new project.)

With over 82,000 Google hits for "no-knead bread," there are no doubt thousands, perhaps tens of thousands, of people who overcame their fear of yeast, baked their first loaf of bread, and were thrilled with what they created. How cool is that?

But once we decided to include it, we had to figure out what to do with a loaf that's had pretty much anything you can think of already done to it. Beth ended up turning hers into a nutty oatmeal cinnamon swirl toasting bread. Kevin used his dough to make English muffins--and learned a lot in the process. I took my version of the basic recipe I've been making and gave it an Italiano twist. Then I sliced it up and made one of the best grilled cheese sandwiches I've ever eaten.

If you haven't yet heard about this no-knead bread, you're in for a simple, scrumptious surprise. If you'd like to start with my basic version (click here to see a photo), just follow the Italiano recipe but omit the herbs and spices. If you're one of the zillions of people besides me who fell head over heels for this loaf and wrote about it on your blog, leave us a link to your post in a comment at A Year In Bread, and/or post a photo at the A Year In Bread flickr group. I'm Farmgirl Susan on flickr if you'd like to add me as one of your contacts.

Just joining in? The first bread we tackled at A Year In Bread was pizza dough. You'll find my recipe here, Beth's here, and Kevin's here. And today's post is full of some of our favorite bread baking tips. So what are you waiting for? If you're ready, breadie, then come bake bread with us!


© Copyright 2007 FarmgirlFare.com, the award-winning blog where Farmgirl Susan shares photos and stories of her crazy country life on 240 remote Missouri acres - and everything's better with homemade bread.

Saturday, December 30

Daily Farm Photo 12/30/06: No Knead Bread!


Hot Crusty Bread Is Definitely The Stuff Of My Life

This is my version of the No Knead Bread that recently appeared in the New York Times and immediately became the biggest thing since, well, sliced bread. When I read the original article back in November, I knew I had to try baking it.

I made it for Thanksgiving dinner in my new
Lodge Enamel Dutch Oven (which I then immediately washed out and cooked Thanksgiving dinner in—no it wasn't turkey), and it was delicious and beautiful. The crust was crisp, and the crumb was light (in a good way) and full of various-sized airholes.

But because I'm a firm believer that if you have either freezer space or friends you should never bake just one loaf of bread at a time, I experimented and learned that there is actually no need (ha ha) for the dutch oven.

The loaves you see here were baked directly on a hot baking stone and I did not find them any the worse for it. I did make minor changes to the recipe--mainly adding more salt and increasing the first rise to about 24 hours (because this time of year there is no place in The Shack that stays 70 degrees). I used Heartland Mill Organic Strong Bread Flour (which I buy in 50-pound sacks), simply adding more than called for if the dough was too sticky.

Doubling the recipe will give you two 1½-pound loaves, three 1-pound loaves, or four baby 12-ounce loaves. Each batch I've made has come out slightly different, but that, of course, is the beauty of handmade bread. Every loaf was scrumptious.

If you haven't already been bombarded by this bread, you can read lots more about it at this post on Lindy's delightful blog, Toast. And this post at The Unemployed Cook includes the entire original recipe as it appeared in the New York Times. If you'd like to read more about bread baking in general, I invite you to check out my Ten Tips For Better Bread.

2007 Update: I gave this bread an Italiano twist over at A Year In Bread—and made one of the best grilled cheese sandwiches I've ever had. Click here for the step by step recipe, which can also be used to make the "plain" version—simply omit the seasonings.

Click here if you'd like to read more about A Year In Bread, the joint blogging project between myself and two other passionate bread bakers. It's 12 months, 36 recipes, and more fun than should probably be allowed in the kitchen. Ready, breadie? Then come bake bread with us!


© 2006 FarmgirlFare.com, the award-winning blog where Farmgirl Susan shares stories & photos of her crazy country life on 240 remote acres, and there are always at least four kinds of homemade bread in the freezer.

Friday, November 17

Oatmeal Toasting Bread Recipe & a Baking Invitation

Hello! If you're a new bread baker—or if you're an experienced bread baker who wishes they could create tastier loaves—you might enjoy my Ten Tips For Better Bread. This post discusses things like using 'old' dough and an autolyse and taking the temperature of your dough, all of which are called for in this recipe.

If you're new to baking sandwich bread, you may want to try my popular Farmhouse White, an easy basic white sandwich bread recipe that's perfect for beginning bread bakers and can be adapted (and made healthier) in all sorts of ways. Another post you might find helpful is How To Shape Bread Dough into Sandwich Loaves and Some Simple Bread Baking Tips. Happy baking!


Freshly Baked Oatmeal Toasting Bread (this batch made with milk instead of water and baked in these awesome commercial pans)

Last night I decided that today was going to be the day I finally posted my Oatmeal Toasting Bread recipe. Hours later I found myself lying in bed in the dark, wondering if I'd ever gotten around to writing down the weights of the ingredients, and if not, if it would be ridiculous to weigh them all out but not actually bake bread because between writing up the post and dealing with the two coolers full of venison on the back porch that I've been ignoring—but that I have now decided I am actually 'aging,' which will make the meat taste even better—there certainly wouldn't be time.

Then this morning I awoke to discover I'd been publicly humiliated—as well as reminded of just how many times I've promised to share this recipe. Okay, I can take a bold-faced hint.

So here it is. I really don't know what the hold up has been, except for the fact that my life seems to be perpetually stuck in an irritating and mildly anxiety-producing catch up mode. In addition, my surroundings are perpetually stuck in a cluttered feng shui nightmare mode, which makes finding things a real pain sometimes, but that's a whole other subject. No wonder I drink all that Tension Tamer tea.

Anyway, if you've been looking for a new and interesting bread to try baking, this could be it. It's different, tasty, isn't difficult to make, freezes beautifully, and is slightly better for you than my popular Farmhouse White. It also makes quite possibly the best toast I've ever eaten.

Oatmeal Toasting Bread - Farmgirl Fare

This is one of my favorite breads. You can also use the dough to make scrumptious burger buns and dinner rolls (see photo below), which would be a wonderful addition to any Thanksgiving table. If you feel like really going all out, you could fill your bread basket with a mixture of Oatmeal Toasting Bread rolls and some of my festive carrot herb rolls (I love these). Just be sure to make enough for little leftover turkey sandwiches.


I've been baking variations of this bread for over ten years, experimenting until I came up with what I consider the perfect loaf. The recipe I originally started with came from a 1995 issue of Gourmet, but since I've ended up changing pretty much everything about it except for the basic ingredients, I claim this version as all mine.

Of course I've found that as soon as any bread recipe (or formula, as commercial bakers call them) is invited into a baker's kitchen, it immediately becomes their own, even if they're attempting to follow it to the letter. Because whether it's by chance or by choice, your bread will most likely end up looking and tasting different than mine. And while this may not be all that desirable when one is creating a cake, I believe it's one of the endearing qualities of handmade bread. No two loaves are ever completely alike.

That said, I invite you to take my recipe into your kitchen and share your results with the rest of us. For instance, when I first sent this recipe to my bread baking partner in crime, Beth (aka kitchenMage), she substituted wheat bran for the oat bran and created an entirely new loaf. She now makes a decadent Cinnamon Spice Pecan Swirl version—and tells me the dough makes awesome cinnamon rolls.

So bake this oatmeal bread and then leave us a comment describing your version. Did you halve the amount of yeast and double the rising time? Knead the dough with a standing mixer? Make it with milk instead of water? Use honey and natural margarine in place of the sugar and butter? Toss in some whole grain flour and a little cracked wheat? Add a few handfuls of raisins and a cup of homemade applesauce? Make your bread in the shape of a braid? If you write about it on your blog, you're welcome to include a link to the post in your comment.

One bread recipe is now in many hands. I'm so glad I finally got around to sharing it, and I can't wait to see what you come up with.


Farmgirl Susan's Oatmeal Toasting Bread Recipe

**Click here to print this recipe**

Makes three 8"x 4" loaves, approximately 24 ounces each, plus 10 ounces of dough to save as 'old dough' for your next batch.

This is the 'old dough' version - instructions are included below for how to make this bread without old dough

As always, I recommend using local and organic ingredients; they really do make a difference. Organic flours and grains are readily available and reasonably priced; look for them in the bulk section at natural food stores. Even organic sugar is becoming mainstream.

I buy one pound packages of instant yeast and keep it in a jar in the freezer, where it lasts for at least a year. I've never had good luck with those little envelopes of yeast, and even if you end up tossing half a pound of the bag out, the larger package is still a bargain.

An instant read thermometer is an inexpensive and indispensible tool; use it to check the temperature of your ingredients, your rising dough, even the air temperature by setting it in a glass of room temperature water.

A digital kitchen scale is another very worthwhile investment. I love my Oxo Good Grips 11-pound scale and often use it several times a day to weigh everything from recipe ingredients to freshly harvested kitchen garden bounty. It's also great for weighing postage. The pull-out display is awesome.

I can't say enough good things about these Chicago Metallic commercial loaf pans, pictured in the top photo above). I mostly use the one pound (approx. 8-inch) size in order to get taller loaves, but I also use the 1½ pound (approx. 10-inch) size, too. They're great for baking both yeast breads and quick breads.

4 cups (32 fluid oz) very hot water or organic (or raw) milk (Update: I always use milk now)
2½ cups (11 oz/311 g) organic old-fashioned oats
1/2 cup (2 oz/62g) organic oat bran
1/2 cup (3½ oz/96 g) packed golden brown sugar
1/4 cup (1/2 stick/2 oz) organic butter
1 Tablespoon (3/8 oz/11 g) instant yeast
(slightly more if using active dry yeast)
6 to 7 cups organic bread flour (6 cups = 1 lb, 15 oz/871 g)
1 Tablespoon (5/8 oz/20 g) salt
10 ounces 'old' dough**
(white/oatmeal/whatever will work; if frozen, defrost first at room temperature or overnight in refrigerator)


**If you don't have any old dough, simply follow these instructions, but ignore the part where it says to add the old dough, and do not take out 10 ounces of dough when shaping the loaves.

Straight Dough Method (when you have no old dough) that will make old dough for your next batch:
If you don't have any old dough, use the recipe above but use 4½ cups of water or milk instead of 4 and adjust the flour accordingly - you'll probably need less than 1 cup extra flour. Also, ignore the part where it says to add the old dough (because you don't have any yet).

Combine the oats, oat bran, brown sugar, and butter in a very large bowl. Add the hot water and stir until combined. Let the mixture sit until about 80°F, about 30 minutes.

Combine the yeast with 2 cups of the bread flour and stir into the oat mixture. Continue stirring in the flour one cup at a time until a soft dough forms. Transfer the dough to a well floured surface and knead for about 8 minutes.

Cover the dough with the bowl and let it rest for 20 minutes.


Knead in the salt & old dough for 5 minutes, or until they're completely mixed in. Sprinkle the flour in the dough bowl, place the dough in it, liberally dust it with flour, and cover it with a damp tea towel.

Update: While I still love using my wooden dough bowls, most of the time I now let my dough ferment (the first rise) in a straight-sided food grade plastic container with a snap-on lid, which makes it easy to see when the dough has doubled in size. There's no need to grease or flour the container.


Kneaded dough ready to rise

Ferment (first rise): Approximately 1½ hours if dough is at an optimal 70° to 75°F. When the dough is ready, you should be able to push your finger deep into it and leave an indentation that does not spring back.


Old dough ready for the freezer

Divide and shape into three loaves, after taking out about 10 ounces to make 'old dough' for your next batch of bread, if desired. (If not, your loaves will just be slightly larger.) 'Old dough' can be wrapped in plastic, put in a zipper bag, and frozen until you are ready to use it.

There are dozens of ways to shape your dough into loaves. I form mine into "logs," and the method I use comes straight from the pages of the wonderful book, Amy's Bread. Here it is, word for word, because if you're like me and have trouble thinking three-dimensionally, this isn't the kind of thing you want to try paraphrasing. (Thanks, Amy!)

"When shaping your loaves, the most important thing to remember is to be gentle with the dough. Your goal is to form an even loaf with a taut skin, while leaving some larger air holes inside.

Very lightly flour the work surface. Start by forming an envelope: Place the dough on the table. Press and flatten it gently with your fingertips to form a rectangle with a short side facing you, leaving a lot of air bubbles in the dough. Fold the top edge down over the middle of the rectangle, then fold the bottom edge up.

Give the dough a quarter turn and repeat the process, folding the top edge down and the bottom edge up again and overlapping the edges slightly in the middle so the dough looks like an envelope. Pat the seam to seal it. Now you have a smaller, tighter rectangle.

Form a cylinder: Starting from the top edge of the rectangle, fold the top third of the dough over itself with one hand. With the heel of your other hand, gently press the seam to seal it. Fold the dough one third of the way down again and work from one end to the other to seal the seam. Try to keep the skin of the dough smooth and tight but not so tight that the skin tears.

Repeat this process one or two more times, until the loaf is a nice round log. Seal the final seam completely with the heel of your hand. Ideally your seam should be straight and tight with no openings or flaps of dough hanging out; with patience, this will become natural. If any dough is protruding from the ends of the log, poke it back in with your finger.

The plain log shape can be placed in a loaf or left on a cloth for a free-form second rise. From the log shape, you can make other cylindrical shapes."


Place logs seam side down in greased loaf pans, then brush the tops of the loaves with water and sprinkle with oats, if desired.


Or, if you want a heavy, even covering of oats on your loaves, you can brush them with water and then roll them gently in a plate of oats as shown in the above photos. Then place seam side down in greased loaf tins and cover with a damp tea towel.


Proof (second rise): Approximately 1 hour if dough is 70 to 75°F. The loaves are ready for baking when you make a slight indentation with your finger in the dough and it does not spring back. Note: this dough will not rise a whole lot while baking, so you want your loaves to be nearly finished size before you put them in the oven.

Bake at 375° for 35 minutes or until golden brown and bottoms sound hollow if tapped. Remove from pans and let cool on a wire rack. Try to wait at least 40 minutes before cutting into a loaf. Store at room temperature or freeze.


Oatmeal Rolls 1
You can also use this bread dough to make scrumptious little rolls.

Note: This dough also makes fantastic dinner rolls and burger buns. Just shape into whatever size you like and reduce baking time accordingly. Rolls and buns can be formed into individual balls and spaced far enough apart on a baking sheet so they aren't touching, or you can place them close together in any size pan and make 'pull-apart rolls.'

A pie or cake pan will give you a nice circle of rolls that look lovely on the table—or presented as a host/hostess gift.

I highly recommend investing in a couple of heavy duty commercial rimmed baking sheets. At less than $14 each, they're one of the best kitchen deals around. Treat them well—I usually line mine with sheets of unbleached parchment paper, which is wonderful stuff—and they'll last for ages. I've been using the heck out of some of mine for 20 years for everything from baking cookies to roasting Brussels sprouts.

Got more flour left? Check out these other Farmgirl Fare bread recipes:
Beyond Easy Beer Bread (my most popular recipe)
Whole Wheat Beer Bread
Onion Rye Beer Bread
How To Make Your Own Pita Bread in About an Hour


Savory Feta Cheese & Scallion Scones
Cranberry Christmas Scones (tasty any time of year!)
Meyer Lemon (or Regular Lemon) Scones
White Whole Wheat Scones with Currants & Oats

Italian Rosemary Raisin Bread
Fresh Tomato & Basil Whole Wheat Sourdough Bread

Carrot Herb Rolls
(and a wonderful bread book for beginners)
My Favorite Easy Pizza Dough Recipe

Still hungry? You'll find links to all my sweet and savory Less Fuss, More Flavor recipes in the Farmgirl Fare Recipe Index.

© FarmgirlFare.com, the slowly rising foodie farm blog where Farmgirl Susan shares recipes, stories, and photos from her crazy country life on 240 remote Missouri acres—and we always have at least a couple of kinds of homemade bread in the freezer.

Thursday, January 26

Recipe: Savory Cheese and Scallion Scones with Cream Cheese and Feta

These simple yet impressive scones are perfect for breakfast, brunch, and beyond.

May 2012 update: You'll find the chive and sharp cheddar version of this recipe here.

Did I ever mention how much I love scones? No? Huh. Well, I do. Absolutely adore them. Could probably eat them every day for a month and never tire of them. I even have a whole stack of delectable sounding scone recipes to try someday. In the meantime, I make my tried and true favorites. I already shared one of them with you last month, Cranberry Christmas Scones, which are tasty any time of year.

Another recipe I've been loving and making for years is for Savory Cheese and Scallion Scones. These were created back in 1993 during a severe scone craving when there was no butter in the house. They mix up quickly and are nicely versatile.

Half & half will give you richer scones with a slightly nicer texture, but whole milk works fine, is lower in fat and calories, and is usually always in the fridge. Either way, these are very moist and are healthier for you than traditional scones made with butter and heavy cream.

You can also substitute Neufchatel cheese for the cream cheese, but I don't recommend using fat-free cream cheese. Fresh baking powder is essential.

And as always, I urge you to seek out local and organic ingredients whenever you can. These days they're often easy to find and, in my opinion, really do taste better—not to mention how much better they are for farm workers and the environment.

Serve these scones warm from the oven with dinner instead of rolls or bread—plain, buttered, or with cream cheese. Or split and toast them in the toaster, spread with cream cheese and thinly sliced ham or turkey for a satisfying breakfast on the run, light lunch, or terrific after-school snack.

They also freeze beautifully if you happen to have any left over (hint: the recipe can easily be doubled). Defrost them at room temperature and heat at 375° for about 5 to 8 minutes. If you're in a hurry, you can defrost them gently in the microwave and then put them in the oven or toaster oven.

The optional egg glaze gives these scones a beautiful shine and dark golden color. Look for farm fresh eggs at your farmers' market or natural foods store, or search for a local farmer on Local Harvest. You won't believe the difference compared to commercial eggs laid by unhappy hens living in horrible battery cages. The yolks are sometimes so dark they're a gorgeous deep orange, and the eggs actually taste like eggs! And of course, you're also supporting small farmers.

Not a feta fan? Try cheddar and chive instead, with or without a sprinkling of dill. You'll find more about growing your own chives (it's easy!), along with a recipe for homemade herbed yogurt cheese here.


Farmgirl Susan's Savory Cheese & Scallion Scones
Makes 8 large scones or 12 small ones

**Click here to print this recipe**

I highly recommend investing in a couple of heavy duty commercial rimmed baking sheets. Treat them well—I usually line mine with sheets of unbleached parchment paper, which is wonderful stuff—and they'll last for ages. I've been using the heck out of some of mine for 20 years for everything from baking cookies to roasting Brussels sprouts.

2½ to 3 cups organic all-purpose flour
1 Tablespoon + 2 teaspoons baking powder (make sure it's fresh!)
1 teaspoon salt
4 ounces feta cheese, crumbled
4 ounces cream cheese, softened in the microwave 15-30 seconds (you want it very soft)
4 scallions (green onions), green & white parts, chopped

1 cup organic whole milk or half and half
1 large egg

Optional Egg glaze:
Beat 1 egg and 2 Tablespoons of organic milk (or half and half) well with a fork

1. Heat the oven to 400 degrees F.

2. Combine 2½ cups of the flour, the baking powder, and salt in a large bowl.

3. Add the cheeses & toss gently with a fork until combined.

4. Add the scallions & toss gently with a fork until combined.

5. Beat the milk (or half and half) with the egg and gently it fold into the dry ingredients, mixing lightly until a soft dough forms. Add up to 1/2 cup additional flour if the dough is too sticky.

6. On a floured surface, gently pat the dough into a circle approximately 1-inch thick (or into two smaller circles for 12 scones). The key to tender scones is to handle the dough as little as possible and with a light touch.

With a sharp knife (I use a large serrated knife dipped in flour), cut the circle(s) into 8 or 12 wedges and place them on a heavy duty baking sheet lined with unbleached parchment paper.

7. Brush the tops and sides of the scones with the egg glaze if desired, and bake for 20 to 25 minutes, or until golden brown. Cool on a wire rack. Serve warm, or cool completely and refrigerate or freeze in a heavy zipper bag or airtight container.

More Farmgirl Fare muffin, scone, and quick bread recipes:
Meyer Lemon (or Regular Lemon) Scones
Cranberry Christmas Scones (tasty any time of year!)
Beyond Easy Beer Bread (one of my most popular recipes)
Whole Wheat Beer Bread
Heavenly Lemon Coconut Quick Bread
Spicy Pumpkin Pecan Raisin Muffins
100% Whole Grain Ginger and Pear Bran Muffins
My Best 100% Whole Grain Blueberry Bran Muffins (plus other flavors)

Still hungry? You'll find links to all my sweet and savory Less Fuss, More Flavor recipes in the Farmgirl Fare Recipe Index.

© FarmgirlFare.com, the sconehead foodie farm blog where Farmgirl Susan shares stories & photos of her crazy country life on 240 remote Missouri acres—and you can always find a scone or two in the freezer.