Wednesday, November 30

Daily Farm Photo: 11/30/05


Llama Llama

Tuesday, November 29

Daily Farm Photo: 11/29/05


Autumn Artwork

Monday, November 28

A Little Yelp For Help


We're Not Happy

Can you feel the stunned silence? That would be coming from me, sitting here in my tumbledown farmhouse in the middle of nowhere, while the arctic wind howls around the darkness outside, staring in disbelief at my broken camera. I can't decide whether I want to hold a little memorial service for it or throw it against a wall.

I need some advice. I was already promised a new camera for Christmas, but I haven't even started researching. (I'm big on doing a lot of legwork before making an important purchase.) All of the photos I've posted on Farmgirl Fare have been taken with my several year old Kodak Easyshare DX3700, so anything will no doubt be an improvement.

Here's what I'd like. Something that is under $300. (Preferably way under.) Size does not matter. I need all the 'auto' stuff I can get, but having manual options would be nice, too. I use the LCD preview thingie instead of the viewfinder. I like the digital zoom. I need it to take excellent landscape shots, as well as close-up food photos. A few weeks ago (did I mention I'm not real tech savvy?) I found the macro setting. That sure is a nice feature.

I will be in the Little City on Wednesday, so another option is to buy an inexpensive interim camera (which would still probably be better than what I'm used to). This camera has served me very well, and I have often been surprised by the amazing quality of the photos it has given me. I should probably do an ad for Kodak, though I guess it would be better if the camera still worked.

Anyway, I would be grateful for any advice you can offer me. In the meantime, I do have some extra farm photos kicking around, so we're not going to disappear or anything. And yes, I happen to have all the pictures for the Oatmeal Toasting Bread post taken, so maybe I'll actually get around to writing it. Nothing like forced incentive. Speaking of which, I guess I'd better sign off and do a little online camera shopping.

Daily Farm Photo: 11/28/05


So You All Ate Turkey On Thanksgiving, Right?

Sunday, November 27

Weekend Dog Blogging #11


Bear & I Finally Got The Garlic Planted

What? You thought his only job was working the sheep?

Attention Dog Lovers! It's time for Weekend Dog Blogging!
If you'd like to see more fun dog photos and discover yummy new food blogs, head over to
Sweetnicks on Sunday night for the complete roundup. We'd love to have you join us. Just post your pup and e-mail the permalink to Sweetnicks.

Weekend Herb Blogging #8: Growing & Using Mint


Cool & Minty

Even if you have an extremely brown thumb, you can probably grow mint. In fact, once planted, it is very hard not to grow it. Words like "aggressive spreader" and "invasive" are often used to describe this hardy perennial. If you don't watch out, it can take over your entire yard (which might not be a bad thing if you do have a brown thumb). The encroachment factor is easily remedied, though, as mint will thrive when grown in pots. Be creative with your containers; the mint in this photo is actually growing in a hollow section of a large tree stump that I filled with sheep manure and compost. Click here for a better view of the plant (and for some container gardening tips in the comments section below it).

Speaking of remedies, mint is a must-have item in the herbal medicine chest. According to Rosemary Gladstar's Family Herbal, it is rich in vitamin C, beta-carotene, and chlorophyll. It is "stimulating to the mind and creates 'wakefulness.' Whiffs of the essential oil, sometimes even the tea, will improve alertness and awareness, so it's useful when driving, studying, and during times of stress. It is an excellent anti-spasmodic and is indicated for cramps and spasms. A terrific remedy for nausea, mint is recommended for travel sickness and some cases of morning sickness. It's also great for tummy aches in children and adults. The flavor of mint cleanses the palate and can be used to rinse the mouth after a bout of vomiting."

There are several varieties of mint, with spearmint and peppermint being the most common. Mint will grow from one to five feet in height and prefers wet to moist soil and shade to partial shade. I bought this mint plant last spring at the local Garden Club Plant Sale, where members dig up and divide plants from their own gardens and sell them to raise money for their organization. This is the perfect kind of place to buy your plants, as you know that they have been thriving in your climate. The prices are usually good, too. My mint plant (which was just a tiny thing when I bought it) cost me fifty cents. When I inquired as to what kind of mint it was, I was informed that it was "garden mint--you know, a combination of every mint." Okay. It smells like spearmint to me. I also procured a couple of pineapple mint plants for fifty cents apiece as well (along with enough other herbs and plants to fill up my entire car). I think I shelled out a grand total of about twenty bucks.

The simplest thing you can do with your mint is to use it (fresh or dried) to make tea. Lemonade with fresh mint leaves is extremely refreshing. Recipes incorporating mint abound, but I confess I haven't ventured into the kitchen with my mint plants yet. Mostly I am content to tear off a leaf as I pass by a plant, crushing it between my fingers and inhaling that fresh, unmistakable scent (which is apparently stimulating my brain and calming me down). I just know it smells really nice. If you are interested in doing more with your mint than sniffing it,
Kalyn's WHB#7 post offers links to several of her favorite recipes that incorporate mint.

Weekend Herb Blogging, hosted each week by Kalyn's Kitchen, is a fun way to learn about interesting herbs & edibles from around the world while discovering yummy new food blogs. We'd love to have you join us. Just photograph and blog about an herb, plant, veggie, or flower and email Kalyn the permalink by Sunday afternoon (Utah time). The round-up of all the featured plants is published each Sunday night at Kalyn's Kitchen and is always a delightful and informative read.

New to Weekend Herb Blogging? Catch up with these links to the last two roundups: Weekend Herb Blogging #7 and Weekend Herb Blogging #6. And remember--it's never too early to start planning next year's garden. I've already received two 2006 seed catalogs in the mail--and the Garden Club Spring Plant Sale is marked on my calendar.

Daily Farm Photo: 11/27/05


More Found Art

Saturday, November 26

Weekend Cat Blogging #25


Confrontation On The Screened-In Porch

Special Additon! Click here to see Miss Domino, our lovely foster blog cat, enjoying the holiday weekend.

Attention Cat Lovers! It's time for Weekend Cat Blogging #25!
Food Bloggers around the world unite each week and share pictures of our favorite felines. See cute cat photos and discover yummy food blogs. We'd love to have you join us. Just send your permalink in a comment to Clare & her amazing cat Kiri at Eat Stuff in Australia--where you'll find all the links to this week's kitties.

Can't get enough cats? Head over to The Friday Ark, where each week there are links to dozens of fun feline photos, along with links to pet pictures of everything from snakes to sheep (yes, those would be my sheep).

Daily Farm Photo: 11/26/05


Same Scene, New View: This Was Late October


This Is Now

Friday, November 25

Daily Farm Photo: 11/25/05


How Long Do We Have To Live In Here With Uncle Dan?

Thursday, November 24

Daily Farm Photo: 11/24/05


Happy Thanksgiving To You

Year Round Thankfulness


Every Single Day I Am Thankful For Robin

There are so many things to be thankful for.
And so many opportunities to say, "Thank you."

Wednesday, November 23

Daily Farm Photo: 11/23/05


Out in the open, it's easy to forget just how big some of our trees are.

Tuesday, November 22

Monday, November 21

Can You Tell What This Is?


I'd Never Seen Anything Like It Before

Four more photo hints will be posted throughout the day.


Here's Another One


Moving Out For A Slightly Larger View


Putting Things Into Perspective


And Bear Attacks!

Interesting guesses all (especially the 'bored water-trough fairies' idea--love it). The black thing is a 100-gallon Rubbermaid stock tank (that holds water for large livestock), but it is turned upside down. It is sitting in the grass, totally out in the open, nothing is overhead, and nothing was sitting on top of it or anywhere near it.

The other night it was very cold (12 degrees F in the morning) and extremely windy (notice the fur on Bear's back blowing up?). It did not rain. The only thing I can figure out is that the wind blew up tiny 'waves' of the water that was sitting on the tank (from a previous rain) and it was so cold that they immediately froze. Neither Joe nor I have ever seen anything like it before. The same thing happened on two other tanks sitting several yards away from this one. I suppose there must be a scientific term for these gorgeous and amazing little things, but for now I'm calling them 'upsicles.' (And Joe, who just wandered in and read this, has decided that it was indeed the water trough fairies.)

This is also where and when
this leaf photo was taken.

Daily Farm Photo 11/21/05: Seeing the Moon on a Sunny Day


Are You Remembering To Look Up?

Sunday, November 20

Recipe: Spicy Pumpkin Pecan Raisin Muffins


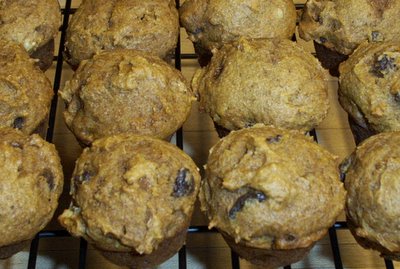
These moist and flavorful muffins were a bestseller at my bakery.

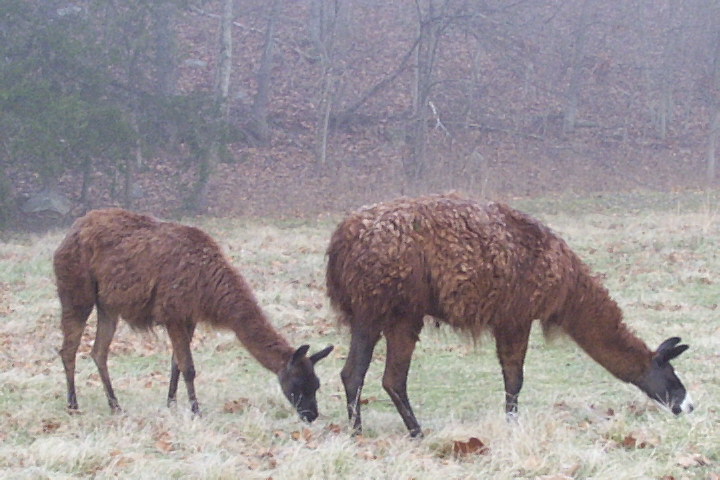
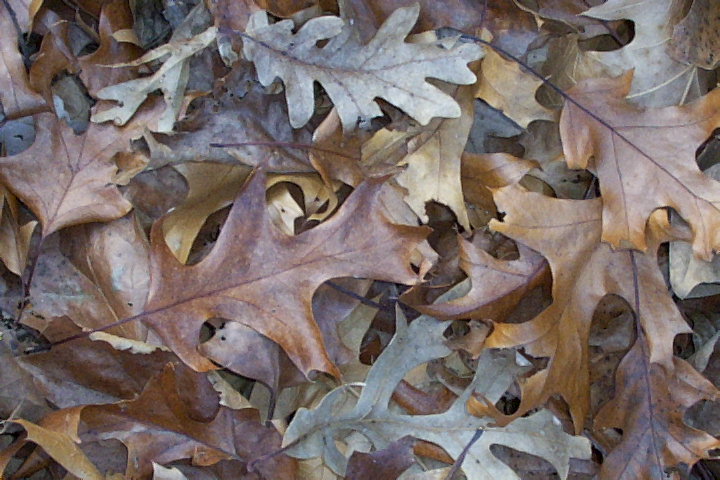
This is my favorite time of the year, and not just because all the cabbage worms and blister beetles have been killed by a nice hard frost. No, it's more than that. The pleasant crunch of leaves underfoot, the smell of woodsmoke in the air, the invigorating cool weather can only mean one thing—The Season Of Eating has begun.

Fall is in full bloom out here in the country, and I am ready to eat.

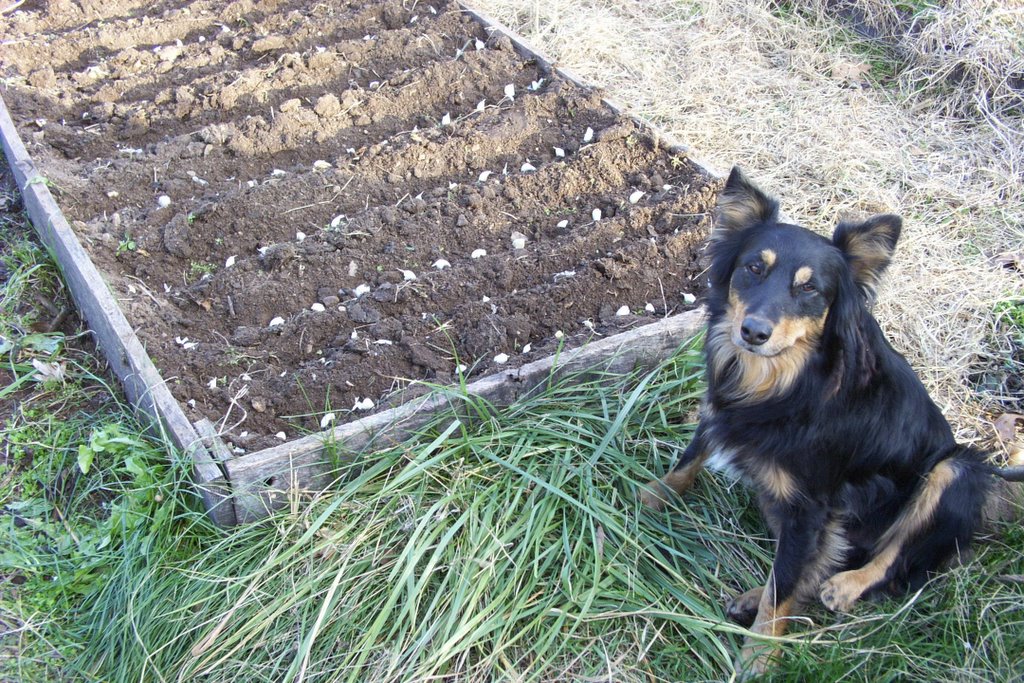
There's nothing like a crisp autumn day spent turning the compost piles or cleaning up the kitchen garden to stimulate the appetite. So what if the last few 
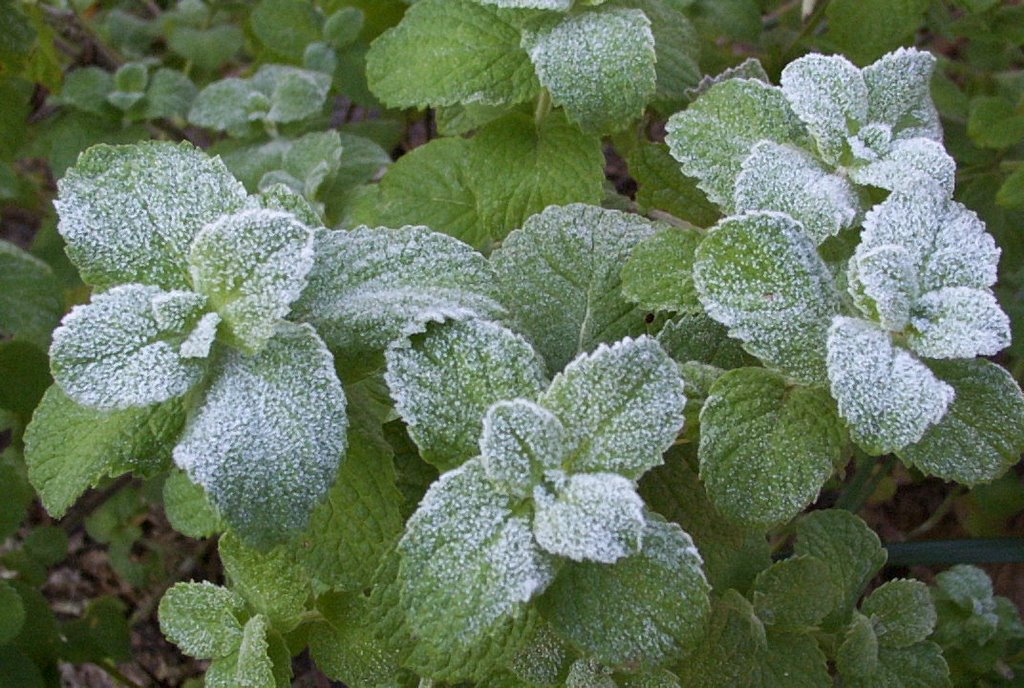
heads of lettuce froze during the night? The days of green salad and sorbet suppers are over.

It's time to pack away the tank tops, slip into those heavy sweaters, and delve into six months of serious eating. Favorite novels are forsaken as I fall asleep at night reading of crusty breads, slow roasted dinners, and the best way to make sausage gravy.

This is also the season when forgotten friends and relatives suddenly appear on your doorstep, wanting to be fed. Of course what these ravenous visitors are truly hoping to find—as they cross over your threshold with their noses expectantly sniffing the air—is the heady aroma of homemade baked goods wafting out of the kitchen.

Since a disappointed and malnourished guest is a terrifying sight, it's always a good idea to have some little yummy thing on hand, like these moist, and filling muffins.

They're easy to make and taste delicious any time of day. Since they're not overly sweet, you can even serve them as an addition to bread or rolls at your holiday dinner. This recipe makes about 18 good-sized muffins, so you'll have plenty on hand for everyone wanders into the kitchen in search of snacks.

If you're expecting heavy hungry traffic, consider making two batches and sticking one in the freezer. Simply defrost later at room temperature, toss a little cinnamon into the air, and claim they just finished cooling.


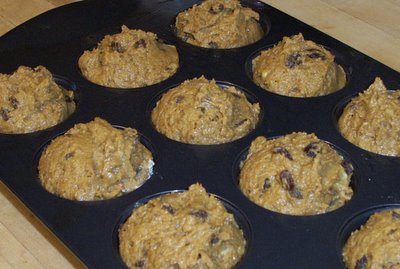
The secret to nice large muffins is to overfill the muffin cups with batter. I use a large stainless steel scoop to fill them. (These are also great for making nice round cookies; I have them in several sizes and use them all the time.)

You can make these muffins using all white flour, but the 1/2 cup of whole wheat flour adds more depth to the flavor and texture. Soaking the raisins in the orange juice makes them nice and plump, but is not absolutely necessary.

I usually use pecans, but I made this batch with walnuts, and there were no complaints. If you want to go the extra mile, you can spread the nuts on a baking sheet and toast them at 350° for about 10 minutes.

As always, I urge you to seek out local and organic ingredients; they really do make a difference. Organic raisins are an organic best buy, and organic canned pumpkin is easy to find. Even organic sugar is becoming mainstream. I stock up on organic butter when it goes on sale (often for $2.50 a pound) and freeze it.

Now that I live several miles from anyone (and several states from any relatives), unexpected guests on the doorstep are rare. But I did hand a steaming bag of these muffins to some grateful deer hunting friends passing through the other day.

And that experimental loaf of whole wheat beer bread? They made off with it, too. (I was assured that it was perfectly fine to give someone a warm loaf of bread with two test slices missing.)


You can also make lots of bite-size baby muffins.

Spicy Pumpkin Pecan Raisin Muffins
Makes about 18 large muffins (recipe may be halved)

1 cup raisins
3/4 cup orange juice

3 cups organic all-purpose flour
1/2 cup whole organic wheat flour
2 teaspoons baking soda
1 teaspoon baking powder (make sure it's fresh!)
1 teaspoon salt
1 teaspoon cinnamon
1 teaspoon nutmeg (a little less if freshly grated)
1/2 teaspoon ground cloves

1 cup (2 sticks/8 ounces) organic butter or trans-fat free vegetable oil sticks
(such as Earth Balance), melted*
1 cup light brown sugar, packed
1/2 cup honey
3 large eggs
1 15-ounce can organic pumpkin (or 1 pound fresh pumpkin purée)
1 cup chopped pecans or walnuts, toasted if desired

*Lower fat version: Simply omit 1/2 cup (1 stick) of the butter.

Heat oven to 350°. Place raisins and orange juice in a small bowl and microwave for 2 minutes; set aside. Grease muffin tins (I love my Chicago Metallic commercial muffin pans).

Combine flour, whole wheat flour, baking soda, baking powder, salt, cinnamon, nutmeg, and cloves in a large bowl and set aside. Combine butter, brown sugar, honey, and eggs in a large bowl and mix well. Stir in pumpkin. Gently fold in dry ingredients, alternating with the raisin/juice mixture. Stir in the pecans.

Generously fill muffin pan. Bake until a toothpick inserted in the center comes out clean, about 25 to 30 minutes. (Bake baby muffins about 15 minutes.) Cool muffins in tins for 15 minutes, then remove from tins and serve warm, or let cool on wire racks. Store in an airtight container for up to three days or freeze.

Still hungry? You might enjoy these other sweet baked treats:

Cookies and Bars
Molasses Ginger Spice Snaps
Chocolate Biscotti For Beginners
Toasted Almond Chocolate Chip Biscotti
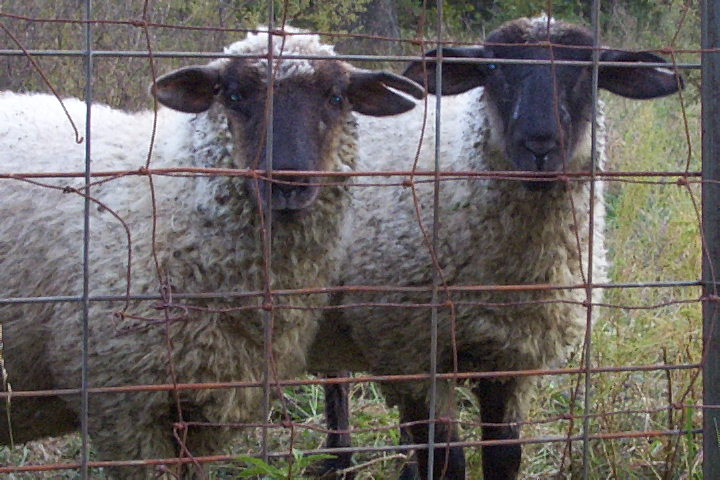
Whole Wheat Chocolate Chip Raisin Cookies (and how to hug a sheep)
Yip Yap Whole Wheat Chocolate Chip Banana Snaps
Choco-Oat-Butterscotch-Coconut Crazy Cookies

Blueberry Breakfast Bars
Just Peachy Blueberry Breakfast Bars
Apple Blueberry Crumble Bars

Muffins and Scones
Cranberry Christmas Scones (tasty any time of year)
Spicy Pumpkin Pecan Raisin Muffins
100% Whole Grain Bran Muffins (four different flavors)
100% Whole Grain Ginger Pear Bran Muffins

Cakes, Tarts, and More
Autumn Pear and Apple Crisp
Quick Emergency Chocolate Cake
Chocolate Babycakes
Easy Orange Yogurt Loaf Cake
Heavenly Lemon Coconut Quick Bread
Chocolate, Cinnamon & Banana Mexican Monkey Cake
Really Raspberry Tartlets

Still hungry? You'll find links to all my sweet and savory Less Fuss, More Flavor recipes in the Farmgirl Fare Recipe Index.

© FarmgirlFare.com, the sugar and spiced foodie farm blog where Farmgirl Susan shares stories & photos of her crazy country life on 240 remote acres—and nobody leaves the farm empty handed.

Weekend Dog Blogging #10: The Interloper


Wayward, Worn Out Hunting Dogs. . .


Don't Help Cut Firewood

Attention Dog Lovers! It's time for Weekend Dog Blogging!
If you'd like to see more fun dog photos and discover yummy new food blogs, head over to Sweetnicks on Sunday night for the complete roundup. We'd love to have you join us. Just post your pup and e-mail the permalink to Sweetnicks.

Daily Farm Photo: 11/20/05


More progress! Look who sneaked into the llama pen.

Saturday, November 19

Weekend Cat Blogging #24


I'm Not Coming Out 'Til It Warms Up!
(J2 Peeks Out From The Back Of The Cat Cabin)

Attention Cat Lovers! It's time for Weekend Cat Blogging #24!
Food Bloggers around the world unite each week and share pictures of our favorite felines. See cute cat photos and discover yummy food blogs. My pal Clare & her amazing cat Kiri are back in fine form, so you'll find all the links to this week's entries at Eat Stuff in Australia. We'd love to have you join us. Just send your permalink in a comment to Clare (Kiri's slave) at Eat Stuff and add a "Weekend Cat Blogging" tag to your post.

Daily Farm Photo: 11/19/05


Good Morning, Sun. Now Turn Around To Find. . .


Goodnight, Moon.

It's certainly been a colorful morning at Farmgirl Fare!
Yes, I have a charming new banner, designed especially for me by talented Danish artist Liselotte Weller (who also happens to be the winner of the Farmgirl Fare Name That Sheep Contest). Click here to see more of Liselotte's delightful work and for information on how to commission your own one-of-a-kind illustration.
And a very Happy Birthday to Liselotte!

Okay, Okay, I Suppose It's Only Fair: WDB#1


He's A Donkey Doodle Dan-dy!

Attention Donkey Lovers!
It's time for Weekend Donkey Blogging!

And we already have an entry from The Moveable Feast!
Click here to see another cute ass.


This is getting ridiculous.

Weekend Herb Blogging #7


This Is The Parsley That Went In The Soup

I don't know what I would do without Italian Flat Parsley in the garden. It is easy to grow, happily tolerates heat, cold, and drought (this healthy plant survived twelve degrees F the other night covered with just an old quilt), and adds a flavorful touch to so many foods. Parsley: it's not just a garnish!

Don't have
a pet to post? Join us for Weekend Herb Blogging! Hosted each week by Kalyn's Kitchen, it's a fun way to learn about interesting herbs & edibles and discover yummy food blogs. Just photograph and blog about an herb, plant, veggie, or flower and send Kalyn the permalink by Sunday afternoon (Utah time). The round-up of all the featured plants is published each Sunday night.

Friday, November 18

Hearty Lentil Soup Recipe With Carrots, Tomatoes, & Smoked Sausage


This healthy soup isn't gorgeous, but it tastes great

Here's the perfect thing to go with your
beer bread. This flavorful tummy warmer was another big hit at my Cozy Breads & Soups cooking class. It's quick and easy to put together, yet it tastes as if it's been simmering on the stove for hours. Start the soup, then mix up the beer bread batter while it comes to a boil, and in a little over an hour you'll be serving up cold weather comfort food at its best.

Add a bag of organic baby spinach tossed with your favorite dressing (or try my Lower Fat Homemade Buttermilk Ranch Dressing) and an
Emergency Chocolate Cake, and casual weeknight entertaining is suddenly a snap. Is everyone coming over to your place to watch the big game on Sunday? This recipe, which tastes even better after a day or two in the fridge, can easily be doubled, and it's hardly any more work to make two batches of beer bread (perhaps different flavors?) than it is to make one. Simply reheat the soup while the beer bread bakes, and you can effortlessly feed a crowd without missing a minute of the fun.

The nice thing about lentil soup is that it's very accommodating. You can make it with just about anything, and it's always tasty and satisfying. It happily adapts itself to whatever ingredients you have on hand, freezes beautifully, and can even be eaten cold. It's also cheap to make. Leftover lentil soup makes a lip-smacking lunch, whether consumed after a morning spent stacking firewood or slaving away in a cubicle.

This stew-like version takes advantage of the winter pantry by using canned tomatoes, onion, garlic, and carrots. Packed with nutrients and fiber, it'll fill you up and keep you going. Consider trying a bowl for breakfast. Use whatever types of lentils and sausage strike your fancy.


This batch was made with these small, reddish brown organic lentils that I found in the bulk section at Whole Foods Market


and this fully-cooked, smoked kielbasa made by our local meat processor. Sausages vary widely from region to region (and even from town to town), so feel free to experiment. I once bought kielbasa from another nearby meat processor to use in this recipe, and it turned out to be an uncooked sausage that looked like what I call Italian sausage. The resulting soup was delicious. You can also omit the sausage altogether for a vegetarian version.

As always, I encourage you to seek out local and organic ingredients.
They really do make a difference. Organic carrots and onions are year round best buys and can be found in many supermarkets. Are you a garlic lover? Look for interesting varieties of organic garlic—as well as other locally produced foods—at your local farmers' market.

Hearty Lentil Soup With Smoked Sausage
Makes about 8 cups — Recipe may be doubled

1 to 2 Tablespoons olive oil
1/2 lb. (8 ounces) kielbasa or other sausage, sliced into 1/2-inch thick rounds
1 large onion (about 12 ounces), chopped
3 medium carrots (about 12 ounces), chopped
4 to 6 cloves garlic, chopped

4 cups water
1 cup lentils, rinsed
1 28-ounce can tomatoes with juice (about 3 cups)
1/2 cup chopped fresh parsley, plus additional for garnish
2 teaspoons ground cumin
1 Tablespoon paprika
1-1/2 teaspoons salt
1 teaspoon red pepper flakes (optional)

1. Heat 1 Tablespoon of the olive oil in a medium pot. Add the kielbasa and cook over medium heat until nicely browned, about 2 to 3 minutes per side. Remove from pot and set aside. When cool, slice rounds in half and set aside.

2. Add the onion and carrots to the pot, adding up to 1 Tablespoon of olive oil if necessary to prevent sticking. Cook 5 minutes over medium heat, stirring so that the vegetables are coated with the caramelized bits left in the pot from cooking the sausage. Add the garlic and cook 1 to 2 more minutes.

3. Add the water, lentils, and tomatoes and bring to a boil. Reduce heat and simmer, with the lid cracked, 20 minutes, stirring occasionally.

4. Stir in the parsley, cumin, paprika, salt, and red pepper flakes if desired. Simmer, with the lid cracked, an additional 30 minutes, stirring occasionally.

5. Carefully purée about half of the soup in a blender on low speed until still slightly chunky, then return to the pot. Or use an immersion hand blender to purée the soup to desired consistency. (I love my KitchenAid hand blender
; it may be the best $50 I've ever spent in the kitchen.) Stir in the sausage. Cook over medium heat 5 minutes. Serve hot, garnished with chopped fresh parsley if desired.

How about some bread to go with your soup?
Beyond Easy Beer Bread (my most popular recipe)
Quick Rosemary Focaccia
Whole Wheat Beer Bread
Onion Rye Beer Bread
Savory Feta Cheese & Scallion Scones
Parisian Four Hour Daily Baguettes
No-Knead Crusty Freeform Bread
Oatmeal Toasting Bread (makes great rolls, too)
Fresh Tomato & Basil Whole Wheat Sourdough Bread
Italian Black Olive Cheeks
Carrot Herb Rolls (And A Bargain Bread Book For Beginners)
Three Onion & Three Cheese Pizza

You might also enjoy my other Less Fuss, More Flavor soup recipes:
Quick Black Bean Soup/Chili
Quick and Easy Roasted Red Pepper, Tomato, & Artichoke Soup
Cream (or not) Of Artichoke Soup With Garlic, Onions & Garbanzo Beans
Broccoli Onion Garbanzo Bean Soup
Susan's Super Spinach Soup
Garlic Lover's White Bean Soup
Use It Or Lose It Lentil & Escarole Soup
Spur Of The Moment Summer Squash Soup
Simple Summer Harvest Soup
Simple Summer Harvest Soup, the Autumn Version

© Copyright 2005 FarmgirlFare.com, the tummy warming foodie farm blog where Farmgirl Susan shares recipes, stories, and photos from her crazy country life on 240 remote Missouri acres.

Daily Farm Photo: 11/18/05


Snugglebunny With Frosting

Thursday, November 17

Daily Farm Photo: 11/17/05


We're Having A Bit Of A Cold Snap

Wednesday, November 16

Daily Farm Photo: 11/16/05


Same Scene, New View: This Is Now


This Was Late October

Click here and here to see other Same Scene, New View photos.

Tuesday, November 15

Almost Too Easy Whole Wheat Beer Bread Recipe

Beyond Easy Whole Wheat Beer Bread
A warm, hearty loaf of flavorful whole grain bread in about an hour.

Two days ago I wrote a post on how to make homemade beer bread. Since then, several of you have asked me about substituting whole wheat flour for some of the all-purpose flour in the recipe. Since I figured I could spare five minutes in the name of bread—and because I was getting curious myself—I baked this loaf of whole wheat beer bread a couple of hours ago.

Instead of the three cups of all-purpose (white) flour in the original recipe, I used two cups of whole wheat all-purpose flour and one cup of all-purpose flour. Both were organic. Organic flours bake up beautifully, don't cost a whole lot more than conventional, and are better for both you and the environment. Look for them in the bulk bins at natural foods stores and even some supermarkets.

I decided not to add any herbs or cheese to the basic mix. The batter was extremely thick and heavy, so I mixed in 1/4 cup (2 ounces/60 ml) of water along with the 12 ounces of beer. If it hadn't been nine o'clock in the morning, I would have opened a second bottle of beer and drunk the excess.


Within minutes of putting the bread in the oven, the kitchen smelled divine. I did let the finished loaf cool 20 minutes before cutting into it, but it wasn't easy. I tasted a warm slice slathered with organic butter and was very pleased with the results. This bread has a nice texture and is dense but not too heavy. It would stand up well to a hearty stew or chili.

I again used a bottle of our homebrewed Irish pale ale, and the flavor of the beer really came through. I think this version would also be good spread with cream cheese or
herbed yogurt cheese. And after inhaling his warm test piece, Joe suggested covering toasted slices with sausage gravy. This bread has serious possibilities.

Farmgirl Susan's Almost Too Easy Whole Wheat Beer Bread Recipe
Makes one loaf

2 cups organic whole wheat flour
1 cup organic all-purpose flour
1 Tablespoon granulated sugar
1 teaspoon salt
1 Tablespoon baking powder (make sure it's fresh!)
14 ounces beer (or 12 ounces beer & 2 ounces water)

Optional glaze: 1 egg & 2 teaspoons water, beaten

Heat the oven to 375 degrees. In a large mixing bowl, combine the flour, sugar, salt, and baking powder. Slowly stir in beer and mix just until combined. The batter will be thick.

Spread in a greased 8-inch loaf pan (I love my Chicago Metallic Commercial Loaf Pans, which are great for baking yeast breads, too), brush with the egg glaze if desired, and bake until golden brown and a toothpick stuck in the center comes out clean, about 45 minutes.

Cool in the pan on a rack for 10 minutes. Remove from the pan and cool 10 more minutes. Serve warm or at room temperature.

More bread recipes on Farmgirl Fare:

Ten Tips For Better Bread
Farmhouse White: An Easy Basic White Sandwich Bread
My Favorite Easy Pizza Dough Recipe
Oatmeal Toasting Bread
How To Make Homemade Pita Bread in about an Hour
Fresh Tomato & Basil Whole Wheat Sourdough Bread
Savory Cheese & Scallion Scones (one of my most popular recipes)
Christmas Cranberry Scones (tasty all year round!)
100% Whole Grain Moist & Flavorful Bran Muffins (made without cereal)

Still hungry? You'll find links to all my sweet and savory Less Fuss, More Flavor recipes in the Farmgirl Fare Recipe Index.

©
FarmgirlFare.com, the freshly baked foodie farm blog where Farmgirl Susan shares stories & photos of her crazy country life on 240 remote acres.

Daily Farm Photo: 11/15/05


And They're Off!

Monday, November 14

Daily Farm Photo: 11/14/05


Did I hear that right? Clare is back?!

Welcome home, dear friend.

Sunday, November 13

Beyond Easy Beer Bread Recipe: A Warm Crusty Loaf in Under an Hour

Beyond Easy Cheddar & Dill Beer Bread Recipe - Farmgirl Fare
Homemade Beer Bread with Sharp Cheddar & Fresh Dill

Click
here for my Whole Wheat Beer Bread recipe.
Click
here to read about my Onion Rye Beer Bread.

Ready to try baking yeast bread? Check out my Ten Tips For Better Bread, and then try my super popular Farmhouse White, an easy basic white sandwich bread recipe that's perfect for beginning bread bakers and can be adapted in all sorts of ways.

When it comes to minimum input and maximum output in the kitchen, beer bread is about as good as it gets. Five minutes of work reward you with a heavenly aroma wafting through the house and a warm, crusty loaf in under an hour.

I once made beer bread for a cooking class called Cozy Breads and Soups, and even after watching me make it, several people could still hardly believe how easy it was to put together—and how good it tasted.

Beer bread is delicious warm or at room temperature and goes well with just about anything. You can even use it to make sandwiches. A thick slice of leftover beer bread popped in the toaster and slathered with butter is a wonderful thing. It also freezes beautifully. (If you're not planning to serve your beer bread right away, keep in mind that the flavor of any herbs you add may intensify over time.)

There are endless flavor variations of beer bread possible; simply add whatever you desire to the basic dry mix. Try experimenting with different beers and ales, too. A darker beer will give you a deeper flavor. You can even make it with non-alcoholic beer.

For this loaf I used a bottle of our homebrewed Irish light lager, along with fresh dill and finely grated sharp cheddar cheese. The combination was inspired by the hardy
volunteer dill in my organic heirloom kitchen garden.

Many people first taste beer bread that was made from a mix. Then they start wondering if they can make their own beer bread from scratch. The answer is yes! In about five minutes.

In fact, once you realize just how few ingredients there are in basic beer bread—flour, sugar, salt, baking powder, & beer—it's difficult to believe that anyone would have the nerve to market beer bread mix. And yet I've seen packages of it selling for up to eight dollars.


Onion Un-Rye Beer Bread (recipe here)

That said, why not make up a few batches of your own signature homemade beer bread mix to give as gifts? Just tuck a zipper bag of the dry mix into a colorful tin (or even a brown paper bag tied with a festive ribbon) and voila!—a charming, scrumptious gift suitable for practically any occasion. Include baking instructions written or printed out on a simple card; all they have to do is stir a 12-ounce bottle of beer into the mix, spread it in a pan, and pop it in the oven.

For an even niftier gift, create an all-in-one Beer Bread Kit: nestle the beer bread mix and a bottle of beer in a nice pan. I love my
my Chicago Metallic commercial loaf pans (shown in the photo above). I've been using them for years for baking everything from yeast breads, like my popular Farmhouse White, to loaf cakes, such as this Easy Orange Yogurt Loaf Cake and this Lemon Coconut Quick Bread, which is heavenly when toasted. I also really like USA Pan loaf pans.

And if the recipient of your Beer Bread Kit is a very dear friend, you might even consider sharing the recipe for the mix. Or you can just keep it to yourself for a while. It's not like it'll be any trouble to make them some more.

Beyond Easy Cheddar and Dill Beer Bread Recipe - Farmgirl Fare
Farmgirl Susan's Beyond Easy Dill & Cheddar Beer Bread Recipe
Makes one 8-inch loaf

**Click here to print this recipe**

The optional egg glaze gives the top a beautiful, dark golden color. As always, I encourage you to seek out
local and organic ingredients. They really do make a difference.

Ingredients:
Basic Beer Bread Mix:
3 cups organic all-purpose flour
1 Tablespoon granulated sugar
1 Tablespoon baking powder (make sure it's fresh!)
1 teaspoon salt

2 Tablespoons chopped fresh dill (or 2 teaspoons dried)
1 cup finely grated sharp cheddar cheese
12 ounces beer

Optional glaze: 1 egg & 2 teaspoons water, beaten

Instructions:
Heat the oven to 375°. Combine the flour, sugar, baking powder, salt, dill, and cheddar in a large mixing bowl. Slowly stir in the beer and mix just until combined. The batter will be thick.

Spread in a greased 8-inch loaf pan
, brush with the egg glaze if desired, and bake until golden brown and a toothpick stuck in the center comes out clean, about 45 minutes.

Cool in the pan on a wire rack for 10 minutes. Remove from the pan and cool 10 more minutes. Serve warm or at room temperature.

Flavor Variations (also see the comments section at the end of this post for lots more beer bread flavor inspiration):

Garlic & Herb: Add 1 teaspoon dried rosemary, 1 teaspoon dried oregano, 1 teaspoon dried thyme, and 2 minced garlic cloves (or 1 teaspoon garlic flakes) to the basic mix. For fresh herbs, use 1 chopped Tablespoon of each.

Dill & Chive: Add 2 Tablespoons chopped fresh dill (or 2 teaspoons dried dill) and 1/4 cup chopped fresh chives to the basic mix.

Rosemary & Feta (courtesy of my bread baking buddy, Beth—see her recipe, which includes metric measurements, here): Add 2 Tablespoons chopped fresh rosemary and 3/4 cup crumbled feta cheese (about 4 ounces) to the basic mix.

Italian: Add 1 teaspoon each dried basil and oregano (or 1 Tablespoon each chopped fresh basil and oregano), 2 minced cloves of garlic, and 1/2 cup finely grated parmesan or pecorino romano cheese to the basic mix.

Other Additions: Any dried or fresh herbs; 1/2 cup freshly grated asiago (or other hard cheese); 1/2 cup finely chopped onion, 1/2 cup chopped scallions; 1/2 cup chopped fresh parsley, 1/2 cup whole wheat flour or 1/2 cup oats in place of 1/2 cup of the all-purpose flour. Or practically anything else you can think of—just use your imagination.


Still hungry? You'll find links to all of my sweet and savory Less Fuss, More Flavor recipes in the Farmgirl Fare Recipe Index.

© FarmgirlFare.com, the freshly baked foodie farm blog where Farmgirl Susan shares recipes, stories, and photos from her crazy country life on 240 remote Missouri acres.

Weekend Herb Blogging #6


Volunteer Dill Coming Up Among The Escarole (Yippee!)

Dill is a versatile herb that is easy to grow and a vigorous self-seeder. Plant it once, and you may never have to sow seeds again. It is a wonderful addition to any kitchen garden.

So what did I make with my surprise bounty of dill? Click
here to find out. And don't forget the Weekend Herb Blogging roundup on Sunday night at Kalyn's Kitchen.

Weekend Dog Blogging #9: We Have Contact!


Lucky Robin Gets a Kiss from One of Our New Llamas

© FarmgirlFare.com

Daily Farm Photo: 11/13/05


Making Progress

Saturday, November 12

Weekend Cat Blogging #23: Be Well, Clare

It seems hard to believe that this is already the 23rd week of Weekend Cat Blogging (WCB), a fun event that has grown by leaps and bounds due mainly to my dear friend Clare's nonstop enthusiasm and love of cats. I remember when there were just three of us posting pictures of our cats each weekend.

If you haven't already heard, Clare has been in the hospital for over a week after having been seriously injured while trying to save herself and
her amazing cat Kiri from an attacking dog. (Click here to read my earlier post about this tragic incident.)

This special edition of Weekend Cat Blogging is dedicated to Clare, and we have invited everyone to join in, even if you are catless. Boo at Masak-Masak in Malaysia is this weekend's guest host. Click
here to find all of the links to this week's outpouring of love for Clare and Kiri. More links will be added throughout the weekend, so be sure to check back on Monday for the complete roundup. If you would like to join us, simply leave your WCB#23 permalink in a comment at Masak-Masak.

Special Additon! Click here to see Miss Domino, our lovely foster blog cat, looking for Clare & Kiri.

As promised, I have come up with some hearts & cats for Clare & Kiri. Well, lots of hearts, but just one cat. Today is opening day of Deer Season, and everybody except Molly Doodlebug is out trying to bag themselves some venison. So here are the hearts. . .


This was my first foray into cookie decorating and color scheming; you may need to click on the photo to read the writing.


And here is the cat. Why on earth I thought she would sit nicely next to the plate of cookies while I snapped a darling picture is beyond me. And no, she's not just sniffing them. . .


Behold The Doodle Damage

Many thanks to everyone who has taken the time to send e-hugs and healing thoughts to Clare during the past week. If we keep it up, hopefully she'll be back with us for Weekend Cat Blogging #24.