Showing posts with label herbs. Show all posts

Saturday, March 1

How To Cook Lamb: Onion & Herb Crusted Lamb Spareribs Recipe & Grilled Lamb Leg Steaks


Simple Yet Superb: Onion & Herb Crusted Lamb Spareribs

People often ask me if we eat any of the animals we raise. The answer is yes, and I wouldn't have it any other way. You can read more about my philosphy
on raising animals for meat in my previous post, Book Review: Cooking With Shelburne Farms & A Recipe For Grilled Lamb Burgers With Roasted Red Pepper, Parsley, & Kalamata Olive Relish. And look for more of my Less Fuss, More Flavor lamb recipes to be posted soon. Well, maybe not soon, but in the near future.

There are lots of people in this country who do not eat lamb. Some of them had very bad experiences with mutton many decades ago, usually while in the military. Others consider lamb too expensive, preferring to plunk down the same amount of hard earned cash for a couple of juicy T-bone steaks rather than some itty bitty loin chops they aren't completely sure what to do with anyway. And, sadly, a surprisingly large number of people have simply never had the opportunity to taste lamb in any way, shape, or form. According to USDA's Economic Research Service, each American eats less than one pound of lamb a year.

The most well known cuts of lamb are the chops and the leg. Roast leg of lamb, the year round Sunday dinner of choice in England for centuries, is sometimes found on formal holiday tables in this country, as is rack of lamb. Both are suitably impressive looking, which no doubt helps to foster the reputation lamb has of being a very fancy dish. Lamb in America has become the champagne of meats, and serving it is often reserved for special occasions. But this reputation - as anyone who has ever had a cozy dish of slow cooked braised lamb shanks will tell you - is undeserved and needs to be abolished (as does that whole ridiculous 'champagne is only for celebrations' nonsense). And I'm not just saying that because I happen to raise and sell lambs. There is much more to a lamb than a couple of roast legs and some chops.

When I was a child, lamb chops made a regular appearance on our family dinner table. My mother broiled them, and they were always served with mint jelly. I don't recall having any other cuts of lamb, though once I moved to a farm and started raising sheep, I discovered that my mother has a deep and abiding love for lamb. During her 10-day visit last fall we ate lamb at least seven times. When I dropped her off at the airport, she had a lamb sandwich in her carry-on and a small insulated container of leftover roast leg of lamb in her suitcase.

We sell our naturally raised, grass-fed lambs directly to local individuals each year in late spring. We deliver the lambs to a nearby family-owned processor, and a week later the customers pick up their frozen meat which has been cut and packaged to their specifications. This butcher didn't have a whole lot of experience processing lambs before I - totally clueless and not real good at picturing things three dimensionally - showed up with my battered copy of Betty Crocker's Cookbook opened to the page titled 'Lamb Retail Cuts: Where They Come From And How To Cook Them.' The last several years have been a learning experience for all of us.

I ask lots of questions, and they do their best to accommodate me. Can you tell me the exact time to deliver the lambs so they don't have to wait around being nervous and stressed? Yes. Can you hang the dressed meat using this special technique so it ends up even more tender? Yes. Can you hang it for several days longer than you usually do? Yes. Can you make us some lamb salami with seasonings I provide and without any nitrates? Yes. Do you know how to cut a rack of lamb? No, but we'll figure it out.


Easy Summer Supper: Grilled Lamb Leg Steaks & Garden Veggies


Last year, after talking with a new customer who mentioned that he and his wife don't cook roasts ("We're grill people!"), I asked our butcher if he thought it would work to cut the legs into steaks instead of leaving them whole. Yes! Since we probably use our outdoor propane grill 300 nights a year, we decided we would have the legs on one our own lambs sliced into 1-1/4 inch steaks (the same thickness we get our chops). We love roast leg of lamb, and we love having all the leftovers for sandwiches, but we just don't end up cooking them that often, especially during the warmer months.

We grilled two test steaks for six minutes a side and served them up alongside some sauteed veggies from the organic kitchen garden. I took one bite and stared down at my plate as a big grin spread across my face. "It's like eating an enormous boneless lamb chop!" (The legs are actually bone-in, but you barely notice the little piece in each steak.)

When I called the butcher the next day to ask if he could cut up meat that's already frozen, without skipping a beat he said, "You want me to cut up the other legs you have in your freezer, right?" Yes. Leg steaks are now hands-down my favorite cut of lamb.

Nobody's perfect of course, and butchers do make mistakes from time to time. Unfortunately when you're doing custom processing, there isn't a whole lot that can be done once you've messed up somebody's meat. Take, for instance, the time a friend of mine went to pick up her fat hog and found that the two whole hams she'd ordered (and had special plans for) had both been sliced into steaks. It isn't as if they could just be glued back together.

Last year one of our customers was truly distraught when she realized that her two racks of lamb spareribs were nowhere to be found. They'd inadvertantly been turned into stew meat, an understandable oversight since according to the butcher almost nobody ever wants the ribs. Unfortunately they just happened to be this woman's favorite cut, and she'd been looking forward to eating them for months.

It isn't easy to find whole racks of lamb spareribs (which come from the breast) for sale, but this overlooked cut is worth seeking out, and they shouldn't be very expensive when you find them. Check with a good butcher or try searching at Local Harvest for a lamb producer in your area.

As always - and especially during these times of more and more scary recalls - I urge you to pay attention to where your food comes from and under what conditions it was raised. Do you want to eat animals that have been given growth hormones and antibiotics? Or spend their lives crammed into a filthy feedlot eating GMO corn?

Lambs that are allowed to graze freely on pastures, exercising and gaining weight slowly, are happy, healthy animals. Their lean meat is better tasting and better for you than lambs quickly fattened up on grain in commercial feedlots. Studies show that grass-fed meat is lower in fat and higher in omega-3 and omega-6 fatty acids. It also contains as much as 500 times the amount of conjugated linoleic acid (CLA), a compound substance and essential fatty acid necessary for optimal health, as conventional animals fed grains and feed.

One lamb has two racks of spareribs. Ours weigh between 1-1/2 to 2 pounds each. The ribs don't have a lot of meat on them, but they're very tasty. Two whole racks should serve four people, though after a hard day of working around the farm, my lamb loving mother can polish off nearly an entire rack by herself. I roast the racks whole and then cut them up before serving. Eating lamb ribs is a messy but thoroughly enjoyable experience.


Just A Few Minutes Of Prep & They're Ready For The Oven

Onion & Herb Crusted Lamb Spareribs

This is the same way I prepare a whole leg of lamb for roasting. You simply slather on a thick layer of the onion and herb mixture and pop it in the oven. Both the leg and ribs will taste even better if you allow the meat sit for several hours once you've spread the topping on (set it in the fridge if it's going to be more than two hours). You can cook the ribs for as little as an hour, but two hours makes the topping nice and crisp and the meat more tender. You could probably slow cook them at a lower temperature for even longer.

Onion flakes are marvelous little things that I toss into all sorts of stuff. I see them selling in the bulk herb sections of natural food stores for a ridiculous $15 to $18 per pound, but for years I've been ordering them - along with all kinds of other top quality herbs and spices at wholesale prices -for $3.10 a pound from AmeriHerb in Iowa. The minimum order is just one pound of anything, and they only charge you their actual shipping costs. You can read more about AmeriHerb and why I love them so much in my previous post, Onion Flakes & Things For Cakes.

I never measure out quantities when I make this; I just start with at least a couple of big handfuls of onion flakes and go from there. As long as there's enough olive oil to hold everything together and enough paste to make a thick layer, you really can't go wrong with this combination of ingredients, especially if your herbs are freshly picked. Simply adjust the amounts of everything to suit your tastes.

2 whole racks of lamb spareribs (about 3 to 4 pounds)

Onion flakes
Chopped fresh garlic
Chopped fresh rosemary
Chopped fresh thyme
Chopped fresh basil
Chopped fresh parsley (I use lots)
Dijon mustard (not too much)
Nice salt & pepper
Extra-virgin olive oil

Spread spareribs in a large roasting pan.* Combine remaining ingredients in a small bowl to form a thick paste. Using your fingers, spread it all over the ribs. Cook, uncovered, at 325 degrees for 1 to 2 hours. Using a sharp knife, carefully cut each rack into individual ribs. Pile on a platter and serve with plenty of cloth napkins and a bowl for the bones.

Leftover ribs can be reheated in the oven or toaster/convection oven the next day for lunch. Or if you're pressed for time because your mother, disguised as a starving farm worker, is sure she will pass out from hunger before they're ready, you can gently reheat them in the microwave.

* Our lamb ribs come with a couple of separate end pieces that won't fit in my big new roasting pan (how did I survive so long without one of these?), so on a whim I slathered them with Soy Vay Veri Veri Teriyaki Sauce that I bought at Trader Joe's and cooked them in a separate small dish. Yum. Then I tried marinating two entire racks in the stuff overnight. Double yum. So if you can't get a hold of some nice fresh herbs for this recipe, here's another easy and tasty option.

This is my contribution to Grow Your Own, a wonderful monthly food blogging event hosted at Andrea's Recipes that celebrates the foods we grow or raise ourselves and the dishes we make using our homegrown products. This month's roundup will be posted at Andrea's Recipes in a day or two. Want to join in the Grow Your Own fun? Find out how here.

Still hungry?
You'll find links to all of my Less Fuss, More Flavor recipes in the sidebar of the Farmgirl Fare homepage.

© 2008 FarmgirlFare.com, the award-winning blog where Farmgirl Susan shares stories and photos of her crazy country life on 240 remote Missouri acres - and we all eat very, very well.

Monday, November 19

Recipe: Colorful Carrot Herb Rolls and a Beautiful Bread Book for Beginners


Packed with carrots and perfect for the autumn (or spring!) table.

Some of my personal goals for this year included delving into the numerous (and mostly unused) cookbooks on my shelves, baking new kinds of breads, and making much better use of all the beautiful herbs in my kitchen garden.

I've been doing okay, but with this new recipe I hit the personal goal jackpot. It's a variation of the carrot bread in Bread: Artisan Breads from Baguettes and Bagels to Focaccia and Brioche by authors and cooking instructors Eric Treuille and Ursula Ferrigno (he's French, she's Italian).

I've been reviewing this book, and my opinion of it can be summed up in one word: wonderful. Wait, make that two words: wonderful and inspiring. This is the second recipe I've made so far, and the first bread, a round Italian Rosemary Raisin Loaf, is as pretty as it is delicious.

Here's a little blurb from the book jacket, and it's all true:

Bread mixes delicious recipes with essential techniques to provide the home cook with practical reference and inspiration. From mixing and shaping to proofing and glazing—each stage of the bread-making process is clearly explained, with problem-solving tips and a complete illustrated guide to key ingredients and equipment to help you succeed. Bread's step-by-step demonstrations of the principles and practices of bread-making will give you the confidence and skills to try its tantalizing range of over 100 breads.

If you learn best by looking at pictures, then this is definitely the book for you because it's packed with gorgeous, full-color photos. And while it's a perfect book for beginners (I already know at least one budding bread baker who'll be receiving a copy for Christmas), I think many experienced bakers would also enjoy it.

I've already discovered all sorts of handy tips and useful nuggets of information, and there are several more breads I'm planning to make, including the Hungarian Potato Bread, Dark Chocolate Bread (1¼ cups of cocoa powder!), Swedish Dill Bread (made with cream cheese), and the Prune and Chocolate Bread ('a deeply indulgent loaf, chock-a-block with juicy prunes and melted chocolate').

There's also an intriguing recipe for a straight dough (as opposed to sourdough) Pane con Pomodori e Cipolle Rosse (Tomato and Red Onion Bread) which looks similar to the Fresh Tomato & Basil Whole Wheat Sourdough Bread I wrote about last month.

One of the nice things about it is that many of the breads start with the same basic recipe and build on it, which means trying all sorts of different breads suddenly becomes much less daunting.

Variations on the same recipe are also often given. For example, you can take the American multi-grain bread and turn it into sunflower and honey bread, cracked grain bread, or shape it into rolls. The pita bread recipe includes a whole-wheat version as well as instructions on how to make Lavash (Armenian Flat Bread).


A new holiday tradition?

Farmgirl Susan's Carrot Herb Rolls
Makes sixteen 3-inch rolls — Adapted from Bread: Artisan Breads from Baguettes and Bagels to Focaccia and Brioche

**Click here to print this recipe**

The carrot bread recipe this is adapted from came from the chapter in Bread called Flavored Breads, and what caught my eye was its use of raw shredded carrots. Other variations included are: spinach bread, beet bread, chili bread, onion and caraway bread, and herb bread (which didn't include the carrots).

First I made the plain carrot dough, shaping half into a round loaf and the rest into rolls. The second time around I dove into the herb garden first, emerging with fistfulls of fresh parsley, rosemary, and thyme which I tossed into the mix. I also substituted 1 cup of white whole wheat flour for 1 cup of the bread flour.

The result? Flavorful, healthy, autumn-colored rolls that I think would be a welcome and interesting addition to any holiday table. They have a soft but substantial crumb and a chewy crust that crisps up nicely when reheated. They also freeze beautifully. You can really taste the carrots, and a taste-tester friend I gave some to reported that they're great with goat cheese.

As always, I urge you to seek out local and organic ingredients; they really do make a difference. At around a dollar a pound and readily available, organic carrots are a bargain. Look for organic flours in the bulk sections of natural food stores.

I highly recommend investing in a couple of heavy duty commercial rimmed baking sheets. At less than $14 each, they're one of the best kitchen deals around. Treat them well—I usually line mine with sheets of unbleached parchment paper, which is wonderful stuff—and they'll last for ages. I've been using the heck out of some of mine for 20 years for everything from baking scones to roasting Brussels sprouts, not to mention baking thousands of cookies.

3 cups organic bread flour (15-3/8 oz, 437 g)
1 cup organic white whole wheat flour (5 oz, 143 g)
2 teaspoons (10 ml) instant yeast
1½ cups warm water (12 oz, 335 g)
2 Tablespoons organic butter, melted (1 oz, 28 g)
2¼ cups organic carrots, finely shredded (13-7/8 oz, 380 g)
1/4 cup chopped fresh parsley (3/8 oz, 10g)
2 Tablespoons (30 ml) chopped fresh rosemary
1 Tablespoon (15 ml) chopped fresh thyme
2½ teaspoons (12 ml) salt


At first it may seem like there are too many carrots. There aren't!

Mix the whole wheat white flour, bread flour, and yeast in a large bowl. Make a well in the center and pour in the water and melted butter. Stir until combined. Mix in the carrots, parsley, rosemary, and thyme and stir until a soft sticky dough forms.

Turn dough out onto a well-floured surface and knead 5 minutes, sprinkling on a little more bread flour if necessary to keep dough from sticking to your hands and the work surface.


Kneaded dough read for a rest (autolyse).


Cover dough with bowl and let rest 20 minutes (this rest period is called the autolyse).

Sprinkle the salt over the dough and knead for another 5 minutes, until the salt is fully incorporated and the dough is smooth and still slightly sticky, adding more flour if necessary.


It's so easy to see if the rising dough has doubled in size.

Put the dough in a clear, straight-sided food grade plastic container with a snap-on lid and let it rise until doubled in size, about 1 to 1½ hours. I mark the height of the unrisen dough and the doubled height on the side of the container with a felt tip pen (it comes off when scrubbed with a sponge). You could also use a piece of tape.

The ideal temperature for rising dough is about 70 to 75 degrees F. If the air is cooler, you can use warmer water when mixing the dough or simply let it rise longer (which will actually improve your finished bread).

An instant read thermometer, like the one you can see poking into my dough in the photo above, is an inexpensive, handy little item that is extremely helpful when baking bread. Use it to check the temperature of your ingredients (water, milk, even flour) before adding them. Then use it to check the temperature of the dough while it's rising.

You can even check the air temperature in your kitchen by putting the thermometer in a glass of room temperature water (this is also a good way to accurately check the temperature inside your refrigerator).

You may be surprised at just how much such a small investment will change your kitchen experiences. Once you start using one, you'll probably wonder how you ever lived without it. These thermometers are called "instant," but it does take a few seconds to get a reading. There are also digital versions available, but I've never used one.

Once the dough has risen, punch it down by pressing down with your knuckles into the center of the dough. Turn the dough out of the container onto a lightly floured work surface, then let it rest for 10 minutes.


Shaped rolls ready for proofing.

Divide the dough into 16 pieces, about 3 ounces/84 grams each. To shape round rolls, press down on the pieces to expel any air bubbles. Cup the palm of your hand over each piece and roll it over an unfloured surface until it forms a smooth ball.

If you don't want your finished rolls to end up touching each other, simply space them farther apart on two baking sheets. Either bake both sheets at once, or set the second one in the refrigerator or someplace cool while the first one bakes. Alternatively, you can place the dough balls closer together and in a circle to make decorative pull-apart rolls.


Risen and ready for the oven.

Place the rolls on a heavy duty baking sheet lined with unbleached parchment paper.

Sprinkle rolls lightly with flour and cover with a tea towel. Proof until doubled in size, about 45 minutes.

About 20 minutes before baking, heat oven to 400 degrees (205C).

For a light shine and crisp baked crust, brush rolls with lightly salted water immediately before baking. I use a silicone pastry brush.

Perfect for mini sandwiches, too.

Bake in preheated oven until the tops are golden brown and the bottoms sound hollow when tapped, about 25 to 30 minutes. Cool on a wire rack. Store in an airtight container or freeze. If desired, reheat at 350F (175C) for 5 to 10 minutes before serving. The crust will crisp right back up.


Still hungry? You'll find links to all my sweet and savory Less Fuss, More Flavor recipes (including several other bread recipes) in the Farmgirl Fare Recipe Index.

© FarmgirlFare.com, the crazy for carrots foodie farm blog where Farmgirl Susan shares stories & photos of her crazy country life on 240 remote acres.

Tuesday, November 21

Friday, June 16

Daily Farm Photo: 6/16/06


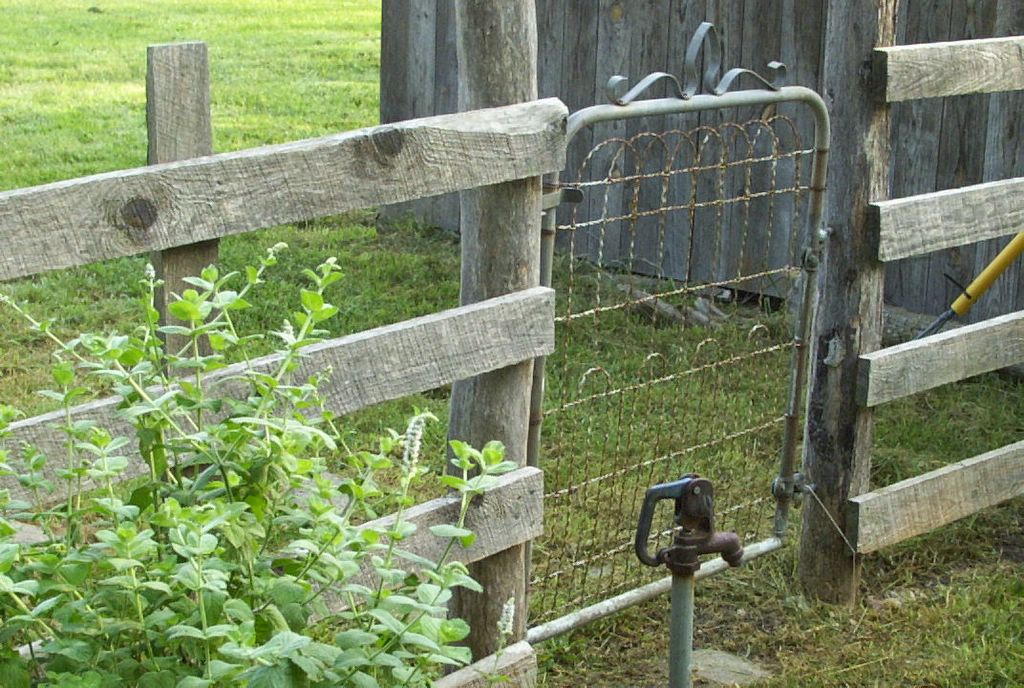
Garden Mint & Handmade Fence

Welcome new visitors to Farmgirl Fare!
Looking for more food? You'll find links to all of my tasty, original recipes and food posts in the sidebar of the homepage under "Previous Posts: Food Stuff w/ Recipes" and "Previous Posts: More Food Stuff." I also invite you to visit my garden blog offshoot to Farmgirl Fare, In My Kitchen Garden.com. It's definitely not just for gardeners! Click here to read why.

If you'd like to scroll through more Farm Photos, click on the monthly archives in the sidebar of the homepage. To read more about a certain topic (such as "dog stories" or "recipes,"), just click on any of the labels at the bottom each post. Some of the most popular labels are: Farm Landscape Photos, Autumn Color, Sheep, Lambing Season 2007, Donkey Doodle Dandy, Lucky Buddy Bear, Robin The Beagle, Cat Photos, Same Scene New View, Farm Life Tidbits, Heart Rocks, and My Hunky Farmguy.

Or you can use the Google Custom Search box at the top of the sidebar to find whatever you like.


If you're wondering who Cary the lamb is, read this.

Click here to visit my Amazon Farmgirl Fare Favorites Store and see some of the kitchen stuff and other things I just can't live without, like my camera.

And, lastly, if you'd like to know how I went from Cultured California Chick to Manure Mucking Missouri Farmgirl and read some lighthearted stories about my early farm adventures, click here.

Thanks so much for stopping by. I welcome your comments and hope you enjoy your e-visit to my farm!

April 2007 Update: Are you a bread baker or wanna be bread baker? I'm involved in a delicious new blog project called A Year In Bread. It's twelve months, three passionate bread bakers, thirty-six recipes, and more fun than should probably be allowed in the kitchen. You're invited to come bake bread with us as we play with flour and call it research. Click here to learn more.

A year of Daily Photos ago: Front Yard Gate

Wednesday, March 22

Daily Farm Photo: 3/22/06


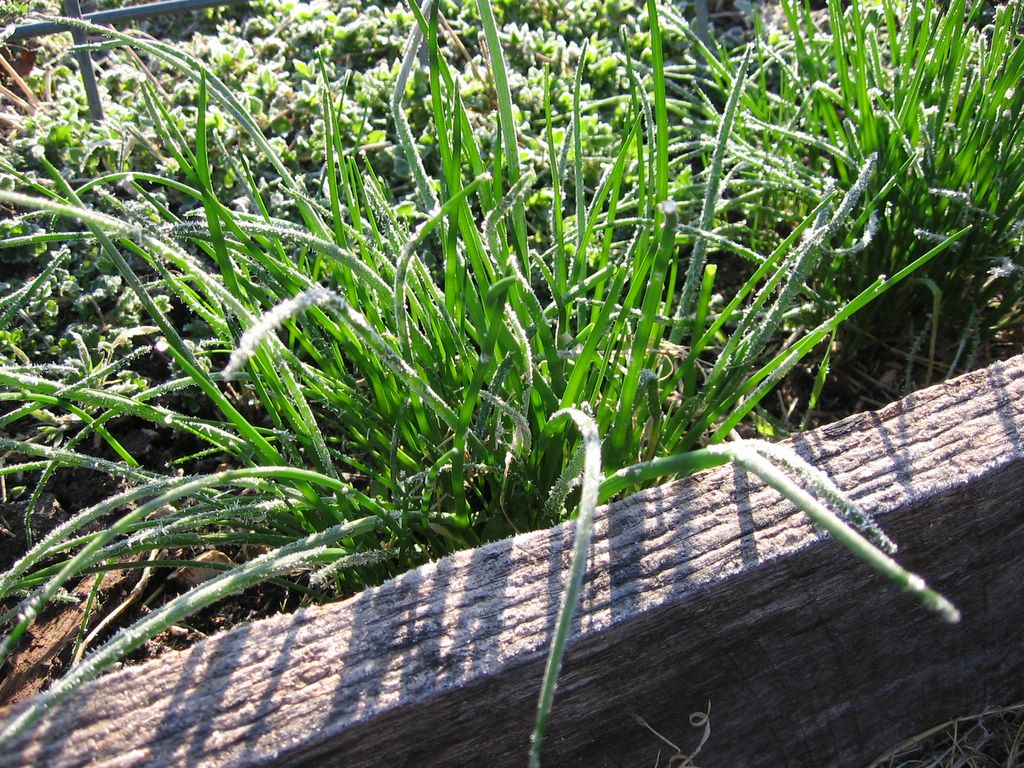
Fresh Frozen Chives

Okay, I do in fact have a (according to Whitey) boring little announcement to make, which I promise will be up later. In the meantime, this photo, taken this morning in the garden, does have something to do with it. But right now I'm headed out into the last of the afternoon sunshine. That frozen morning turned into a glorious spring day.

Saturday, February 18

Weekend Cat Blogging: Herban Cat Crossing


For Some Reason I Thought They'd Be Safer Indoors

© Copyright FarmgirlFare.com

Sunday, November 27

Weekend Herb Blogging #8: Growing & Using Mint


Cool & Minty

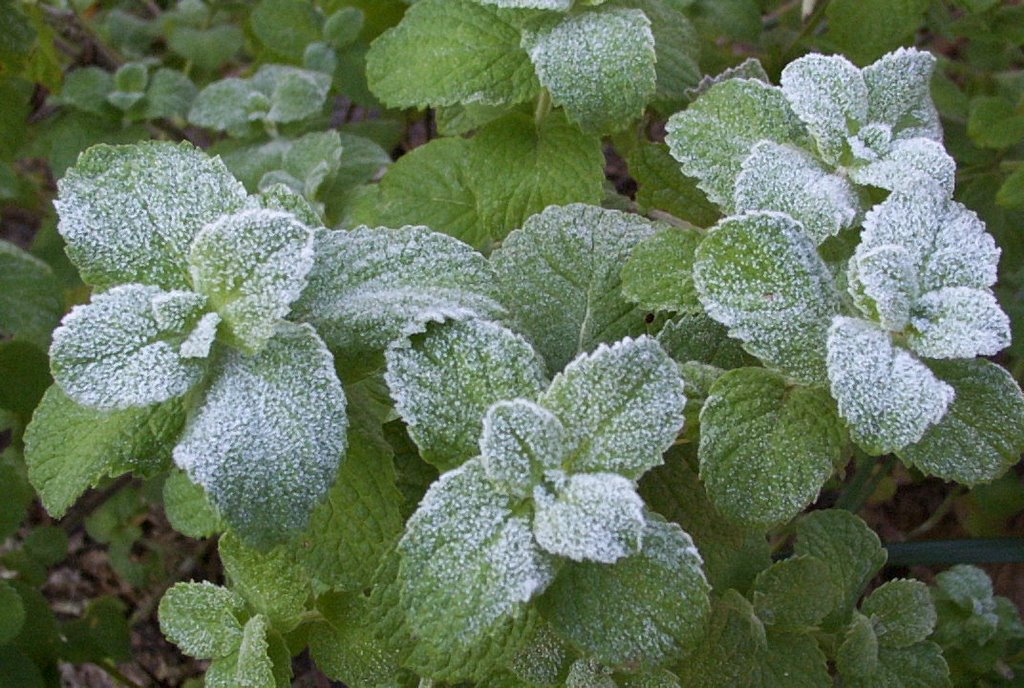
Even if you have an extremely brown thumb, you can probably grow mint. In fact, once planted, it is very hard not to grow it. Words like "aggressive spreader" and "invasive" are often used to describe this hardy perennial. If you don't watch out, it can take over your entire yard (which might not be a bad thing if you do have a brown thumb). The encroachment factor is easily remedied, though, as mint will thrive when grown in pots. Be creative with your containers; the mint in this photo is actually growing in a hollow section of a large tree stump that I filled with sheep manure and compost. Click here for a better view of the plant (and for some container gardening tips in the comments section below it).

Speaking of remedies, mint is a must-have item in the herbal medicine chest. According to Rosemary Gladstar's Family Herbal, it is rich in vitamin C, beta-carotene, and chlorophyll. It is "stimulating to the mind and creates 'wakefulness.' Whiffs of the essential oil, sometimes even the tea, will improve alertness and awareness, so it's useful when driving, studying, and during times of stress. It is an excellent anti-spasmodic and is indicated for cramps and spasms. A terrific remedy for nausea, mint is recommended for travel sickness and some cases of morning sickness. It's also great for tummy aches in children and adults. The flavor of mint cleanses the palate and can be used to rinse the mouth after a bout of vomiting."

There are several varieties of mint, with spearmint and peppermint being the most common. Mint will grow from one to five feet in height and prefers wet to moist soil and shade to partial shade. I bought this mint plant last spring at the local Garden Club Plant Sale, where members dig up and divide plants from their own gardens and sell them to raise money for their organization. This is the perfect kind of place to buy your plants, as you know that they have been thriving in your climate. The prices are usually good, too. My mint plant (which was just a tiny thing when I bought it) cost me fifty cents. When I inquired as to what kind of mint it was, I was informed that it was "garden mint--you know, a combination of every mint." Okay. It smells like spearmint to me. I also procured a couple of pineapple mint plants for fifty cents apiece as well (along with enough other herbs and plants to fill up my entire car). I think I shelled out a grand total of about twenty bucks.

The simplest thing you can do with your mint is to use it (fresh or dried) to make tea. Lemonade with fresh mint leaves is extremely refreshing. Recipes incorporating mint abound, but I confess I haven't ventured into the kitchen with my mint plants yet. Mostly I am content to tear off a leaf as I pass by a plant, crushing it between my fingers and inhaling that fresh, unmistakable scent (which is apparently stimulating my brain and calming me down). I just know it smells really nice. If you are interested in doing more with your mint than sniffing it,
Kalyn's WHB#7 post offers links to several of her favorite recipes that incorporate mint.

Weekend Herb Blogging, hosted each week by Kalyn's Kitchen, is a fun way to learn about interesting herbs & edibles from around the world while discovering yummy new food blogs. We'd love to have you join us. Just photograph and blog about an herb, plant, veggie, or flower and email Kalyn the permalink by Sunday afternoon (Utah time). The round-up of all the featured plants is published each Sunday night at Kalyn's Kitchen and is always a delightful and informative read.

New to Weekend Herb Blogging? Catch up with these links to the last two roundups: Weekend Herb Blogging #7 and Weekend Herb Blogging #6. And remember--it's never too early to start planning next year's garden. I've already received two 2006 seed catalogs in the mail--and the Garden Club Spring Plant Sale is marked on my calendar.

Friday, September 9

Wednesday, July 6

Growing Chives & a Recipe for Herbed Yogurt Cheese


Happy chives growing in my kitchen garden.

You can't go wrong with chives. They're well-mannered and friendly and get along splendidly with everything. They're the garden's equivalent of the perfect party guest: dependable and diplomatic, able to liven up even the most humble gathering. They are easy to grow and easy to harvest.

A single clump of chives, happily soaking up sun in the ground or in a pot, is adequate for home culinary use, but why stop there? Orderly rows of chive plants add grace and charm to any garden, be it a sprawling vegetable patch or formal herb bed.

Chives are the ideal plant for the lazy or time-pressed gardener, for once established, they require little maintenance, and it's practically impossible to kill them. They will endure hot, dry, humid summers with nary a droop and are hardy to Zone 3.

Pests virtually ignore them (as they do all members of the allium family), and they're even said to discourage harmful insects, including aphids and mites, from attacking nearby plants. Chives are a welcome addition to the organic garden.

Dormant in winter, chives will renew your sense of hope each year as their tiny green shoots poke out of the ground at the first hint of warmer temperatures.

In early spring, while most perennials are still shaking off their winter sleep, your already verdant chive rows will be busy transforming themselves into cheerful masses of showy, lavender-pink globes that will delight your color-starved eyes and draw scores of grateful bees to your otherwise lackluster garden.

Go Green To Save Money - Growing Your Own Fresh Herbs (2)
Extending the chive border in one of my (falling apart) raised beds with both divided and purchased plants.

Inexpensive chive plants are widely available at nurseries and garden centers, and they can also be started fairly easily from seed. I sow seeds indoors in February or March. Once they have sprouted (this may take up to three weeks), I place them in individual plugs and move them into the unheated, homemade greenhouse or outdoors, depending on the weather.

When the seedlings are several inches high, they're transplanted into the garden. I've been told that it can take a few years for chive plants to mature and bloom, but this has not been my experience. Seedlings planted in late spring were covered with flowers the following year.

Another option is to swipe some chive bulbs from a friend's garden and relocate them to yours. This will actually benefit both of you, as chives should be dug up and divided every three years. The best time to do this is in late summer or early fall, so start scouting around now for likely prospects.

The dividing process is simple. Water the chives a few hours before you begin. Then use scissors to snip them back to about four inches in height. Carefully dig them up and separate each clump into smaller clumps of three or four plants each.

Replant these smaller clumps 1/2 inch deeper than they were growing before in a spot that will receive at least six hours of sun a day. They should be spaced four inches apart in the garden, or you can plant one or more clumps in a pot. Water them well and watch them grow.

Taking care of chive plants is a cinch: I fertilize with sheep manure, mulch thickly with hay or grass clippings to discourage weeds, and remove spent blooms. Harvesting individual stems requires nothing more than a pair of scissors.

To extend your chive harvest, snip off the flower buds as soon as they appear.

If your perfect party guest is truly perfect, they should also be able to keep you company while you are in the kitchen, and this is certainly true of chives. Once you discover the hundreds of uses for chives, you'll wonder how you ever survived without them. Their mild onion flavor perks up everything from chicken salad to quesadillas.


One of my favorite ways to celebrate chives is in these easy to make Savory Chive and Sharp Cheddar Cheese Scones.

Chives even make food look better, too. Like a beautiful strand of pearls, a sprinkle of freshly-snipped chives will add instant sophistication to almost anything: a serving of mashed potatoes, a platter of stir-fried vegetables, even plain old scrambled eggs.

Your meals will begin to look as if they came out of a fashionably chic cafe. For a truly elegant touch, toss some of the edible, peppery blossoms into your salad, or float a few atop bowls of spinach soup.

Maintaining your new culinary style throughout the winter months is simply a matter of putting a few cups of chopped chives into an airtight container and sticking it in the freezer. The pieces will freeze individually, enabling you to pull out only a pinch or two whenever you need it.

Agreeable and compatible, chives are at their best when mingling with other herbs. One of the nicest ways to take advantage of this is to make herbed yogurt cheese.

Yogurt cheese is simply unflavored yogurt that has had most of the whey drained from it. It's a tasty, healthy alternative to cream cheese, sour cream, mayonnaise, or butter, and can even be made with nonfat yogurt. Once you try it, you will probably be hooked. Best of all, it's extremely easy to make.

You can make yogurt cheese by putting yogurt in several layers of cheesecloth or in a paper coffee filter set in a mesh strainer and then placing them over a dish to drain into, but these methods can be messy.

For many years I used a pair of inexpensive plastic yogurt strainers that look like cone-shaped coffee filters, but a while back I bought a handy dandy yogurt cheese maker and am so glad I did. It's neat and simple and well worth the modest investment, especially if you make yogurt cheese on a regular basis. It's easy to use, easy to clean, and has a nice tight lid for storing in the fridge.

The best yogurt cheese is of course made from organic homemade yogurt, which is also a snap to prepare: You heat some milk, mix in a heaping tablespoon of yogurt, pour it into little glass jars, and plug in the yogurt maker.

I don't use special starters or add powdered milk or do anything fancy when I make yogurt. I simply use a little bit of the last batch as a starter for the next. Every once in a while I buy a container of organic plain yogurt and use some of it for the starter to refresh the cultures.

You don't need a recipe to make herbed yogurt cheese. Just chop up whatever fresh herbs you happen to have around (I like to combine basil, oregano, parsley, and chives) and stir them into some yogurt cheese along with a splash of balsamic vinegar and some good salt and pepper. The amount of herbs you use is entirely a matter of taste. My philosophy is More, more, more.

When you think there will be more herbs than yogurt, that's probably enough. I recently made some of this for a friend who loves it, and on a whim I stirred in a container of cottage cheese. She pronounced the result even more delicious than the original version. The other day I discovered a container of ricotta in the fridge and mixed that in. It was very nice.

You will quickly find dozens of uses for this delightful concoction. You can spread it on toasted baguette slices and then stick them under the broiler for a minute or two. You can put it on a bagel along with thin slices of vine-ripened, heirloom tomatoes or serve it in a pretty dish alongside a plate of your favorite crackers.

It makes a marvelous dip for nearly any fresh vegetable (my favorites are carrots, cucumbers, and sweet red peppers). You can even slip some into an omelette.

It's a wonderful thing to bring to a potluck party or to a friend you're visiting for lunch. Just be sure to pack it in a container you don't mind parting with; I've never had anyone offer to give leftover herbed yogurt cheese back.

© FarmgirlFare.com, freshly snipped and dipped.