Showing posts with label tomatoes. Show all posts

Thursday, September 24

Summer Pasta Recipe: Sun Dried Tomato & Artichoke Pesto, Cherry Tomatoes, and Fresh Basil with Linguine or Farfalle

Cooking with Less Fuss, More Flavor

Enjoying more fast farm food from the kitchen garden

Tomatoes and basil on the third day of fall? You bet. The calendar may say summer is over, but the kitchen garden keeps to its own schedule, and mine says that tomato season is finally (finally!) in nearly full swing. The beautiful green and purple basil I've been picking since the end of June is still going gangbusters, too.

There's no better—or simpler—way to celebrate your garden fresh tomatoes and basil than to toss them with hot pasta, but adding this quick sun-dried tomato and artichoke pesto to the mix brings the dish to a whole other level.

I've made this with larger tomatoes chopped into chunks, but cherry tomatoes really work best. A mixture of red and yellow looks especially nice. I like to make this with fettuccine or farfalle (because bowties are always so much fun), but other pasta shapes would probably be good, too.

Saturday, October 25

Saturday Farm Photo:
A Different Kind of Autumn Color


Courtesy of the Kitchen Garden

A year of Farm Photos ago:
10/16/07: A Beautiful Autumn Scene (it's the donkey)
10/19/07: New Face in the Cat Cabin
10/21/07: A Flash of Brilliance
10/25/07: Absolute Autumn

Two years ago:
10/18/06: My Little Girl is Growing Up
10/19/06: High Wire Act
10/23/06: Patchy Cat on the Old Porch
10/24/06: There's That Distracting Sky Again
10/25/06: I Get This Look A Lot

Three years ago:
10/22/05: So Brief, So Beautiful
10/22/05: Farm Cats Rescue Themselves
10/23/05: Flaunt It While You've Got It
10/23/05: Are You Smiling Yet?

And out of the October kitchen came:
Easy Little Chocolate Babycakes
Whole Grain Cottage Cheese Sandwich Bread
Factory Tours & Fiesta Cottage Cheese Veggie Dip
Fresh Tomato & Basil Whole Wheat Sourdough Bread
Quick & Easy Garden Gazpacho
Homemade Tomato Vegetable Juice

© Copyright 2008 FarmgirlFare.com, the award-winning blog where we've past our official October 15th frost date without any frost, though we often get frost even earlier since we're tucked down in this little valley. Colder weather is headed our way, and while the majority of our green tomatoes are already safely in the pantry (some will turn red on their own and the rest are headed for a batch of my salsa-like green tomato relish), we couldn't help trying for a few more vine-ripened red—and orange!—ones (the ones ripened off the vine won't have anywhere near as much flavor). Thanks to floating row covers and old bedsheets we toss over the plants at night, we're still enjoying a few more—and oh how we're savoring each one. Update: Okay, so between the time I wrote this last night and woke up this morning, the farm has been completely covered with frost. Tonight we'll have the last BLTs of the season for dinner (made with bacon from the locally raised hog we had butchered this summer and served on toasted homemade bread) while the woodstove keeps us toasty warm. What a delicious contradiction!

Sunday, October 12

Recipe: How To Make Your Own V8 Juice (Easy Homemade Vegetable Tomato Juice)

 Cooking with Less Fuss, More Flavor

Bye bye, V8 juice! This healthy, homemade V4 version will blow you away.

Would you rather have your refreshing summer vegetables raw? Check out my quick and easy gazpacho recipe. Is your garden full of green tomatoes that won't have time to ripen? Turn them into my super simple, super popular salsa-like green tomato relish. Or learn how to ripen green tomatoes indoors the really easy way.

I have a sheep farmer friend who recently told me that she swears by Campbell's V8 juice when working out in the heat. She says it's more rejuvenating than drinking water or Gatorade and literally makes the difference between wanting to keel over and being able to keep going for hours.

This is the kind of stuff I need to know—especially during haying season.

But Campbell's V8 juice is mostly made from water and tomato paste, plus a frightening amount of salt. (Since you lose so much sodium while sweating, this may be part of the reason for its revitalizing abilities.) So what would be better than V8? Homemade V8!

Technically my version is only V4, but you can add more vegetables if you like. Either way, this healthy, easy to make vegetable tomato juice will blow that V8 away.
 

To make it, all you do is chop everything up and toss it into a pot, simmer until soupy, then put it through a food mill (I have this one and love it). It's a great way to use up overripe, imperfect, or just plain ugly tomatoes, which you can sometimes find for a deal at farmers' markets. The first time I made it I used a bunch of tomatoes from my kitchen garden that had all cracked after a recent rainstorm and needed to be dealt with immediately.

Tuesday, October 23

Recipe: Fresh Tomato & Basil Whole Wheat Sourdough Bread

Whole wheat sourdough bread made with fresh tomatoes and basil - FarmgirlFare.com

Are you a beginning bread baker? You might find my Ten Tips on How To Bake Better Artisan Breads at Home helpful.

One of the side effects of having a food blog is that I get lots of e-mail. Food e-mail. Bread e-mail. For a bread baking foodie, there's nothing better than finding a note like this in your in box:

It occurred to me that you might be interested in trying this bread. We tried making tomato basil whole wheat sourdough last week with tomatoes (as water) and roughly chopped basil leaves.

I'd be happy to send you the percentages if you are interested. It just seemed like something that was right up your alley. It was really quite delicious. Simply sliced with some smoked cheddar cheese it made a delectable sandwich.


Yes, it was definitely right up my alley, and it really was quite delicious. Even though they've been baked, you still get that fresh tomato flavor. Many thanks to fellow breadies Joel and his wife (in the wonderful state of West Virginia!) for generously sharing their recipe.


Fresh Tomato & Basil Whole Wheat Sourdough Bread
Makes 2 loaves, approximately 20 ounces each

What immediately piqued my interest about this bread was that it uses chopped fresh tomatoes in place of water. Such a brilliant idea. My only concern was what color it would turn out. I used to make savory feta cheese & sun-dried tomato scones when I had my little bakery cafe in Northern California, and while quite tasty, they were an odd sort of pinkish orange.

Using whole wheat flour, which bakes up darker than white flour, easily solves this problem. Joel's version calls for 100% whole wheat flour, but I used 50% whole wheat flour and 50% bread flour.

The tomatoes don't need to be peeled, which is always good news in my book. If you don't have any sourdough starter handy, I'm thinking that you could try replacing all or some of the water with fresh tomatoes in pretty much any bread recipe.

Creating a sourdough starter takes several days but isn't difficult to do. There are many different types, and recipes for them abound. I made my French levain starter several years ago using the instructions in Daniel Leader's Bread Alone, one of my favorite bread books.

I also love Local Breads, is Daniel's latest bread book, and am looking forward to making some of the European starters in it hopefully soon.

Joel's starter is 50% flour, 50% water, refreshed about 6 to 8 hours before using it. I simply refreshed my 50%/50% levain starter like I do when I bake pain au levain by adding flour to the entire batch and then letting it sit on the counter overnight. I think whatever sourdough starter you have should work in this recipe.

A digital kitchen scale makes baking and cooking so much easier. I love my 11-pound Oxo Good Grips scale (which was voted #1 by America's Test Kitchen for good reason) and often use it several times a day. The pull-out display is awesome, and it's also great for weighing postage.

As always, I urge you to seek out local and organic ingredients, as they really do make a difference.

300 g refreshed sourdough starter (10-1/2 oz,1-1/8 cups)
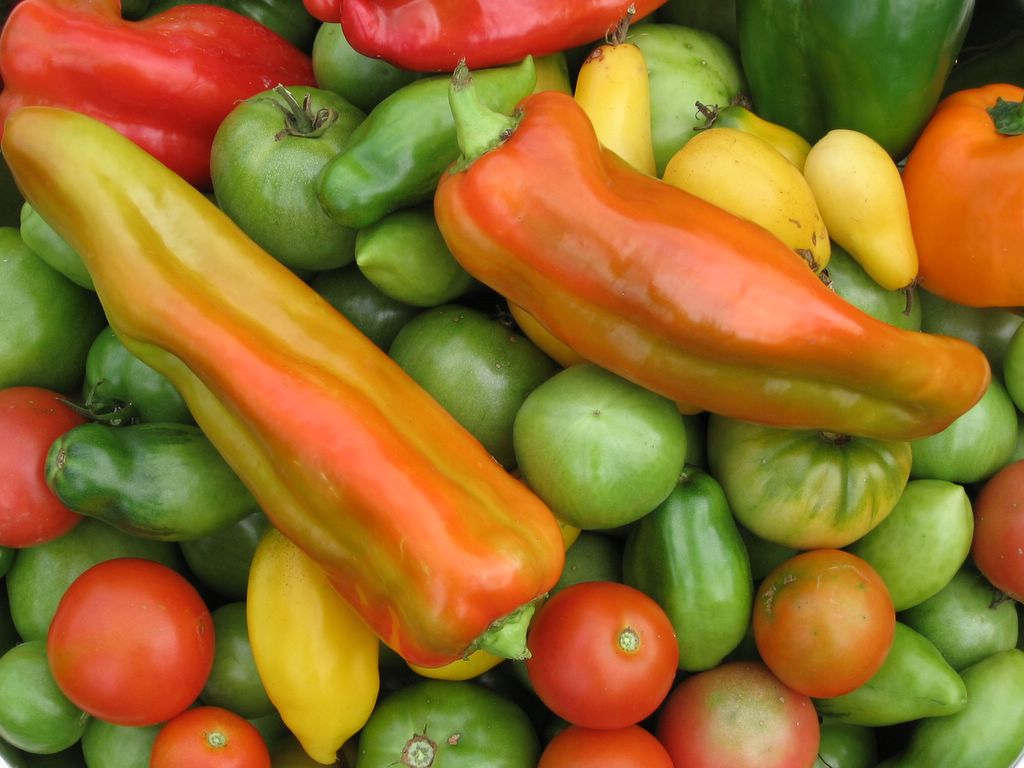
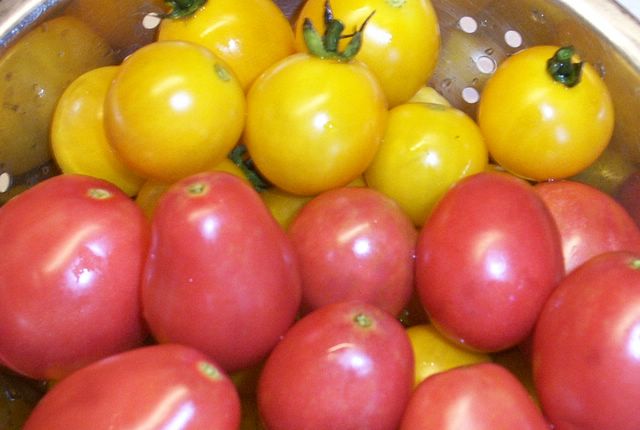
300 g coarsely chopped fresh tomatoes, preferably juicy organic heirlooms (about 2 medium, 10-1/8 oz)
30 g coarsely chopped fresh basil (2 large handfuls, 1 oz)
225 g whole wheat flour (7-7/8 oz, 1-3/4 cups)
225 g bread flour (7-7/8 oz, 1-3/4 cups)
113 g warm water (4 ounces, 1/2 cup; may not need)
1 Tablespoon salt (15ml)

Combine the sourdough starter, tomatoes, and basil in a large bowl. Stir in the whole wheat flour and most of the bread flour. Mix until roughly combined, then let rest for 20 minutes. This is the autolyse.

At this point, you can add up to 4 ounces (1/2 cup) warm water if your dough seems like it's going to be too stiff (it will depend on how juicy your tomatoes are). Or you can add more chopped tomatoes; I didn't have any more or that's what I would have done. How slack (wet) you want the dough is up to you.

With the extra 4 ounces of water, mine ended up so slack it was sticky and hard to work with, and the loaves really spread out while proofing despite using a couche. The bread still came out great, but I'll make a slightly stiffer dough next time.


Kneaded and ready to ferment (rise for the first time)

Turn the dough out onto a floured work surface and knead in the salt. Continue kneading for 10 to 15 minutes until the tomatoes are incorporated and the dough is soft and smooth, adding more bread flour as needed.

Place the dough in a straight-sided food grade plastic container with a snap-on lid and let it rise (ferment) until it has doubled in size, about 2 to 4 hours. You should be able to push a floured finger deep into the dough and leave an indentation that doesn't spring back.

Cover a baking peel (also called a pizza peel) with unbleached parchment paper (this is wonderful stuff) and sprinkle it with flour.

Turn the risen dough out onto a lightly floured work surface, flattening gently with your hands to break up any large air bubbles. With a bench/pastry scraper (these are so handy; I use mine all the time) or large knife, cut the dough into two equal pieces and shape them into rounds or logs about 12 inches long.

An hour before baking, place a baking stone (the secret to crusty breads and amazing pizzas) on the middle rack and heat the oven to 500 degrees.


Nestled in their couche and ready to proof


Place the loaves smooth side up on the parchment paper, about 2 inches apart. Make a couche by lifting the parchment paper between the loaves, making pleats and drawing the loaves together. Tightly roll up two kitchen towels and slip them under the parchment paper on the sides of the two outer loaves to support and cradle them.

Lightly dust the tops of the loaves with flour and cover them with plastic wrap or a damp tea towel (my preference). This nifty parchment couche trick comes from Local Breads. Alternatively, you can use a traditional, well-floured canvas couche as I did above.

Let them proof until almost doubled in size, about 1 to 2 hours. If you press a floured fingertip into the dough it should spring back slowly.

Quickly score the tops of the loaves with a blade or sharp knife (I use a large serrated knife) and slide them, still on the parchment, onto the baking stone. Bake until the loaves are dark golden brown and the bottoms sound hollow when tapped, about 25 to 30 minutes. Try to let them cool for at least 40 minutes before tearing into them.

Store in a resealable plastic bag at room temperature or freeze.

Baking notes: I only had enough garden tomatoes left to make this recipe once, but I'll be experimenting with it more next summer. I'm thinking the tomato flavor could be enhanced even more with the addition of a few slow roasted tomatoes, a speciality of my food blogging pals Kalyn and Alanna. Maybe next year I'll finally talk myself into turning the oven on for hours and hours during the mid-summer heat to make some. They both keep assuring me it's worth it.

Still have more flour left? You'll find links to more scumptious bread recipes in the Farmgirl Fare Recipe Index.

© FarmgirlFare.com
, where Farmgirl Susan shares recipes, stories, and photos from her crazy country life on 240 remote Missouri acres—and there's always at least one sourdough starter in the fridge.

Saturday, October 13

Recipe: Low Fat, Full Flavor Fiesta Cottage Cheese Veggie Dip Recipe (and Going on Factory Tours)


Tomatoes, peppers, cilantro, and scallions: making a memory even tastier.

When I was a kid, one of the things we often did while on vacation was to go on factory tours. Except for a few, like the Volkswagon factory in Germany, these places usually manufactured or processed some sort of food. To this day, details from those visits make up some of my clearest childhood memories.

There was, for example, the pineapple factory in Hawaii where pineapple juice came out of a drinking fountain. And the tuna factory where two of the ladies cutting up large whole fish on a long assembly line smiled and pointed at me as I pinched my little nose in an attempt to escape the overpowering scent of tuna.

I remember watching thousands of Hershey's chocolate kisses riding stair-step conveyors at the Hershey factory in California, and being disappointed when the tour of the "real" factory in Hershey, Pennsylvania turned out to be nothing more than an amusement park type ride.

As an adult, I happily toured the Ben & Jerry's ice cream plant in Waterbury, Vermont not once but twice. I tasted ice cream right off the assembly line and saw the original note sent to Ben & Jerry from a fan—written on an ice cream carton lid—suggesting they create a flavor called Cherry Garcia.

I also discovered that through much experimenting in the early days, Ben & Jerry determined the best way to break up Heath Bars into the perfect sized chunks for their Heath Bar Crunch ice cream was to drop a case of the candy bars onto the ground from a stepladder. They employ a slightly more advanced technique now.

While touring the Jelly Belly jelly bean factory a few years ago, my mother learned that the flavored outside layer on each jelly bean is applied by tumbling them around in what look like gigantic clothes dryers. And at the on-site gift shop, Jelly Belly "seconds" are packaged up and sold as Belly Flops.

After a tour of the memorabilia-filled Coca-Cola headquarters in Atlanta, Georgia, a friend of mine had a chance to taste several flavors of soda only available outside the U.S.

Factory tours have become quite popular, especially with families, because they're interesting, usually kid-friendly, and often free. There are even books devoted to the subject. Watch It Made In The U.S.A.: A Visitor's Guide To The Best Factory Tours and Company Museums by Karen Axelrod and Bruce Brumberg promises to "help you and your family discover information about more than 300 ordinary and extraordinary products most of us take for granted."

While factory tours are fun for people of all ages, I do think the fascinating glimpses they give us into what often seem like whole other worlds have the most profound effect on children. Every once in a while Joe still fondly recalls the tour of a potato chip factory he took with his Cub Scout troop some forty years ago.

The most memorable factory I've ever visited was actually the one closest to home. It was a tortilla factory owned by the mother of my very first friend (we "met" when we were just a few months old), and one year she treated our Brownie troop to a personal tour.

We saw enormous vats of masa, watched tortillas travel along what seemed like miles of conveyor belts, and were given handfuls of warm tortilla chips by the ladies running a machine that magically coated the chips with nacho flavored seasoning.

Even without the tortilla factory, my friend's mother stood out from the crowd. She put an antique wooden carousel horse with a tail made from real hair in the living room, zipped around in a classic Porsche roadster, and once fed us French toast for dinner. They were a family of expert skiers and had a snow cabin full of bunk beds up in the mountains. She was the only mother in the neighborhood we called by her first name, and her entire face lit up when she smiled.

She also spent a lot of time devising ways to get people to eat more tortillas. Long before the days of desktop publishing, she and her mother put out a newsletter called Tortilla Talk, which they filled with interesting recipes using tortillas and tortilla chips.

Back in early August, the first ripe tomatoes from the garden and an ongoing cottage cheese kick prompted this e-mail message to my mother: What was that stuff you used to make a long time ago with cottage cheese and salsa or tomatoes or whatever? And what did you do with it once you made it—just eat it with chips?

The recipe for 'Gayle's Caliente Cottage Cheese Dip' arrived in my inbox soon after, and I wasn't surprised to find that it was from Tortilla Talk. Below it my mother had added, Gayle could be Mrs. Pete Wilson. I've since learned that the recipe did indeed originate in the (now) former First Lady of California's kitchen.

I took the original six-ingredient recipe, applied my More More More motto to it, and came up with this colorful, veggie-packed version I've been devouring ever since. It's always nice when something that's so good for you tastes so good, too. It's even low fat.

So what memorable factory tours have you been on?


The more color, the better is what I always say.

Farmgirl Susan's Fiesta Cottage Cheese Veggie Dip
Makes about 3 cups

Gayle's recipe called for 3 dashes of Tabasco and a 4-ounce can of diced green chiles, which were a staple in many pantry cupboards in our neighborhood when I was growing up. I opted to use a chopped fresh jalapeno pepper instead, but canned chiles would add a nicely flavored kick.

Using yellow or orange tomatoes and/or sweet peppers will make the dip even more colorful. As always, I urge you to seek out local and organic ingredients whenever possible. They really do make a difference.

Ingredients:
1 16-ounce container organic cottage cheese
1 cup chopped Roma, San Marzano, or other paste tomatoes
(about 4 large)
1 cup chopped sweet red pepper
3 large scallions
(green onions) white and green parts, chopped
1 large clove garlic, minced or 1/2 teaspoon garlic powder
1 jalapeno pepper
, chopped (optional)
1/4 cup chopped fresh cilantro
1 teaspoon Worcestershire sauce
1 teaspoon cumin
1/2 teaspoon salt


Instructions:
Mix all the ingredients in a medium bowl. Feel free to add even more veggies if you like. The original recipe says to chill at least 3 hours before serving, then pass with tortilla or corn chips. Waiting a few hours, or even overnight, does improve the flavor, but, as usual, I nibbled away while I chopped and mixed, and it tasted just fine to me.

It's funny, though, how you can add so many ingredients to a container of cottage cheese and have it all fit back in the original container. This dip will keep two to three days in the fridge.


Turn it into instant coleslaw!

What else can you do with it?
Personally I think this dip tastes great just plunked in a bowl and eaten with a spoon, which is the way I've enjoyed most of the six or so batches I've made over the past few months. It's a nice (and healthier) change from plain cottage cheese. If you haven't used up all your cabbage making my
Mexican Jumping Bean Slaw, simply combine some Fiesta dip with shredded cabbage for another new twist on coleslaw.

You could also use it to fill an omelette or top a baked potato. Or make a quick vegetarian burrito by stirring in a can of black beans and a can of corn into either the plain dip or the coleslaw and wrapping it all up in a flour tortilla, perhaps with an extra sprinkling of chopped fresh cilantro. You could probably even spread some on a sandwich.

Can you tell I love this stuff?

Still hungry? You'll find links to all my sweet and savory Less Fuss, More Flavor recipes in the Farmgirl Fare Recipe Index.

© FarmgirlFare.com, the always on tour foodie farm blog where Farmgirl Susan shares stories & photos of her crazy country life on 240 remote acres.

Thursday, September 20

Kissing Summer Goodbye
With The Easiest Greek Salad Ever


One Of My Favorite Ways To Celebrate Tomato Season

You'll find the recipe (if you can call something so simple a recipe) over In My Kitchen Garden, along with a little bit about my Less Fuss, More Flavor kitchen philosophy. You didn't know I tend a kitchen garden blog? And it's not just for gardeners either. Click
here to find out why.

Thanks to the culinary talents and generosity of Farmgirl Fare readers, I have two other wonderful seasonal recipes I'm planning to share: Carrot, Raisin, & Zucchini Bran Muffins (a new variation of my beloved bran muffin recipe) and Tomato Basil Sourdough Bread. But, as usual, I'm racing the calendar here. If you like bran muffins and can still get your hands on some zucchini, you might want to freeze some. For a dozen muffins you'll need 1 packed cup (8 ounces) of grated zucchini. You can read all about freezing zucchini in this post. And don't miss the comments section; it's full of helpful zucchini tips, ideas, and recipes.

As for the bread, it needs to be made with fresh basil and tomatoes. Except for a couple of gangly cherry tomato plants in the greenhouse, my really pathetic tomato season is pretty much over. Last night I savored the final Greek salad of the summer--while standing in the kitchen of course. If Tomato Basil Sourdough Bread sounds like something you'll want to make, do you still have tomatoes? Or should I wait and post the recipe next year?

If you don't yet do sourdough (which we're going to tackle soon at A Year In Bread), I think this fresh tomato technique could be used in almost any bread recipe, including the one for the beautifully simple four hour Parisian baguettes from my new favorite bread book, Local Breads by Daniel Leader.

The bread recipe wouldn't be up until next week, so let me know if you'd like to see it. Thanks!

Other Ways I Enjoy Fresh Tomatoes:
My Less Fuss, More Flavor Fresh Pizza Sauce
Savory Tomato Pesto Pie
Tomato Pesto Pizza, My Basil Pesto Recipe, & A Simple Tomato Salad
Three No-Cook Summer Recipes: Mexican Jumping Bean Slaw, Easy Vegetarian Tacos, & High Kickin' Creamy Tomato Dressing
Cream Cheese & Tomato Sandwiches On Italian Black Olive Cheeks
My Seven Second Tomato Glut Solution
Colors Of Summer Salad
Summer In A Bowl

© 2007
FarmgirlFare.com
, the award-winning blog where Farmgirl Susan shares stories & photos of her crazy country life on 240 remote Missouri acres.

Saturday, September 1

Three No-Cook Summer Recipes:
Mexican Jumping Bean Slaw, Easy Vegetarian Tacos & High Kickin' Creamy Tomato Dressing

When Life Gives You Five Enormous Cabbages. . .

Okay, life didn’t exactly give me the cabbages, but when they’re twenty cents a pound and locally grown, in my book that’s practically free—and obviously meant to be. So that was why one day last summer I tossed twenty pounds of cabbage into my supermarket shopping cart.

Once in the kitchen with my bounty, I realized there was no way all those cabbages were going to fit in my already crowded refrigerator, which meant I had to store them in a cooler with ice packs. I then proceeded to stuff myself with cabbage until I was sick of it, which is of course what true seasonal eating is all about.

I was also determined to come up with new ways to enjoy this extremely nutritious member of the Cruciferae family of vegetables. Inspired one day by various ingredients that were all hanging around the kitchen hoping to be eaten soon, I tossed them together with a few pantry staples and created this colorful salad that I immediately named Mexican Jumping Bean Slaw.


I’d forgotten all about it until a couple of weeks ago when I arrived home toting five locally grown cabbages. Obviously I didn’t come down with a case of self-restraint over the past year. Fortunately these little darlings weighed in at less than a pound apiece. They even all fit in the fridge.

The slaw was as good as I’d remembered it, and would be perfect for a potluck. While it tastes great on its own as a side dish, a snack, or a light and healthy lunch, this time I decided to try stuffing some of into warm homemade taco shells. I topped these refreshingly different vegetarian tacos with chopped tomatoes, cilantro, a drizzle of dressing, and a dollop of sour cream. Oh yeah.


Mexican Jumping Bean Slaw

Serves 4 to 6 — Recipe may be doubled

This delicious and healthful coleslaw-type salad doesn’t actually contain any jumping beans and is more Tex-Mex than Mexican, but when it comes to dubbing new dishes I’ll admit that sometimes catchy wins out over reality. Besides, with a name like Mexican Jumping Bean Slaw, you might even be able to talk any picky little eaters at your table into seeing if they’re able to pop a bite in their mouth before it jumps right off their fork.

The snappy tomato dressing, which was inspired by last summer's Seven Second Tomato Glut Solution (oh how I wish I had that glut this year), whizzes together in seconds in the blender and can be used on all sorts of other things besides this slaw (see my suggestions at the end of the recipe), but you can always use a bottled dressing instead. Trader Joe’s sells a lowfat creamy cilantro dressing in their refrigerated section that’s full of flavor but not calories.

The optional cooked chicken turns this into a heartier dish that’s perfect for a summer supper with friends, or for feeding people who simply can’t fathom the idea of eating a vegetarian taco.

As always, I urge you to seek out local and organic ingredients whenever possible. They really do make a difference in so many ways. Cans of organic black beans and organic corn are versatile pantry staples, and both can often be found for about a dollar.

3 cups (about 9 ounces) shredded green cabbage
1 cup (about 3 ounces) shredded purple cabbage
2 large sweet red peppers, diced
2 medium carrots, grated
4 large scallions, chopped
1 15-ounce can organic black beans, drained and rinsed
1 15-ounce can organic whole sweet corn, drained or 1-1/2 cups cooked fresh corn
2 cups shredded or diced cooked chicken (optional)
Salt to taste

2-1/2 cups High Kickin’ Creamy Tomato Dressing (see recipe below)

In a large bowl, combine green cabbage, purple cabbage, red peppers, carrots, black beans, and corn. Stir in chicken if desired. Add 2 cups dressing and mix well, adding another 1/2 cup dressing if desired. Salt to taste. Serve immediately, or for best flavor, chill for several hours or overnight. Slaw will keep in the fridge for 2 to 3 days.


Mexican Jumping Bean Slaw Tacos

Few Tablespoons olive or canola oil
Corn tortillas

Optional toppings:
Chopped vine-ripened tomatoes
Chopped fresh cilantro
More High Kickin' Creamy Tomato Dressing
Sour cream
Guacamole or diced avocado
Shredded cheese

Heat 2 Tablespoons oil in a large skillet. Add two or three tortillas. Using tongs, turn tortillas over so that both sides are covered with oil. Let cook, turning once or twice more, until just starting to crisp, 2 to 3 minutes. Set on a paper towel-lined plate and sprinkle lightly with salt. Cook the remaining tortillas, adding more oil to the skillet as needed.

To serve, fold warm tortillas in half and stuff with Mexican Jumping Bean Slaw and optional toppings, drizzling with more High Kickin’ Creamy Tomato Dressing if desired.

High Kickin' Creamy Tomato Dressing
Makes about 3-1/2 cups

1 pound juicy, vine-ripened tomatoes (about 3 medium), coarsely chopped
1 cup yogurt (I use lowfat or nonfat)
1 cup sour cream (I use lowfat)
3 Tablespoons apple cider vinegar
3 cloves garlic, peeled & chopped
1 Tablespoon ground cumin, preferably freshly ground
1 teaspoon ground coriander seeds, preferably freshly ground
1 teaspoon chile powder (or more to taste)
1/2 teaspoon salt

Combine all ingredients in a blender and blend until smooth, adding a little more tomato if it’s too thick. Store in refrigerator for up to 3 days. Warning note: The heat from the chile powder in the dressing becomes more pronounced the next day.

Other ways to enjoy this dressing:
--Mixed into a Tex-Mex potato salad
--Drizzled over a platter of sliced garden tomatoes
--Tossed with a green salad
--With a plate of grilled summer squash
--In your favorite chicken salad
--As a quick way to give rice salad a kick

© FarmgirlFare.com, the cabbage crazed foodie farm blog where Farmgirl Susan shares stories & photos of her crazy country life on 240 remote Missouri acres.

Saturday, August 25

Tomato Pesto Pizza, My Favorite Basil Pesto Recipe, & The Simplest Tomato Salad

Tomatoes & Homemade Pesto Are
A Match Made In Summer Eating Heaven


Homemade basil pesto & tomato pizza (my easy dough recipe is here)

When we're young and naive and clueless in the kitchen, we naturally look to those who are older and more knowledgeable for guidance and advice. And like certain traumatic experiences on the childhood playground or the junior high school dance floor, some of what we're told ends up sticking with us for life.

Garlic salt is a waste of money because half of what you're paying for is plain old salt; buy pure garlic powder instead.

Bad water makes bad coffee.

Overripe bananas will always give you the best tasting banana bread.

And fresh tomatoes should never, ever be put on a pizza because they'll make it soggy.


To this day I wonder why anyone would purchase garlic salt instead of garlic powder or granulated garlic. When it comes to coffee, I'm borderline obsessive regarding every aspect of its preparation, and most people would probably run away screaming if they saw the scary black bananas I often use when baking.

But it took many years of deprivation before I realized that whole thing about not putting fresh tomatoes on pizza was positively flat out wrong.

A freshly picked, vine-ripened tomato from the garden is, for many people, the epitome of summer eating. For me, it's a tie between tomatoes and fresh basil pesto. When combined, these two symbols of summer become much more than the sum of their parts, and never more so than on a homemade pizza.

Like a hunk of old-fashioned devil's food cake, a salad of freshly picked lettuce, or a perfectly grilled steak, a pizza topped with basil pesto and big slices of orange tomatoes is one of the most beautiful things you'll ever see on a plate. And of course leftover pizza of any kind is one of life's truly great inventions.

For the 8-inch pizza pictured above, I spread a thick layer of pesto on the dough, covered it with slices of fresh mozzarella, added slices (not halves) of sweet, fat cherry tomatoes, then sprinkled on some coarsely grated pecorino romano.

For a second pizza, I completely covered the pesto with a layer of chopped Roma tomatoes and then added the cheese. I cooked them both at 500 degrees on a hot baking stone on the lowest rack of the oven until the crust was golden and the cheese was bubbly and starting to brown. You'll find my simple and straightforward pizza dough recipe here.

If your chopped tomatoes are really juicy, you can put them in a colander or strainer and let some of the water drain out before putting them on your pizza. I did this with the Romas as an experiment, but they were so meaty it didn't make much of a difference.

If you don't have the patience to make yourself a mid-summer pizza (or the desire to turn your kitchen into a blazing inferno in the process), the next best thing to do with your pesto and tomatoes is to combine them into a pie. I created this easy and popular Savory Tomato Pesto Pie recipe last summer, and it really is worth turning on the oven for.*


But if neither pizza nor pie are an option, toss a pile of chopped tomatoes with some pesto, stir in a can of garbanzo beans (rinse them first)**, sprinkle on some freshly grated parmesan or pecorino romano, and in less than two minutes you'll not only be digging into a scrumptious and healthy salad, but you'll also have saved yourself from simply gobbling up all of your precious homemade pesto with a spoon.

Basil has proven to be one of the few no-fail crops in my Missouri kitchen garden, and despite making and freezing enough pesto each summer to last me through the rest of the year, I still always end up with more basil than I can use.

This spring, however, I somehow forgot to start any basil seeds. I also forgot to order any. And then I forgot to plant the partial packets of old seeds I found after a frantic, late June search through my highly unorganized seed stash.

I've become so absentminded lately that I'm starting to wonder if my body has been taken over by a pod person who only lets my real mind out maybe once or twice a week.

Thanks to the generosity of a couple of fellow gardeners—including a city friend whose tiny garden I usually supply with seedlings—and an agonizing several minutes during which I eventually talked myself into plunking down four bucks for a potted basil plant at the supermarket, I now have a small but respectable patch of basil flourishing in the garden.

I made my first batch of pesto last week, and there's already enough basil for another one. A dozen kinds of ripe tomatoes cover every flat surface in the kitchen. Things are getting back to normal in my culinary universe.

So what's your favorite way to enjoy pesto and tomatoes? And what's the best—or worst—kitchen or cooking tip you've been given? I need to know if I've been missing out on anything else as good as fresh tomatoes on homemade pizza.

Update: This was the first year I grew purple basil, which makes fantastic, albeit slightly odd looking pesto. For other ideas for using purple basil, along with a super easy white bean pesto spread recipe, check out this post. And Farmgirl Fare readers offer up more wonderful ways to enjoy purple basil here.


At last! Beautiful basil in my kitchen garden.

Farmgirl Susan's Lower Fat, Full Flavor Basil Pesto
Basil pesto recipes abound, but this one is different than most: it calls for almonds and tomatoes, and a relatively small amount of olive oil. I love olive oil as much as the next person, but some pesto recipes call for 2 cups of basil and 1 cup of olive oil. They taste sublime (how could they not?), but personally I'd rather consume all those extra calories in a piece of pie, and my recipe lets you do just that.

The idea of using almonds came from a pesto recipe I found in The Sonoma Diet, a delicious cookbook for anyone who loves good food, even if you aren't trying to lose weight. I don't care for pine nuts, but I'd never thought to use almonds in pesto, and I was thrilled with the results. I like using roasted and salted almonds.

The tomatoes are my own addition. They give the pesto a subtle new flavor while thinning it out. I love the strong, salty taste (and lower price) of pecorino romano and always keep some around, but real parmigiano reggiano can of course be substituted.

Makes about 1½ cups

1/2 cup (about 2½ ounces) raw or roasted and salted whole almonds
4 ounces fresh basil leaves (about 4 cups packed, but it's best if you weigh it; I love my Oxo 11-pound digital scale)
3 to 6 large cloves garlic, peeled
1/2 cup finely grated pecorino romano cheese (or parmesan)
10 ounces fresh tomatoes (about 3 smallish) any kind, quartered
1/2 teaspoon salt
6 Tablespoons extra-virgin olive oil, or more if desired

If using raw almonds, spread them on a baking sheet or piece of aluminum foil and place in a 350 degree oven for 8 to 10 minutes; a toaster oven works great for this, especially in summer (I adore my Oster Toaster Convection Oven and use it daily all year round).

Process the almonds and garlic in a food processor until finely chopped. Add the basil, pecorino romano, tomatoes, and salt and process until thoroughly combined and the consistency you like. Alternatively, you can use a gigantic mortar and pestle if you're trying to build up your arm muscles.

With the motor running, drizzle in the olive oil through the chute. Add more salt to taste if necessary and more olive oil if desired.
This pesto will keep several days in the fridge, or you can freeze it. Cover the top with a thin layer of olive oil to keep it from discoloring if that sort of thing bothers you.

*Last week I was surprised to discover that my Savory Tomato Pesto Pie post, which I had completely forgotten I'd begun by saying "Sometimes it's good to be alone in the kitchen," was published almost one year to the day before my recent review of Alone In The Kitchen With An Eggplant. By the way, have you divulged what you eat when you find yourself alone in the kitchen yet? The ever growing list we're compiling is truly fascinating. So do tell!


© FarmgirlFare.com, the pesto slathered foodie farm blog where Farmgirl Susan shares recipes, stories, and photos from her crazy country life on 240 remote Missouri acres.

Saturday, October 14

Daily Farm Photo: 10/14/06


Freshly Picked Fall Color

And just in time, too. Twenty-one degree frosty mornings have arrived on the farm! Oh the warmth from the first fires in the woodstove each year always feels extra cozy. But back to this beautiful bounty. So what am I going to do with it? Green tomatoes will actually turn red once they've been picked, so I'll be setting some aside for salads as I have all kinds of autumn greens in the garden and greenhouse. They won't develop that deep, vine-ripened flavor, but I figure it's a small price to pay for dining on organic, heirloom homegrown tomatoes on Thanksgiving. (And you know they'll still taste miles better than anything commercially available.)

As for the rest? It's time to make some of my Green Tomato Relish! This tasty (and oh-so-easy) concoction is really more like a salsa, so don't let the name scare you away. You can put it on everything from flank steak to home-fried potatoes, and it'll keep right in the fridge for weeks--no canning necessary. Click here for the recipe--and I do hope you'll let me know if you make some.

A year of Daily Photos ago: Dan & His New Charges

Tuesday, August 22

What To Do with Too Many Tomatoes? Grab the Blender!


Gorgeous bounty from the kitchen garden—and lots of it.

I'm blaming the heat.

In the past 48 hours, not only have I been unable to come up with an interesting little story to go along with this new recipe, or figure out a nice way to photograph it, I can't even think of a decent name for it.

If I call one more creation 'Susan's Super Simple Summer Something,' people are going to start thinking there's something wrong with me.

And the other day I did start thinking something was wrong with me. I kinda sorta almost started getting tired of eating tomatoes. At first this didn't seem possible. After all those months of patiently yearning—not to mention all that sheep manure fertilizer I hauled up to the garden—had my child-like thrill over that first ripe tomato already given way to the glutton's nonchalance?

Then I realized that I've already been enjoying ripe tomatoes from the garden
for six weeks now. Six weeks of pretty much getting all of my 5 to 9 daily servings of fruit and vegetables from tomatoes. And then I didn't feel so bad anymore.

But I still had a problem. Everywhere I turned in the kitchen I saw ripe tomatoes in desperate need of being dealt with. And while the rest of the world apparently gathers up all of their imperfect, overripe, questionable looking tomatoes and roasts them—and while I love the deep flavor of roasted tomatoes—turning on the oven for 8 straight hours in August to cook up anything is never gonna happen in my kitchen.

So I threw them in the blender instead.

And I created yet another super simple summer recipe. That I can't come up with a name for.

Fortunately (while I was slurping it up with a spoon)* I did manage to come up with several ways to use this sublime stuff.

The most obvious is to pour it over pretty much any kind of salad you feel like tossing together (including my
Colors Of Summer Salad). Or you could drizzle it over a platter of sliced tomatoes and mozzarella that you've garnished with fresh basil sprigs. I think it would be fantastic in a chilled pasta salad.

If you happen to feel like turning on the oven for a much more reasonable one hour, you could whip up
some homemade pita breads, stuff them with fresh baby spinach and other veggies and perhaps a few chunks of cheese, pour on a little dressing, and eat your salad as a sandwich. Or you could have warm pitas filled with some nice cooked Italian sausage, slices of roasted red pepper, a few chopped tomatoes, and topped with a splash of dressing.

You could use it to liven up deviled eggs or egg salad or even chicken salad. Make it thick and use it as a dip for slices of
crunchy sweet peppers, carrot sticks, or hunks of raw cauliflower. I think you get the idea.

I just can't believe that with all
the cute critters and crazy goings-on around here I wasn't able to come up with a better excuse for my lack of creativity in the naming department than the stupid heat. Maybe there really is something wrong with me.

Oh well. At least I'm still eating my tomatoes.

Susan's Seven Second Tomato Glut Solution

One 16-ounce carton sour cream or yogurt (or a combination)
Several vine-ripened tomatoes, preferably heirloom & organic
Your favorite basil pesto (you'll find my recipe here
)

Spoon the sour cream into a blender. Toss in as many halved or quartered tomatoes as you like, cutting away any questionable looking spots if you're dealing with overripe or imperfect bounty. The more tomatoes, the thinner the dressing; meaty, plum tomatoes will give you a thicker end result than regular "salad" or "slicing" tomatoes.

Add a few large spoonfuls of pesto. Whirl it all up in the blender, then turn it off and take a little taste. Add more tomatoes and/or pesto if desired. Sprinkle in some salt if needed. Whirl once more and enjoy however you like.

Variations:
—Use thick Greek yogurt or yogurt cheese in place of some or all of the sour cream or yogurt if you want a thicker, dip-like consistency.

—Use
arugula pesto instead of basil pesto.

September 2007 update: This recipe inspired the High Kicking Tomato Dressing I put on my Mexican Jumping Bean Slaw, which also makes great vegetarian tacos.

* I know, I know, I tend to do that a lot. In fact, I've consumed quite a number of meals standing in the kitchen, wielding a large spoon. Just the other night I had pesto for dinner. Not pesto pasta, not pesto pizza, just pesto. Straight out of the food processor. It was really quite tasty.

It's not my fault, though. I inherited an incredibly vigorous taste-testing gene from my mother. You should see us with a bowl of cookie batter.


© FarmgirlFare.com, the well fertilized foodie farm blog where Farmgirl Susan shares stories & photos of her crazy country life on 240 remote Missouri acres.

Saturday, August 12

Recipe: Savory Tomato, Mozzarella, and Basil Pesto Pie with an Easy Cheesy Biscuit Crust

Scared of pie crusts? This easy biscuit crust is perfect for beginners. For even more flavor, try it with the optional Italian sausage!

August 2016 update: This is one of my most popular summer recipes, which men seem to especially love. Click here to read a sampling of rave reviews from the comments section. Thanks so much to all of you who take the time to come back and report on my recipes. And thanks for pinning them on Pinterest too!

Sometimes it's good to be alone in the kitchen. That way, when you pull a pie like this out of the oven and are standing there staring at it while it cools on the counter, mouth watering, stomach rumbling, fingers twitching, you don't have to worry about losing control and getting your hand slapped because you can't resist it.

You can simply tear off a piece of that warm, golden crust and pop it into your mouth and nobody will ever know, because pieces of crust break off pies all the time.

Of course if you end up nibbling off five or six inches around the edge, you're going to have to come up with a good explanation as to why it is missing. Pets can be quite handy for this.

If the pie is just for you, then you'll be forced to face the fact that you just gobbled up the very best part off a large portion of your pie.

Friday, August 19

Daily Farm Photo: 8/19/05


At Last! Ripe Tomatoes In The Garden.